
Granny Bag „Large“
Werkzeuge

Sewing tools
Plotting Scale (50 cm)
Erasable marker
Erasable marker
Pins
Sewing needle
Sewing machine
Clothes Iron
Materialien
• Cloth for exterior 62 cm x 82 cm x 1
• Fusible interfacing cloth 62 cm x 82 cm x 1
• Cloth for lining 62 cm x 82 cm x 1
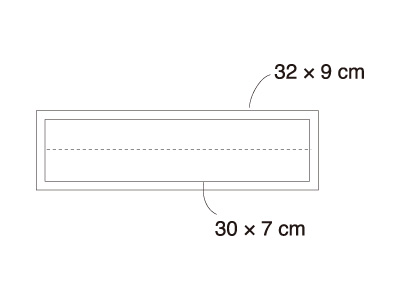
• Cloth for mouth of bag 9 cm x 32 cm x 2
• Sewing thread
• Handles 1 set
Herstellung
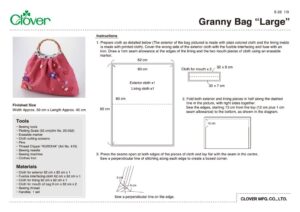
Instructions
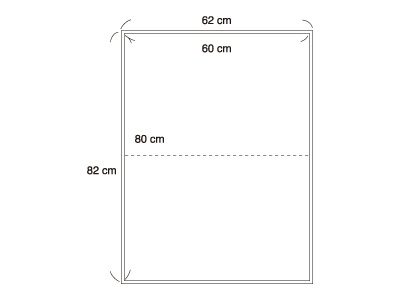
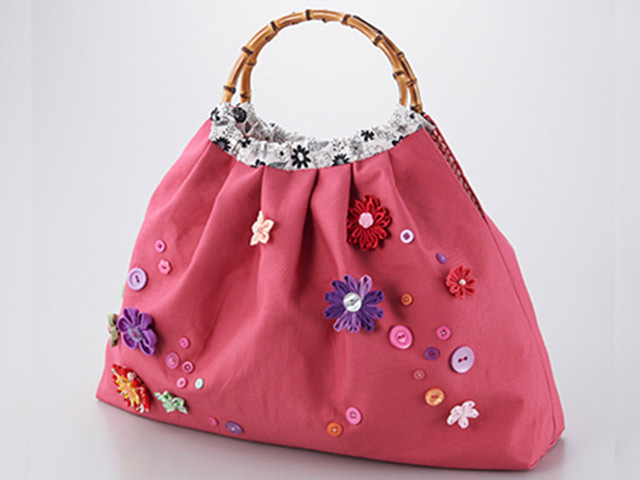
Prepare cloth as detailed below (The exterior of the bag pictured is made with plain colored cloth and the lining inside is made with printed cloth). Cover the wrong side of the exterior cloth with the fusible interfacing and fuse with an iron. Draw a 1cm seam allowance at the edges of the lining and the two mouth pieces of cloth using an erasable marker.
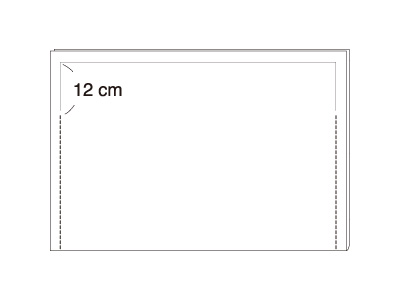
Fold both exterior and lining pieces in half along the dashed line in the picture, with right sides together.
Sew the edges, starting 13 cm from the top (12 cm plus 1 cm seam allowance) to the bottom, as shown in the diagram.
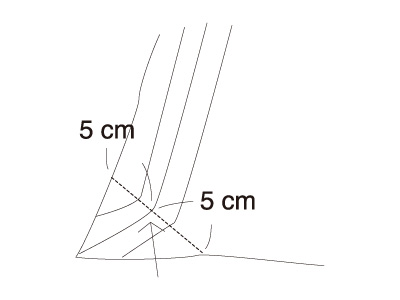
Press the seams open at both edges of the pieces of cloth and lay flat with the seam in the centre. Sew a perpendicular line of stitching along each edge to create a boxed corner.
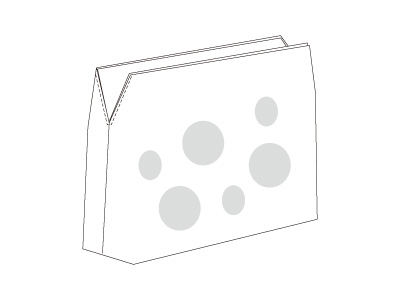
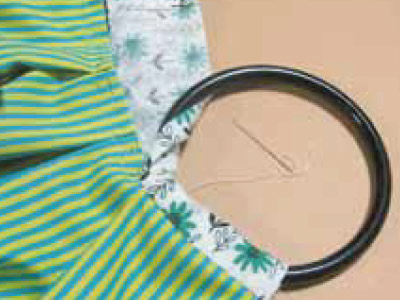
When sewing on motifs such as corsage and yo-yo quilts, it is a good idea to constantly check that the weight is evenly balanced.
Fold back and press the seam allowances at the opening of the lining and the exterior pieces.
Place the lining inside the main body of the bag as they will appear when finished, with wrong sides together.
Stitch the lining and exterior pieces together along the edges, as shown below.
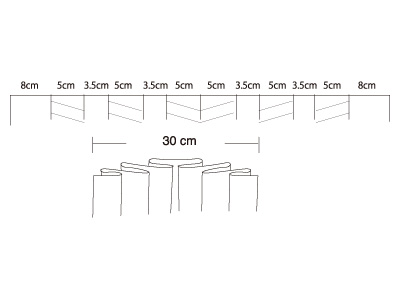
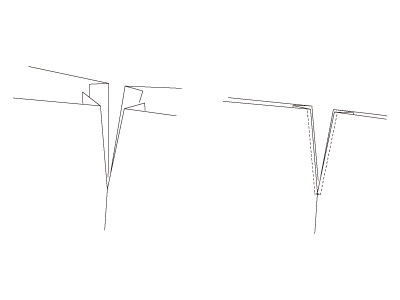
Pin the mouth edges of the lining and exterior cloths together and baste. Pleat the mouth edges as shown in the diagram, (ensuring that the finished measurement is 30 cm) and baste again.
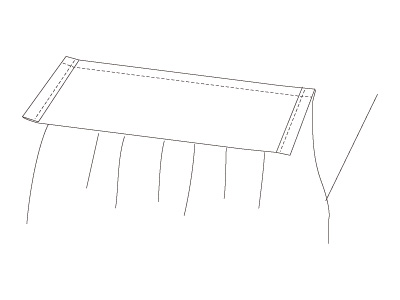
Attaching the handles. Fold and press the seam allowances of the two mouth pieces to the wrong side at both ends and stitch. Stitch the mouth pieces to the exterior of the bag, right sides together. Remove basting. Fold back and press the seam allowance on the remaining side of each mouth piece. Insert the handles and sew the mouth piece to the lining while wrapped around the handles, using a blind stitch. When both sides are complete the bag is finished.
Arrange
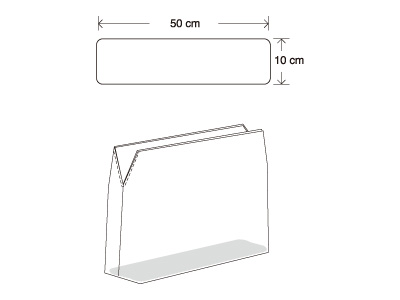
• It's a good idea to make a bottom plate for your bag, to give it rigidity and help it stand up.
〇Materials
Shape 'n Create Bag & Tote Stabilizer (White)/ Shape 'n Create Bag & Tote Stabilizer (Black) 10cm x 50 cm
Cloth (for back and front) 52 cm x 24 cm
〇Instruction
1. Trim the corners of the polyethylene lining to make them round.
2. Using the lining as a template, cut 2 pieces of cloth 1cm bigger than the lining all the way around.
3. With the 2 pieces right-sides together, sew around the edge with a sewing machine, leaving space to return the piece right-side out. Clip the seam allowance at the corners and iron.
4. Insert the lining and stitch the gap closed with the sewing machine to finish.