
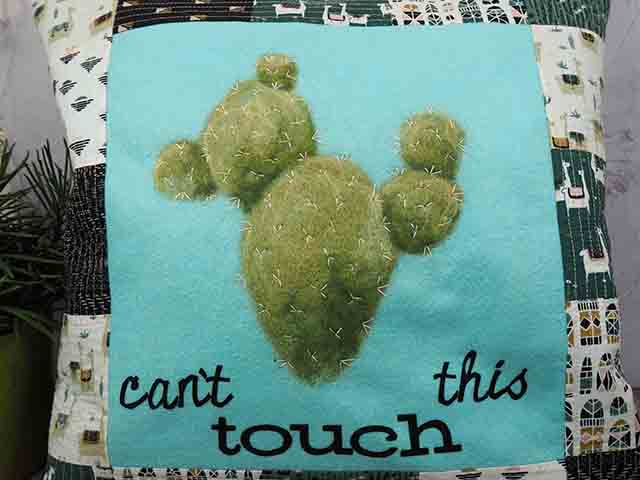
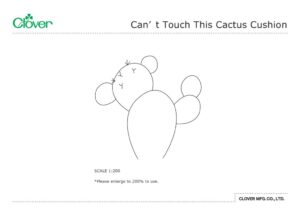
Can’t Touch This Cactus Cushion
Разработано
Debbie von Grabler-Crozier
Инструменты


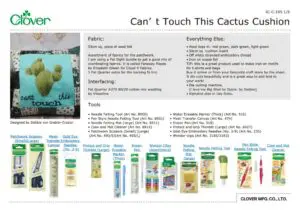
Materials
Fabric:
55cm sq. piece of wool felt
Assortment of fabrics for the patchwork.
I am using a Fat Eight bundle to get a good mix of coordinating fabrics. It is called Faraway Places by Elizabeth Olwen for Cloud 9 Fabrics.
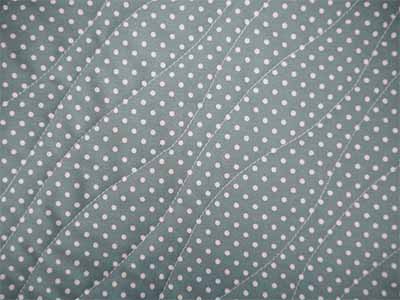
1 Fat Quarter extra for the backing fabric
Interfacing:
Fat Quarter #279 80/20 cotton mix wadding by Vlieseline
Everything Else:
• Wool tops in: mid green, dark green, light green
• 50cm sq. cushion insert
• Off white stranded embroidery thread
• Iron on suede foil
TIP: This is a great product used to make iron on motifs for t-shirts and bags. Buy it online or from your favourite craft store by the sheet. It die cuts beautifully and is a great way to add text to your work!
• Die cutting machine.
(I love my Big Shot by Sizzix. by Debbie)
• Alphabet dies in two fonts.
Изготовление
NB: Seam allowances are all ½ cm unless otherwise stated.
Please read all instructions through and assemble the equipment before beginning.
From the patchwork fabrics, cut 16 squares measuring 11cm sq.
Lay the backing fabric onto the piece of wadding with the right side up and quilt using your favourite design IMAGE 1.
TIP: This quilting pattern doesn’t have to match the front exactly.
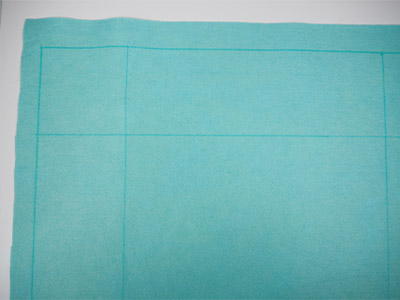
Trim the backing to 50cm sq. it is ready to use. With the water erasable marker, draw a square 50cm x 50cm on the felt. This is the cushion size and your working area. From the outside edge, come in 10cm and draw a line right across. Do this on the other sides too until you have a second square floating in the centre IMAGE 2. This is both the guide line for the patchwork border and the centre bit is where the cactus motif will go.
TIP: Unusually, we will not be using a wadding on the front of the cushion. The felt will become the background for the motif and the wadding. The square border will be attached with a Quilt As You Go (QAYG) method.
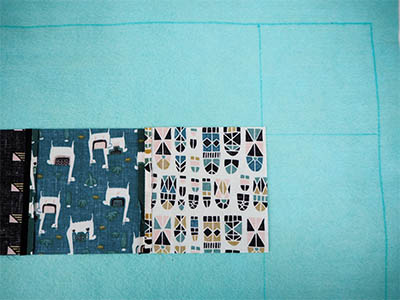
Take your first three squares of fabric and sew them together. Attach them to the felt panel by laying them upside down on the line on the top of the cushion IMAGE 3.
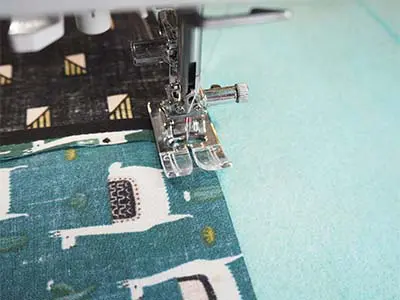
Stitch right along that line IMAGE 4.

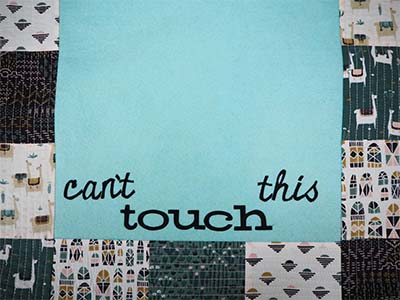
Flip the squares over the right way (they should just come to the outer line) and topstitch in channels to quilt and secure the squares IMAGE 5. Repeat this for the bottom three squares. For the sides, do exactly the same thing but this time ensure that the row of squares overlaps the line and the raw edges of the square panels on top and bottom. Die cut the letters to form the words ‘Can’t touch this’ from the suede foil using your alphabet dies.
TIP: I love to mix the fonts. It gives a really modern look that is not too matchy-matchy.
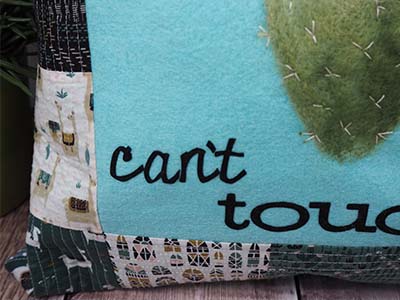
Carefully position the words so that you know where to put the cactus IMAGE 6. Iron the words into place using a cloth to cover the plastic coating. Remove the plastic coating when cool. Transfer the cactus motif to the cushion front using the transfer mesh and the water erasable marker.
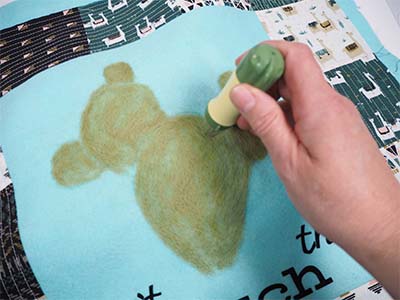
Fill in the cactus with mid green IMAGE 7 using the needle felting tool.
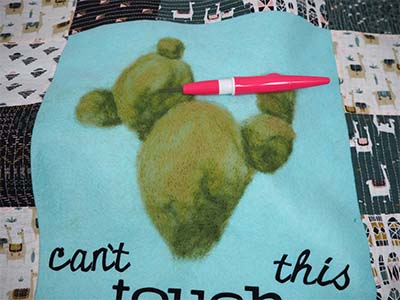
Come back in with dark green and shade IMAGE 8. The pen style tool is better for this.
TIP: This is where the Claw and mat cleaner tool comes in.
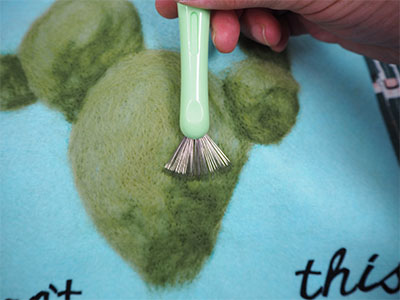
Lightly rake the fibres from the darkest area across to the light IMAGE 9 and then keep felting. You cannot easily achieve this even tone with just your fingers. Highlight with the lightest green.
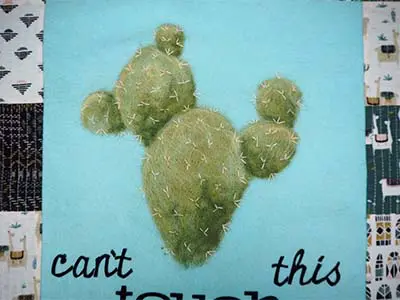
Thread the hand sewing needle with two strands of embroidery floss and embroidery some spikes in groups of three IMAGE 10.
TIP: make some spikes longer than others and don’t forget the cactus edges!
When you are happy with the felting and embroidery, trim the cushion front to 50cm sq. and lay it right sides together onto the back. Pin or clip. Sew around the edge leaving a turning gap in the base.
Clip across the corners to reduce bulk and turn the cushion case out the right way. Insert the cushion through the gap in the base and close the gap.