
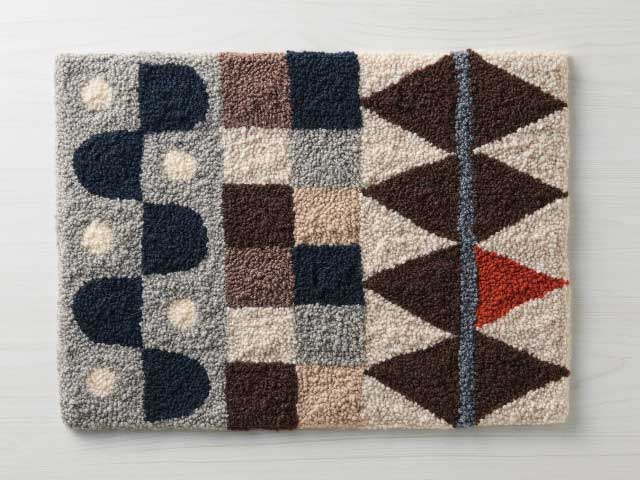
Geometric Design Floor Mat using a Punch Needle
Разработано
Naomi Inoue
Готовый размер
Approx. 40 x 55 cm
Инструменты


Materials
* Your favourite fabric
* 1 skein of thick woolen yarn in approximately 9 colours
Beige, light brown, brown, dark brown, grey, bluish grey, orange, dark navy blue, ecru
* Interfacing (non-woven) Approx. 40 x 55 cm
* Felt Approx. 40 x 55 cm
* Masking tape (used when taping the design onto the window to copy the design)
Precaution
Please see the instruction manual for the directions of use for the Punch Needle.
Изготовление
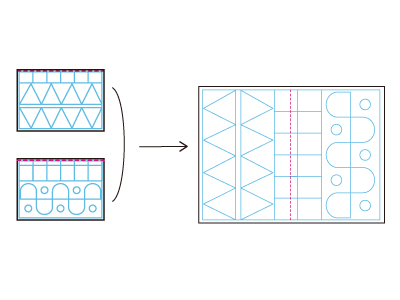
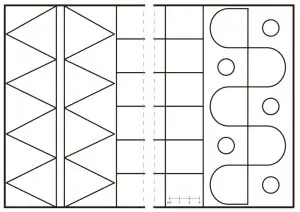
Transfer the template onto the fabric. After printing the template design on an A4-size paper, cut it in half to make them A5-size pieces (left and right). Make photocopy of both pieces with 200% enlargement and align them together at the dotted line and secure them with tape.
Stretch a piece of cloth over the embroidery hoop and use the punch needle to stitch. All stitches are loop stitch, and the number of spacer rings is "2." Stitch while referring to the finished product image for the yarn colours.
Note: Since the floor mat is larger than the hoop, reposition the cloth over the hoop a little bit at a time for easy stitching. When repositioning the cloth, it won't be a problem even if the already-stitched area is compressed in the hoop. Set a large area of fabric on the hoop to avoid the tension loss.
Use craft glue to finish the tip of the yarn and trim the fabric, leaving a 5 to 6 cm allowance.
Iron on the interfacing over the entire back side of the fabric, including the allowance.
Fold the allowance to the back side and secure using craft glue.
Cut the felt slightly smaller than the design and adhere it on the wrong side to complete.