
Knitting Bag With Zipper
Разработано
Debbie von Grabler-Crozier
Инструменты

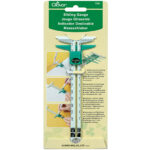


Pressing board
Materials
• Fabric
45cm canvas for the outer
45cm lining fabric
• Interfacing
40cm style-vil foam interfacing (Vlieseline)
• Everything Else
30cm zipper to match your outer canvas
14mm gold eyelet
Something to decorate the zipper pull. I love a strip of leather or a piece of nice ribbon.
Your usual sewing needs
Cutting
NB: Seam allowances are all ½ cm unless otherwise stated. Please read all instructions through and assemble the equipment before beginning.
From the canvas:
-2 pieces 5cm wide x 5cm long for the zipper end outers
-2 pieces 20cm wide x 36cm long for the main outer panels
-2 pieces 15cm sq. for the bag ends
-1 piece 10cm wide x 35cm long for the bag handle
TIP: You can make the handle longer if you want to. Be aware though that it may alter the fabric requirements.
From the lining:
— 2 pieces 5cm wide x 5cm long for the zipper end lining tabs
— 2 pieces 20cm wide x 36cm long for the main lining panels
— 2 pieces 15cm sq. for the bag end linings
— Bias binding 3.5cm wide and about 1m long to bind the ends
TIP: There are no cutting notes for the Style-vil foam interfacing. Instructions will be given as we go along but the basic idea is to press the piece to be interfaced and then pin to a slightly larger piece of foam interfacing. Use a machine basting stitch to attach the canvas panel to the foam, gently keeping a taut tension on it. Then trim the excess foam away.
Изготовление
Preparation
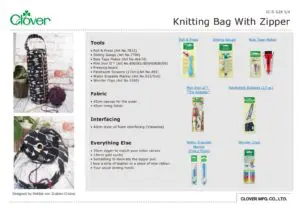
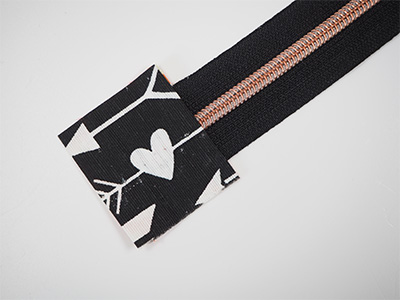
Prepare the zipper first. Take the end tabs (both lining and outer) and fold one side under by 0.5cm IMAGE 1.
TIP: I love the Roll and Press for getting those creases sharp without running to the iron.
Now glue the end tabs to the ends of the zipper IMAGE 2.
TIP: I always glue these. Much less fiddly than sewing and they will be very secure thanks to the stitching all around them.
Put the zipper aside to dry. When the glue is dry, trim the end tabs to the same width as the zipper and 3cm long.
TIP: zippers vary and you can also use a continuous sort of zip for this. The main idea is to achieve a zipper that is 36cm long.
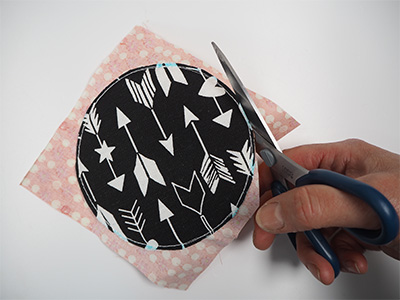
The ends come next. Use the sliding gauge to make two circles from the canvas.
TIP: The sliding gauge measures the radius of the circle which is half its diameter (width). Set your gauge at 6.5cm to achieve a 13cm circle.
Attach these circles to a piece of style-vil foam interfacing, trim and then lay them wrong sides together onto the lining square. Baste together and then cut the circles out IMAGE 3.
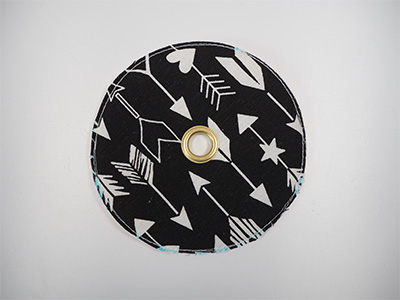
On one circle, attach the eyelet to the dead centre IMAGE 4. The ends are now ready to use. Make the handle. Fold the handle fabric in half lengthways and press to crease. Now fold the two raw edges to the centre crease and press again.
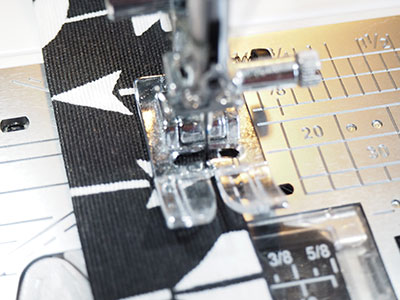
Topstitch IMAGE 5 twice along both long sides to close the handle and decorate. Trim the ends so that they are perfect. Then comes the binding. Join the bias cut strips if you need to and run them through the bias tape maker, using the mini iron to finish the binding perfectly. Roll to store until we need it. Finally attach the two outer panels to some foam interfacing and trim the excess foam.
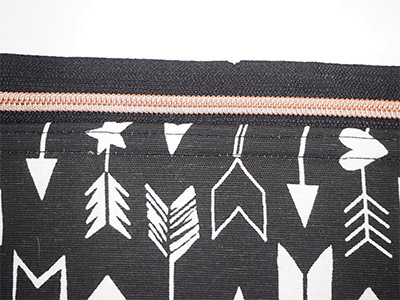
Take the zipper, an outer panel and one of lining and with the right sides together, make a ‘sandwich’ with the zipper in the middle. Sew right along the length of the zipper.Flip the layers open and topstitch twice along the length of the zip IMAGE 6.Repeat for the other side. Then with the right sides together, join up the base seams of the outer and the lining.
TIP: you have a bit extra to play with to allow for seam allowance anomalies so fit the body of the bag onto one of the circles and check for fit. Increase the seam allowance and trim if you need to.
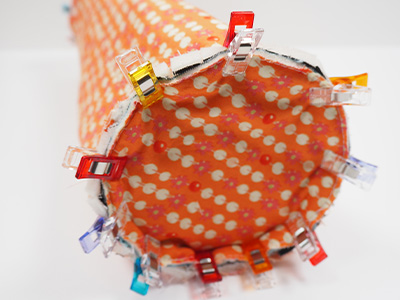
Turn the bag the right way out and check that everything fits. If the lining is a bit saggy, you can increase the seam allowance. This does happen sometimes. When you are happy, hand baste the layers together on each end. This makes the next step easier. Open the zipper and turn the bag inside out. Attach a circle to the base (this is the one without the eyelet hole) IMAGE 7.
TIP: Some small snips around the bag side will help it to fit the circle ends. Also, consider hand basting the ends on and using you zipper foot for easier work.
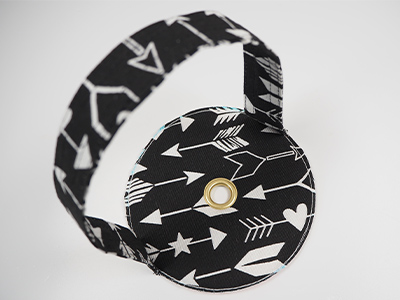
Attach the handle to the other circle IMAGE 8 and then attach that one to the other end of the bag. Finish by binding the trimmed raw edges with your bias binding before turning everything the right way out again.