
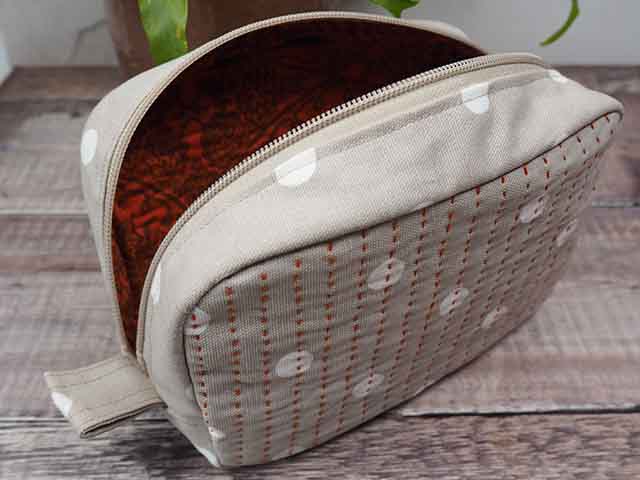
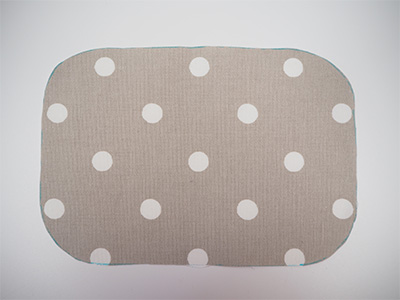
More Manly Zipper Pouch
Разработано
Debbie von Grabler-Crozier
Инструменты


Materials
Fabric
• 35cm canvas fabric in a masculine colour and pattern
• 45cm lining fabric to coordinate
Interfacing
• 35cm H630 fusible wadding (Vlieseline)
Everything Else:
• 41cm heavy duty zipper
• Decorative thread in a coordinating colour. I love Perle coton #8
TIP: My main fabric is tan with white and I have gone for a high contrast (orange). If you are worried about your hand stitching, choose a colour nearer to the main colour of the fabric.
• Matching thread
• Something to decorate the zipper pull
• Your usual sewing needs
Cutting
From the outer fabric:
— 2 pieces for the front and back panels 15.5cm wide x 23cm long
— 2 pieces for the top zipper panel 5cm wide x 41cm long
— 1 piece for the base panel 10cm wide x 28cm* long
— 1 piece for the zipper end tabs 10cm wide x 18cm long
*This length measurement allows for trimming and fitting.
Because all of the items that we can choose for making the curves
on the corners of the front and back panels are different, it is better
to allow a little more fabric. It can be easily trimmed away!
From the lining fabric:
— 2 pieces for the main lining 18cm wide x 25cm long
— 2 pieces for the top zipper panel 5cm wide x 41cm long
— 1 piece for the base panel 10cm wide x 28cm long
— 2 bias strips, each 3.5cm wide x 85cm long.
TIP: You will have to join the bias strips to ensure the right length.
From the H630 interfacing:
— 2 pieces for the main lining 18cm wide x 25cm long (don’t trim these)
— 2 pieces for the top zipper panel 5cm wide x 41cm long
— 1 piece for the base panel 10cm wide x 28cm long
Изготовление
NB: Seam allowances are all ½ cm unless otherwise stated. Please read all instructions through and assemble the equipment before beginning.
Fuse the interfacing to the wrong side of the lining pieces.
TIP: The main lining pieces are left untrimmed for now because if stops fabric creep while you are quilting them. When the front and back hand quilting is done, they will have the edges machine basted and then they can be cut out.
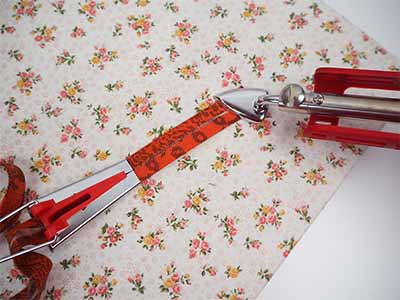
Make the bias tape by joining the strips together and then running them through the bias tape maker, pressing as you go IMAGE 1.
Round the corners of the front and back panels IMAGE 2.
TIP: You can use a quilting ruler, a cup or anything that is nicely rounded and doesn’t have a sharp curve. Rounded corners are so much easier to sew and to bind.
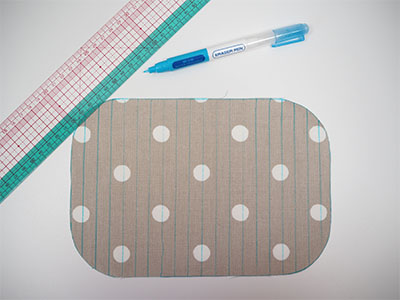
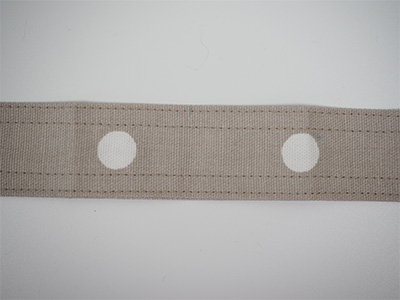
Take the front and back panels and the Chacopen Blue with Eraser (Water Erasable) and using your Graph Ruler, mark lines 1cm apart on the right side of the fabric IMAGE 3.
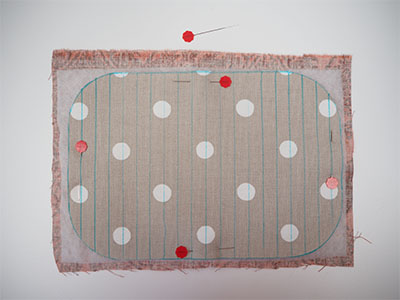
Place the prepared front onto the interfaced lining with the wrong sides together and pin IMAGE 4.
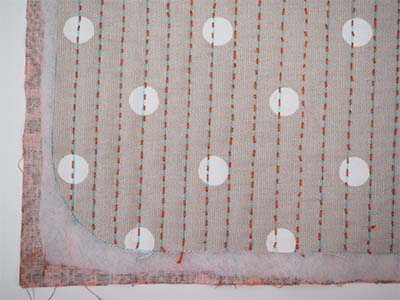
Thread the hand sewing needle with your decorative thread and using a running stitch, stitch neatly along the lines IMAGE 5.

Erase the lines IMAGE 6.
The zipper end tabs are made by folding the strip of fabric in half lengthways and pressing a crease (the finger presser is great for this job). Now fold the raw edges to the centre crease and press them too. Aim for a 3.5cm wide strip. Topstitch with matching thread twice along both sides IMAGE 7 to close the strip and decorate. Now cut it into two equal 9cm pieces and fold them in half. Keep them in half with a couple of stitches on the raw end.
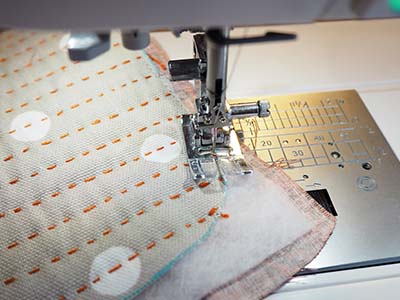
Machine baste the edges of the front and back panels to stabilise them IMAGE 8. Do this with a very narrow seam and then cut the pieces out using the outer as a guide.
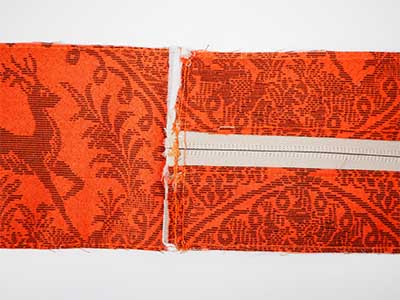
Take an outer top zipper panel and a piece of interfaced lining and the main zipper. Make a ‘zipper sandwich’ with the three pieces (outer and lining right sides together and the zipper in between). Clip ready for sewing IMAGE 9.
Sew along the length of the zip and then flip the layers open so that the zip is at the top.Topstitch with matching thread along the length of the zip.
TIP: I use matching thread for the outer in the top of my machine and thread to match the lining in the bottom. This is well worth the extra effort in terms of style.
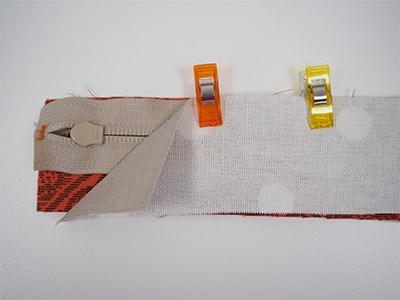
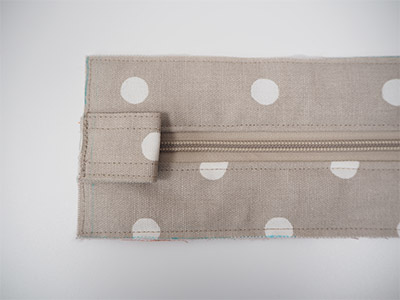
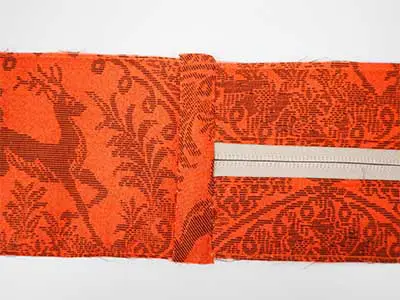
Repeat for the other side of the zip and then machine baste the very edges to keep the layers together. Add a tab at each end of the zipper panel IMAGE 10.
Place the base layers wrong sides together and baste the edges before trimming the excess interfaced lining.Attach the base to one end of the main zipper panel. Check for fit around the edge of the main front panel before attaching the other end of the base panel to the remaining end of the zipper panel to form a loop.
TIP: Inside you will see raw edges IMAGE 11. We don’t want these so bind with a piece of your bias binding IMAGE 12.
Clip the zipper panel loop to the front panel of the bag with the right sides together. Machine sew all around. The raw edges will be to the inside. Repeat for the back and then bind the inner edges. Do open the zipper halfway before you start though! This is essential for turning the pouch the right way out when you are finished.
TIP: I much prefer to do this bit by hand. Much easier to control and relaxing too.Decorate the zipper pull with a piece of ribbon or a scrap of leather. A metal charm works well too.