
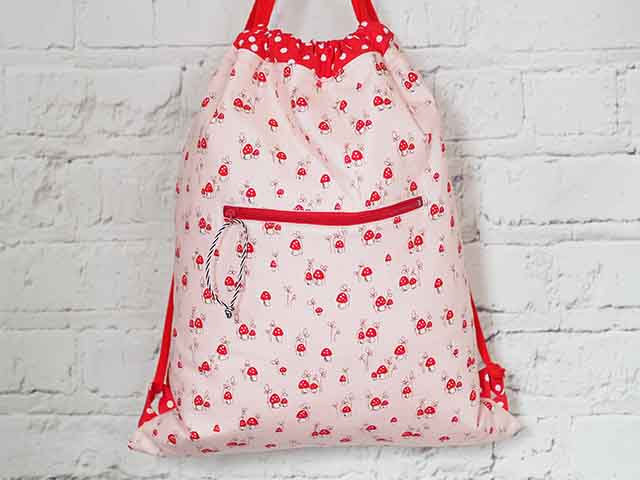
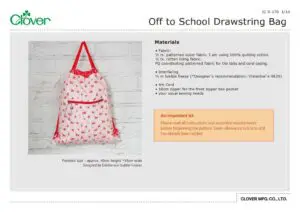
Off to School Drawstring Bag
Разработано
Designed by Debbie von Grabler-Crozier
Готовый размер
approx. 40cm height *35cm wide
Инструменты


cutting mat
Materials
• Fabric:
½ m. patterned outer fabric. I am using 100% quilting cotton.
½ m. cotton lining fabric.
FQ coordinating patterned fabric for the tabs and cord casing.
• Interfacing
½ m fusible fleece (*Designer’ s recommendation: Vlieseline’ s H630)
• 4m Cord
• 18cm zipper for the front zipper box pocket
• your usual sewing needs
An Important bit:
Please read all instructions and assemble requirements before beginning the pattern. Seam allowance is 0.5cm and has already been added
Cutting
From the outer fabric:
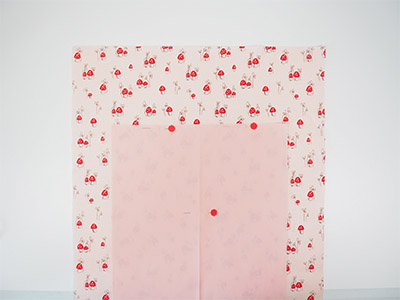
- 2 pieces 36cm wide x 41cm tall for the front and back panels
From the lining:
- 2 pieces 36cm wide x 41cm tall for the front and back lining
- 1 piece 25cm wide x 30cm tall for the front zipper box pocket lining
From the coordinating fabric:
- 4 pieces 9cm wide x 36cm long for the cord casings and lining
- 1 piece 8cm wide x 20cm long for the cord tabs
From the interfacing:
- 2 pieces 36cm wide x 41cm tall for the front and back interfacing
Изготовление
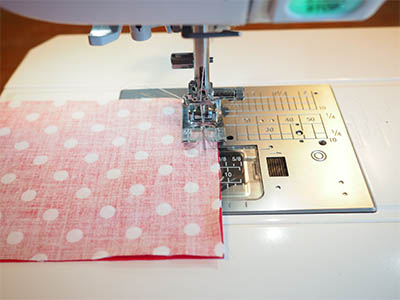
Make the lined cord casing first. Take two pieces of casing material and place them right sides together. Sew the short ends only.
Turn the casing the right way out and iron the ends to make them nice and sharp.

Fold the casing in half lengthways and press lightly. Baste the raw edges on the bottom to keep the casing closed.
Repeat with the other casing pieces.
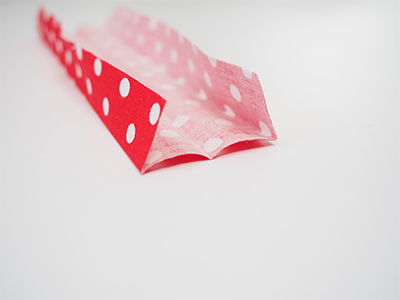
To make the cord tabs for the bottom of the bag, fold the piece of fabric in half with the wrong sides facing and press to obtain a centre crease.
Fold the raw outer edges to the centre crease and iron again.
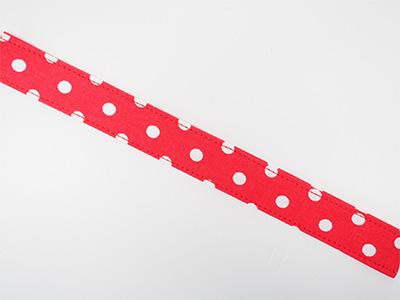
Now fold along all of the lines and topstitch along both long sides to close and decorate the strip.
Cut the piece in half to make two 10cm pieces. They are ready to use.

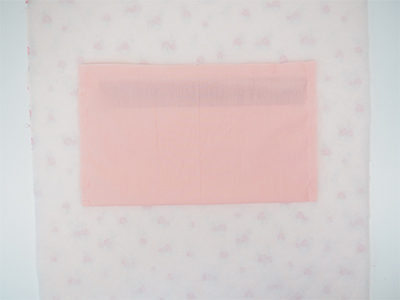
Fuse the interfacing to the wrong side of the front and back outer sections. Put the back aside. The front of the bag has a zipper box pocket. You need the front section, the zipper box pocket lining and the zipper.
Fold the front panel in half vertically and press to obtain a centre crease. Do the same with the zipper box pocket lining.
tip: This simple step will help you to get the zipper pocket perfectly centred.
Open up the front panel and measure down 11cm. Make a horizontal line with your Water Erasable Marker. Place one short end of the zipper pocket lining, right sides together onto these marks.
Make sure that you line up the centre creases to get the pocket perfect. Pin so that the pocket lining cannot move.
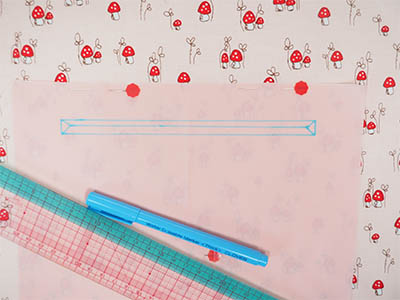
Working on the lining now, measure down 2.5cm and draw a horizontal box 18cm long and 1cm deep. This is the sewing line. Down the centre, draw a horizontal line with two angles at each end. This will be the cutting line.
Sew around the sewing line and cut along the cutting line and then ʻpostʼ the lining through the aperture. Smooth everything out and press the aperture so that it is perfect. Topstitch the zipper into the aperture.
Designer's comment:
I like to use very thin double sided tape to keep the zipper in place while I sew. This can be repositioned so that the zipper is perfect.
Donʼ t forget to wipe your needle afterwards because the glue can stick to the needle and cause missed stitches. Turn the front over and, working on the back, bring the other short end of the pocket lining up to meet the first and sew the sides and top to complete the pocket.
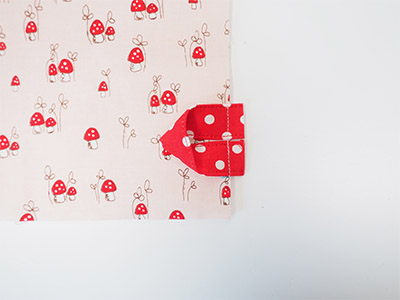
Time to add the cord tabs to the bottom of the bag. Fold the tab over and pin
it 2.5cm up from the bottom edge on either the front panel. Sew the tab on
and repeat this on the other side.
tip: As you can see in image, there is about a ½ cm overhang. This is to make
the tabs really secure.
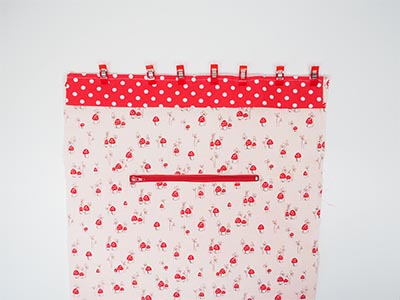
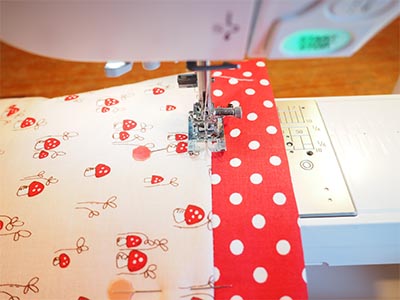
The casings go on next. The front and back are sewn exactly the same. Take
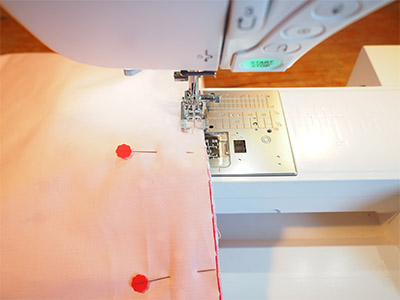
one of the casings and clip it centrally to the front panel. Sew the casing on. Repeat for the back. With the right sides together, sew the front to the back leaving the top part open. Place the lining right sides together too and sew the sides and base. Leave a turning gap in the base seam. Turn the outer the right way out and gently push the corners out so that they are sharp. Pull the lining on over the outer. The right sides of outer and lining should be together and the casing should be down between the outer and the lining.
Sew right around the top edge. Turn the bag out through the gap in the lining and close the gap.
Push the lining down into the bag and topstitch the top edge, just under the casing.
Designer's comment:
I actually do this twice, the first time about ¼ cm and the second time ½ cm under that.
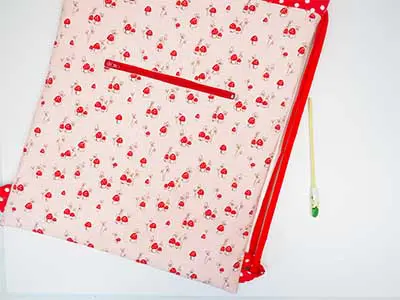
Finally, put the cord through the casing. Cut the cord in half to make two pieces 2m.
Use the Clip ʻn Glide Bodkin tool to thread half of the cord one way through the casing and knot it at the bottom tab.
Then to the same thing in the opposite direction with the other piece of
cord.