
Cheeky Monkey Amigurumi Toy
ออกแบบโดย
Debbie von Grabler-Crozier
ผลิตภัณฑ์


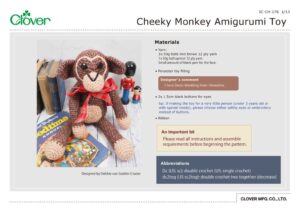
Materials
• Yarn:
3x 50g balls mid brown 12 ply yarn
1x 50g ball apricot 12 ply yarn
Small amount of black yarn for the face.
• Polyester toy filling
Designer’ s comment:
I love Deco-Wadding from Vlieseline.
• 2x 1.5cm black buttons for eyes
tip: If making the toy for a very little person (under 3 years old or with special needs), please choose either safety eyes or embroidery instead of buttons.
• Ribbon
An Important bit:
Please read all instructions and assemble requirements before beginning the pattern.
Abbreviations
Dc (US: sc): double crochet (US: single crochet)
dc2tog (US sc2tog): double crochet two together (decrease)
วิธีทำ
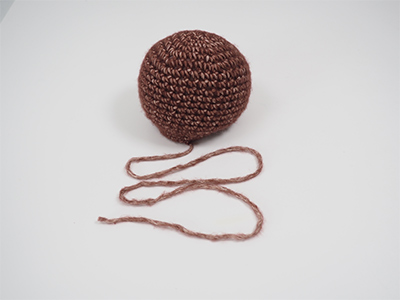
The Head: brown yarn
tip: Use the stitch markers to show the end of each round so that you know where to begin counting again.
Round 1: 5 dc into magic ring (5 stitches)
Round 2: 2dc into each stitch (10 stitches)
Round 3: (2dc in next stitch, 1dc in next dc) repeat to end of round (15 stitches)
Round 4: (2dc in next stitch, 1dc into each of the next 2 stitches) repeat to end of round (20 stitches)
Round 5: (2dc in next stitch, 1dc into each of the next 3 stitches) repeat to end of round (25 stitches)
Round 6: (2dc in next stitch, 1dc into each of the next 4 stitches) repeat to end of round (30 stitches)
Round 7: (2dc in next stitch, 1dc into each of the next 5 stitches) repeat to end of round (35 stitches)
Rounds 8-15: dc into every stitch (35 stitches)
Round 16: (1dc into each of next five stitches, dc2tog),
repeat to end of round (30 stitches)
Round 17: (1dc into each of next 4 stitches, dc2tog) repeat to end of round (25 stitches)
Round 18: (1dc into each of next 3 stitches, dc2tog) repeat to end of round (20 stitches)
Round 19: dc into each stitch (20 stitches)
Round 20: dc into each stitch (20 stitches)
Fasten off and leave about 40cm yarn. When you have finished the head, stuff it well with toy stuffing and set it aside.
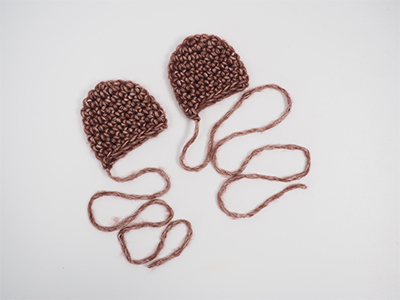
The Ears: brown yarn
Round 1: 4dc into magic ring (4 stitches)
Round 2. 2dc into each stitch (8 stitches)
Round 3: (2dc into next stitch, 1dc into next stitch) repeat to end of round (12 stitches)
Round 4: (2dc into next stitch, 1dc into each of the next 2 stitches) repeat to end of round (16 stitches)
Rounds 5-9: dc into every stitch (16 stitches)
Fasten off and leave a long thread for sewing on. Make a second ear.
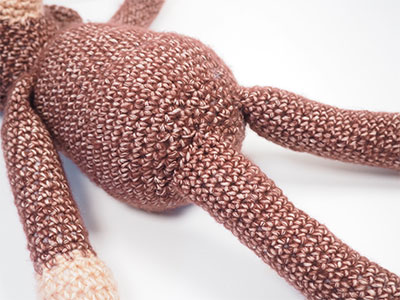
The Body: brown yarn
Round 1: 5dc into magic ring (5 stitches)
Round 2: 2dc into each stitch (10 stitches)
Round 3: (2dc into next stitch, 1dc into next stitch) repeat to end of round (15 stitches)
Round 4: (2dc into next stitch, 1dc into each of next two stitches) repeat to end of round (20 stitches)
Round 5: (2dc into next stitch, 1dc into each of next 3 stitches) repeat to end of round (25 stitches)
Round 6: (2dc into next stitch, 1dc into each of next 4 stitches) repeat to end of round (30 stitches)
Round 7: (2dc into next stitch, 1dc into each of next 5 stitches) repeat to end of round (35 stitches)
Rounds 8-17: 1dc into every stitch (35 stitches)
Round 18: (2dc into next stitch, 1dc into next stitch) repeat to the end of the round (52 stitches)
Rounds 19-24: 1dc into each stitch (52 stitches)
Round 25: (1dc into next stitch, dc2tog) repeat to the end of the round (35 stitches)
Round 26: 1dc into each stitch (35 stitches)
Round 27: repeat round 25 (25 stitches)
Round 28: repeat round 26 (25 stitches)
Round 29: repeat round 25 (15 stitches)
tip: Stuff the body at this point because the opening is getting smaller.
Round 30: repeat round 26 (15 stitches)
Round 31: repeat round 25 (10 stitches)
Round 32: repeat round 26 and fasten off.
Finish stuffing the body so that it is nice and firm.
tip: This time, instead of leaving a long tail of yarn for sewing on, weave the yarn in and slightly draw the stitches together to close the hole at the base.
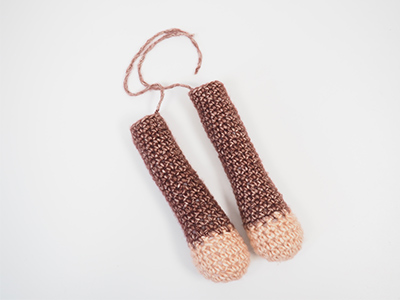
The Arms: apricot yarn and brown yarn
tip: As you work, every 8cm or so, stuff the arm. This is much easier than finishing and then having to reach right in to the bottom of the arm. This applies also for the legs.
Round 1: using apricot yarn- dc 4 stitches into a magic ring (4 stitches)
Round 2: 2dc into each stitch (8 stitches)
Round 3: (2dc into the next stitch and then 1dc into next stitch) repeat to the end of the round (12 stitches)
Round 4: (2dc into the next stitch, 1dc into each of the next 2 stitches) repeat to the end of the round (16 stitches)
Rounds 5 and 6: 1dc into each stitch (16 stitches)
Round 7: (1dc into the next stitch, dc2tog) repeat to end of round (12 stitches)
Rounds 8-30: brown yarn- 1dc into every stitch.
Fasten off and leave a yarn tail for sewing on. Make the second arm the same way. Stuff both arms.
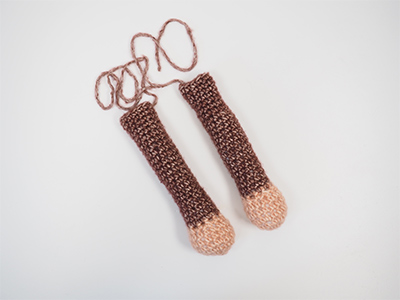
The Legs: apricot yarn and brown yarn
Round 1: using apricot yarn- dc 5 stitches into a magic ring (5 stitches)
Round 2: 2dc into each stitch (10 stitches)
Round 3: (2dc into the next stitch and then 1dc into next stitch) repeat
to the end of the round (15 stitches)
Round 4: (2dc into the next stitch, 1dc into each of the next 2 stitches)
repeat to the end of the round (20 stitches)
Rounds 5 and 6: 1dc into each stitch (20 stitches)
Round 7: (1dc into the next stitch, dc2tog) repeat to end of round
(15 stitches)
Rounds 8-30: brown yarn- 1dc into every stitch.
Fasten off and leave a yarn tail for sewing on. Make the second arm the same way. Stuff both legs.
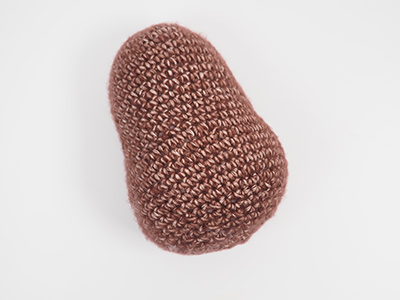
The Muzzle: apricot yarn
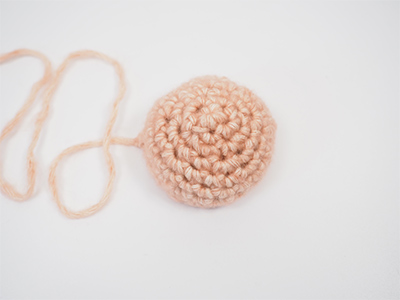
Round 1: 4dc into magic ring (4 stitches)
Round 2: 2dc into each stitch (8 stitches)
Round 3: (2dc into next stitch and then 1dc into next stitch) repeat to end of round (12 stitches)
Round 4: (2dc into next stitch, 1dc into each of next 2 stitches) repeat to end of round (16 stitches)
Round 5: (2dc into next stitch, 1dc into each of next 3 stitches) repeat to end of round (20 stitches)
Rounds 6-8: 1dc into every stitch.
Fasten off leaving a long yarn tail.
The Tummy: apricot yarn
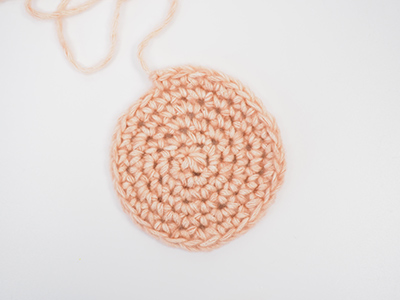
Round 1: 5dc into magic ring (5 stitches)
Round 2: 2dc into each stitch (10 stitches)
Round 3: (2dc into next stitch and then 1dc into next stitch) repeat to end of round (15 stitches)
Round 4: (2dc into next stitch, 1dc into each of next 2 stitches) repeat to end of round (20 stitches)
Round 5: (2dc into next stitch, 1dc into each of next 3 stitches) repeat to end of round (25 stitches)
Round 6: (2dc into next stitch, 1dc into each of next 4 stitches) repeat to end of round (30 stitches)
Fasten off and leave a long yarn tail.
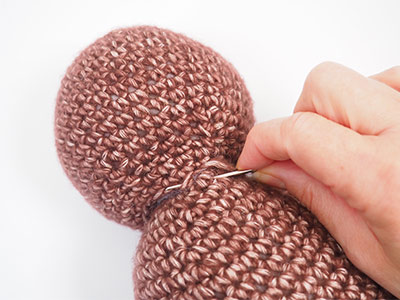
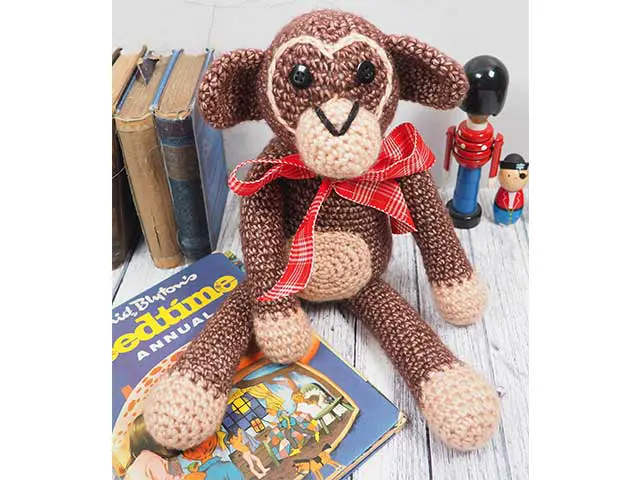
Putting it all Together: You need the darning needle set. Attach the head to the top of the body using the long yarn tail and stitches which are as invisible as possible.
tip: You may need to add some more stuffing as you go so that the head does not flop.
Before we attach the arms and legs, finish the details on the head and the body.
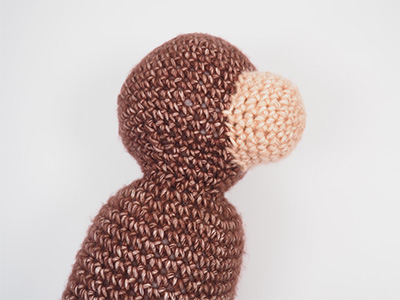
The muzzle sits to the lower half of the face and when you have almost attached it, stuff it and then
continue stitching.
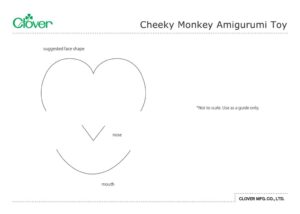
Then use apricot yarn to embroider a face shape with a chain stitch.
tip: You can use the template to guide you.

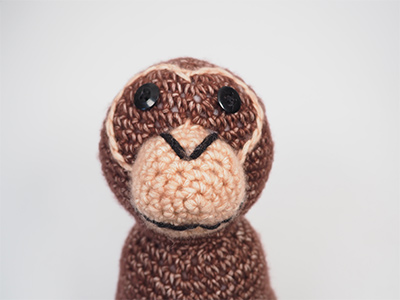
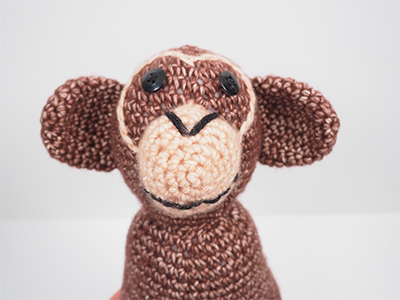
Thread the darning needle with black yarn and, using a backstitch, embroider a mouth and nose. Attach the button eyes. Finally for the face, the ears go on about half way down.
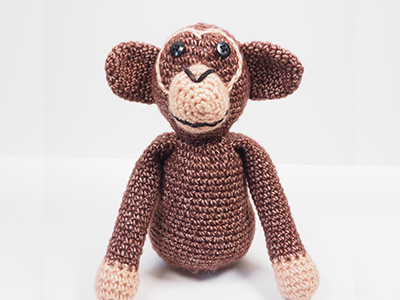
The arms and legs have been stuffed so attach them next. The arms by the sides and the legs to the front of the base.
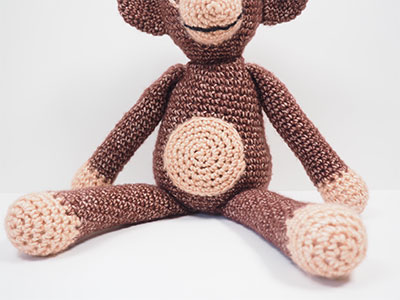
The tummy patch goes next and that sits on the front of the widest part of the body. Attach it with apricot yarn and it doesnʼ t need to be stuffed.
Finish your cheeky monkey with a ribbon tied around his neck for a bow tie.
