
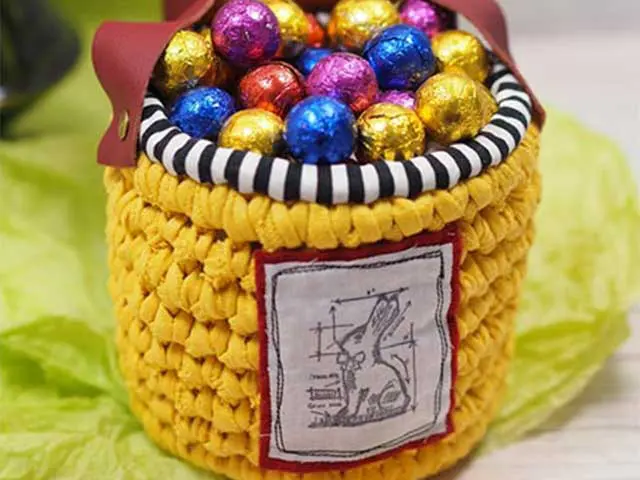
Easter Egg Hunt Basket
ออกแบบโดย
Debbie von Grabler-Crozier
ผลิตภัณฑ์


Materials
• Yarn: 1 ball T-shirt yarn. I have chosen a sunny yellow
• Everything Else: FQ Black and white fabric for bias binding
TIP: This is way more than you need but it is easier to cut the strips from wider fabric.
• 2x 10cm diameter white covered wire rings (Optional)
• Leather handle 2.5cm wide x 35cm long
• 2x brass rivets or Chicago screws
• Piece of red wool blend felt 10cm sq.
• Easter stamp*
*This is a ‘normal’ paper craft stamp and it is just to make a little handmade label for the side of the basket. The less detail it has, the better.
• Ranger archival ink: jet black
• Piece of solid white fabric the same size as the felt
• Your usual crafting needs
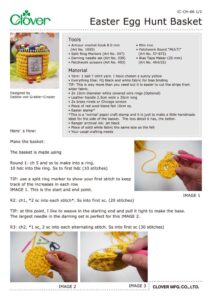
วิธีทำ
Make the basket
The basket is made using
Round 1: ch 5 and ss to make into a ring. 10 hdc into the ring. Ss to first hdc (10 stitches)
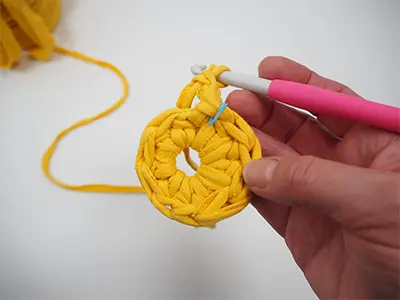
TIP: Use a split ring marker to show your first stitch to keep track of the increases in each row IMAGE 1. This is the start and end point.
R2: ch1, *2 sc into each stitch*. Ss into first sc. (20 stitches)
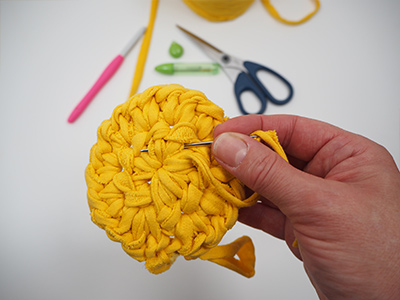
TIP: At this point, I like to weave in the starting end and pull it tight to make the base.
The largest needle in the darning set is perfect for this IMAGE 2.
R3: ch2, *1 sc, 2 sc into each alternating stitch. Ss into first sc (30 stitches)
This finishes the base. I have used a white coated metal ring to keep the base nice and flat and to help it keep its shape. This is optional but if you use one, incorporate it into the stitches on the next row.
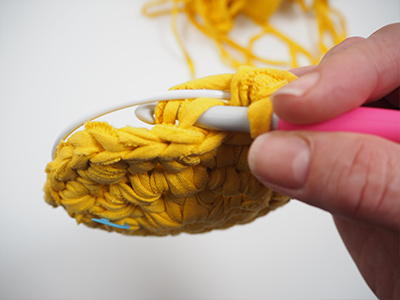
R4: Build the sides. 1 sc into each stitch working into the top loop IMAGE 3.
TIP: Working into the top loop of the sc means that you get a clear base and sides rather than a gradual and more round effect.
R5-top: sc into each stitch working in a spiral. Fasten thread off and weave in end.
TIP: The sides can be as high as you like. I have aimed for 12cm.
Add the second wire ring if using as you do the top row. This will give the basket great structure.
Put it all together:
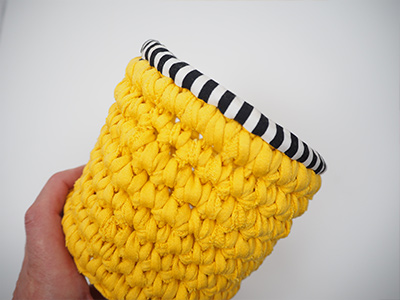
Bind the top edge IMAGE 4.
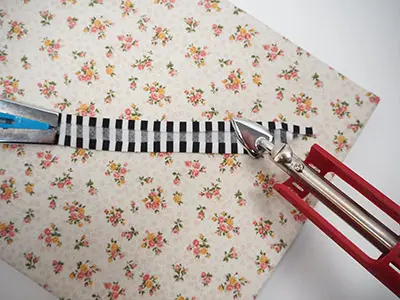
TIP: Making bias binding is easy. Simple cut 5cm strips on the bias and join them if necessary. Then run them through a Clover bias tape maker (I have used the blue one) and press the edges with the mini iron IMAGE 5.
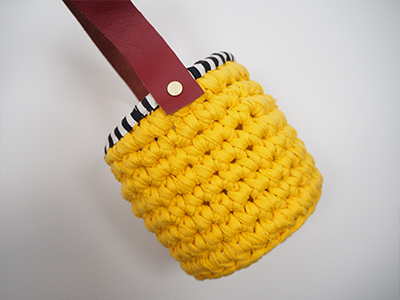
Attach the handle IMAGE 6.
TIP: I have made my own handle from a piece of scrap leather. Simply cut the handle size and add a hole in each end large enough to admit the rivet or Chicago screw.
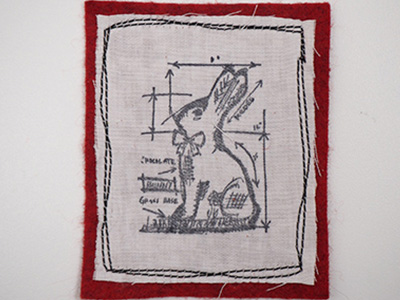
Stamp the white fabric with the stamp and ink. Neaten the edges of the white fabric and applique it to the felt square IMAGE 7.
TIP: I have used free motion machine embroidery in black thread and I have gone around twice and deliberately not too neat. You can hand applique it if you prefer.
Glue the label to the front of the basket.
TIP: Hot glue is the way to go here. It is strong enough to do the job invisibly but will not show on the unlined inside of the basket.