
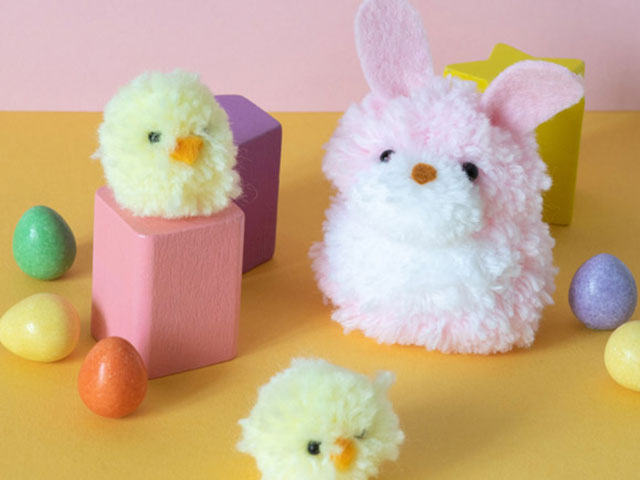
Easter pompoms
ออกแบบโดย
Sachiyo Ishii
ผลิตภัณฑ์


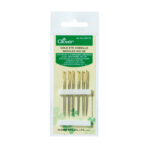
All-purpose sewing needle
Materials
〇Pompom Bunny
• A small amount of 4-ply soft pink
• A small amount of 4-ply white
• Felt fabric, pink and brown
• A pair of 5mm black beads
• Cotton thread, black and pink
• Fabric glue
〇Pompom chick
• A small amount of 4-ply soft yellow
• Felt fabric, yellow
• A pair of 3mm black beads
• Cotton thread, black and yellow
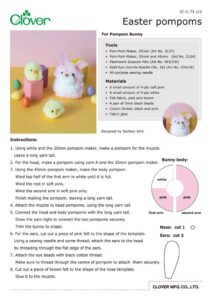
วิธีทำ
Pompom Bunny: step1
Using white and the 20mm pompom maker, make a pompom for the muzzle. Leave a long yarn tail.
Pompom Bunny: step2
For the head, make a pompom using yarn A and the 35mm pompom maker.
Pompom Bunny: step3
Using the 45mm pompom maker, make the body pompom. Wind top half of the first arm in white until it is full. Wind the rest in soft pink. Wind the second arm in soft pink only. Finish making the pompom, leaving a long yarn tail.
Pompom Bunny: step4
Attach the muzzle to head pompoms, using the long yarn tail.
Pompom Bunny: step5
Connect the head and body pompoms with the long yarn tail. Draw the yarn tight to connect the two pompoms securely. Trim the bunny to shape.
Pompom Bunny: step6
For the ears, cut out a piece of pink felt to the shape of the template. Using a sewing needle and some thread, attach the ears to the head by threading through the flat edge of the ears.
Pompom Bunny: step7
Attach the eye beads with black cotton thread. Make sure to thread through the centre of pompom to attach them securely.
Pompom Bunny: step8
Cut out a piece of brown felt to the shape of the nose template. Glue it to the muzzle.
Pompom chick: step1
For the body, make a pompom using the 25mm pompom maker in soft yellow. Trim to shape.
Pompom chick: step2
Attach eye beads with black cotton thread. Make sure to thread through the centre of pompom.
Pompom chick: step3
For the beak, cut out a piece of yellow felt to the shape of the template. Using a sewing needle and some thread, attach the beak to the face by threading through the flat edge of the beak, sewing it into a downward curve, and fasten off securely.