
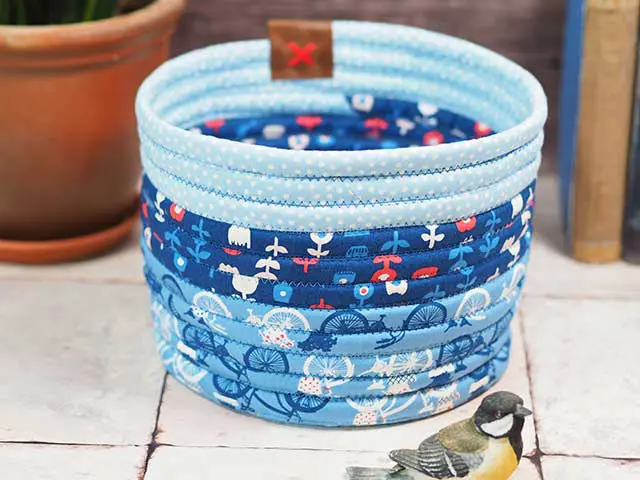
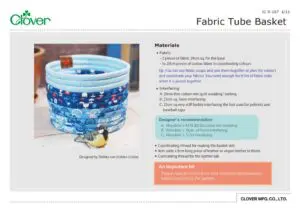
Fabric Tube Basket
ออกแบบโดย
Debbie von Grabler-Crozier
ผลิตภัณฑ์


Ruler and cutting mat
Leather hole punch
PVA glue
Materials
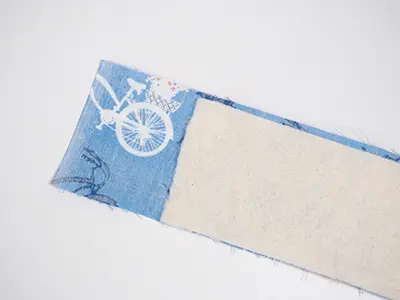
• Fabric
– 2 pieces of fabric 24cm sq. for the base
– 3x 20cm pieces of cotton fabric in coordinating colours
tip: You can use fabric scraps and join them together or plan the colours and coordinate your fabrics. You need enough for 8-9m of fabric tube when it is joined together.
• Interfacing
A: 20cm thin cotton mix quilt wadding/ batting
B: 23cm sq. foam interfacing
C: 23cm sq.very stiff fusible interfacing the fort used for pelmets and baseball caps
Designer’ s recommendation
A: Vlieselineʼ s #279 80/20 cotton mix wadding
B: Vlieselineʼ s Style- vil foam interfacing
C: Vlieselineʼ s S133 interfacing
• Coordinating thread for making the basket side
• 4cm wide x 8cm long piece of leather or vegan leather to finish
• Contrasting thread for the leather tab
An Important bit
Please read all instructions and assemble requirements before beginning the pattern.
Cutting
From the coordinating fabric:
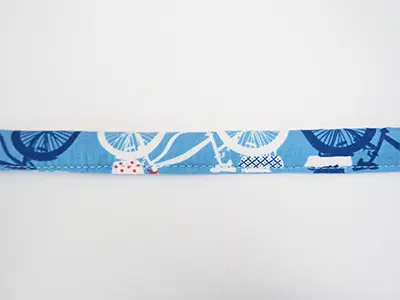
・Strips cut 6cm wide on the straight grain of the fabric and joined to make a long strip 8-9m long
From the Style-vil interfacing:
・1 circle (template)
From the S133 interfacing:
・1 circle (template)
From the #279 80/20 cotton mix wadding:
・Strips cut 6cm wide and joined to make a long strip 8-9m long

วิธีทำ
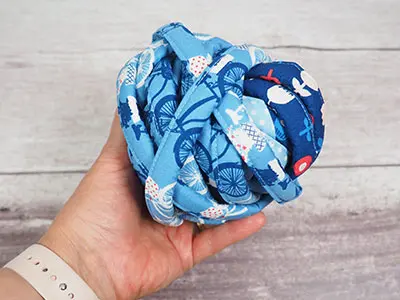
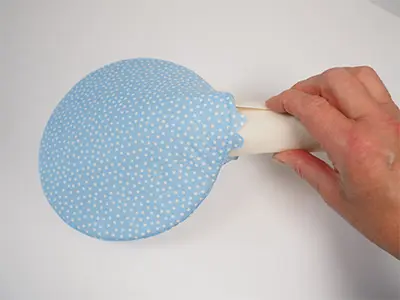
Using the instructions on the packet, make the fabric tube using the strips of fabric and interfacing. Roll the tube and put it aside.
tip: When you make the long tube, begin the wadding 4cm away from the end which will start at the base of the basket.
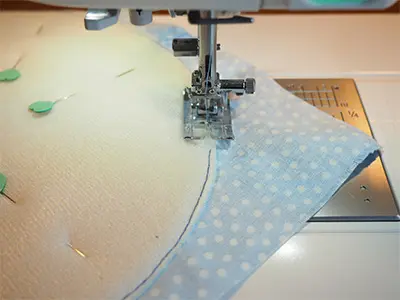
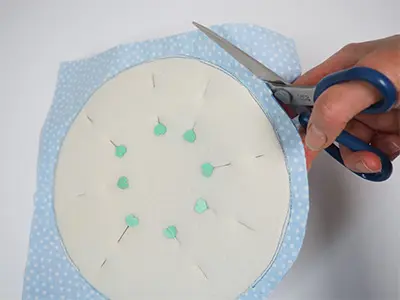
To make the base, you will need the fabric squares and the interfacing circles. Take one fabric square and the foam interfacing circle. Lay the foam onto the wrong side of the fabric square, right in the centre and attach the foam circle to the fabric with the narrowest possible basting stitch.
Place the other fabric square right sides together onto the first (ignore the foam circle) and pin it well.
Sew right around the edge of the foam circle right on the edge of the interfacing. Leave a turning gap
tip: The size of the foam is the actual size of the basket base. The rest of the fabric is the seam allowance and will be trimmed in the next step.
Trim the overhanging fabric so that 1cm all around remains.
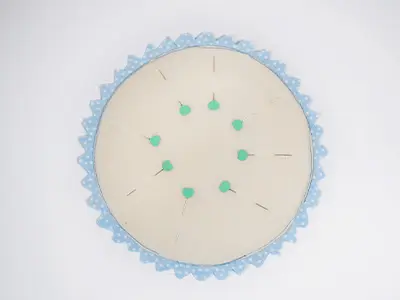
Carefully notch the seam allowance.
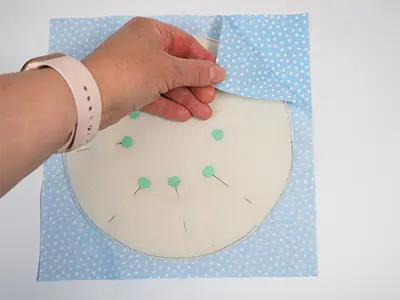
Turn the base out through the turning gap and make sure that the edges are perfect. Roll the interfacing (C) circle and put it through the opening.
tip: You may need to trim interfacing (C) slightly to make it fit.
Flatten interfacing (C) circle and make sure that everything is laying flat.
Close the gap and iron the base. This will fuse the S133 to the foam interfacing and strengthen the base. Put the base aside.
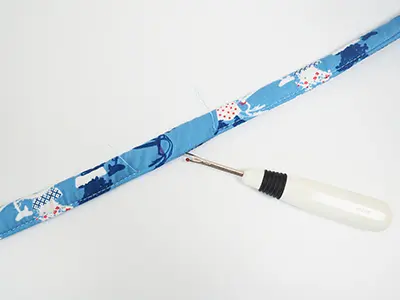
Time to make the sides. Find the end with no interfacing. Measure 70cm from that end and make a mark. Unpick about 3cm of stitches at the mark.
Notice that the fabric tube has a top and a bottom.
The bottom is the stitched edge.
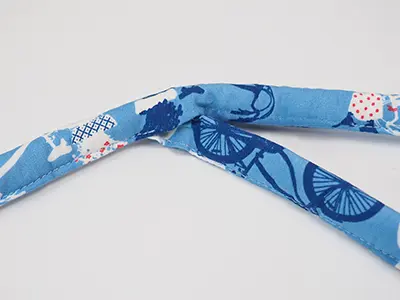
Make a loop with the tube and feed the end into the hole that you have just created at the 70cm mark. Make sure that the fabric tube is not twisted. Clip so that the loop cannot come undone.
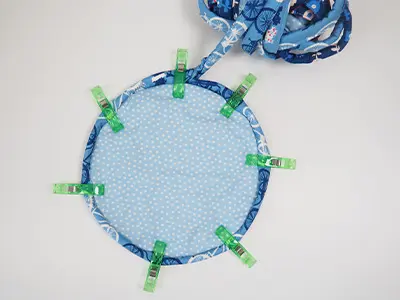
Fit this loop temporarily onto the base. It should have a snug fit.
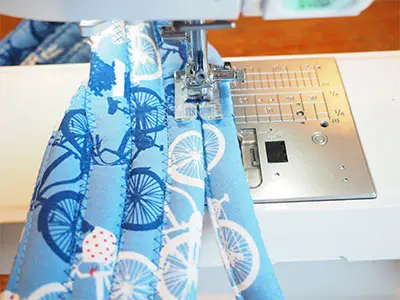
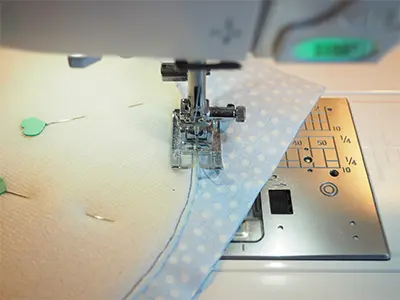
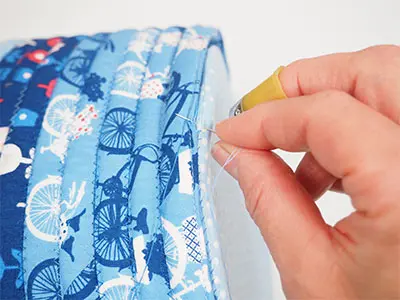
When you are happy with the fit, it is time to sew. With your machine set to zig-zag, sew the basket side, tucking the bottom edge behind the top as you go.
tip: Begin sewing where the tube is tucked into the hole.
When the side is finished, it is time to add the base. There are a few ways of doing this but by far the neatest is to put it in by hand. Place the base into the bottom of the basket and make sure that it fits well. Hand sew the edge right around with matching thread.
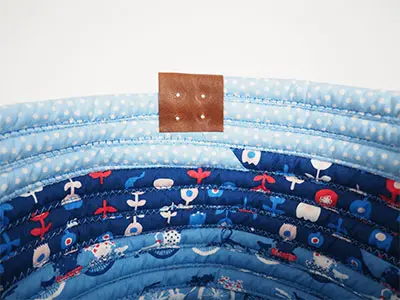
Glue the leather or vegan leather detail over the end of the fabric tube on the top edge and make four, evenly spaced holes.
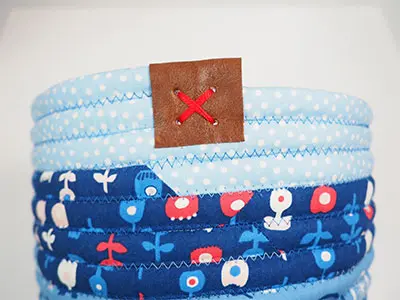
Use the contrast thread to attach the tab properly and decorate it at the same time.