
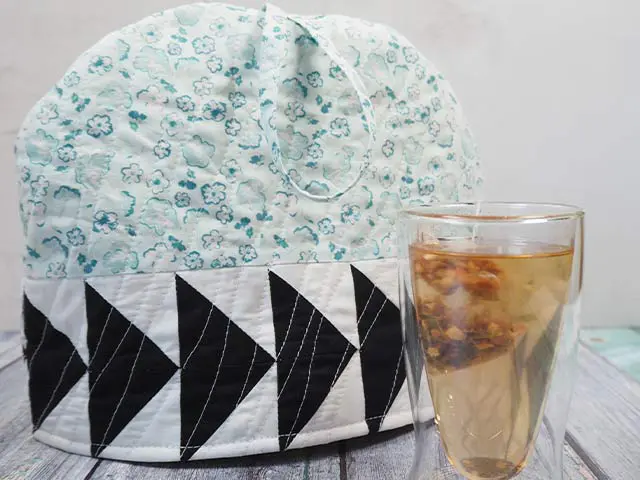
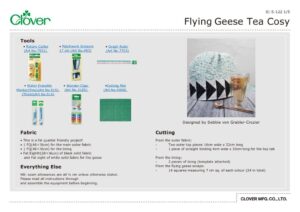
Flying Geese Tea Cosy
ออกแบบโดย
Debbie von Grabler-Crozier
ผลิตภัณฑ์


Materials
• This is a fat quarter friendly project!
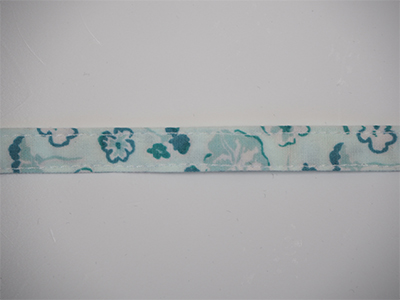
• 1 FQ(46×56cm) for the main outer fabric
• 1 FQ(46×56cm) for the lining
• Fat Eighth(28×46cm) of black solid fabric and Fat eight of white solid fabric for the geese
NB: seam allowances are all ½ cm unless otherwise stated. Please read all instructions through and assemble the equipment before beginning.
Cutting
From the outer fabric:
– Two outer top pieces 16cm wide x 32cm long
– 1 piece of straight binding 4cm wide x 30cm long for the top tab
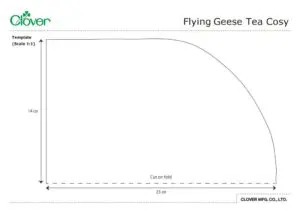
From the lining:
– 2 pieces of lining (template attached)
From the flying geese scraps:
– 14 squares measuring 7 cm sq. of each colour (24 in total)
วิธีทำ
Preparation
Make the top tab first by folding the straight binding in half lengthways and pressing to form a crease. Fold the raw edges to the centre crease and press again. Topstitch along each long side.
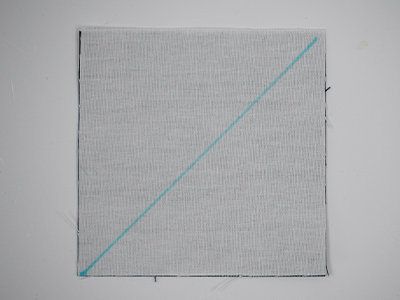
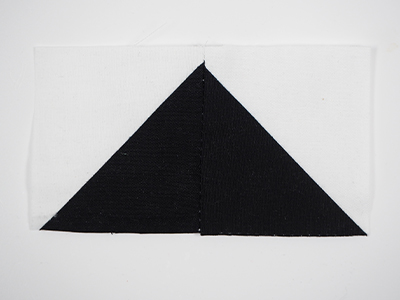
To make the flying geese, take two squares, one black and one white and lay them on top of each other. Using the graph ruler and the water erasable marker, draw a line diagonally from corner to corner.
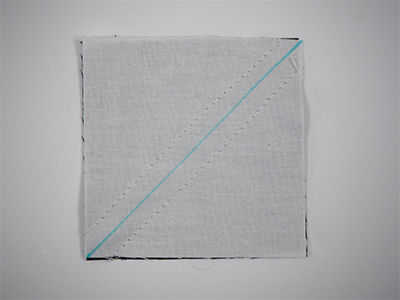
Sew a line 0.5cm either side of this line.
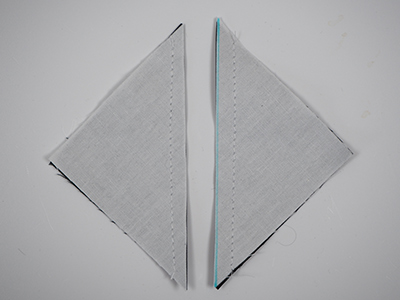
Cut along the original line. Open out and press and then trim to 5.5cm sq. Repeat for the other geese.
tip: When you press the seam, press to the dark side so that the shadow will not be visible.
This method makes two flying geese units at a time. To make the whole flying geese block, sew two units together.
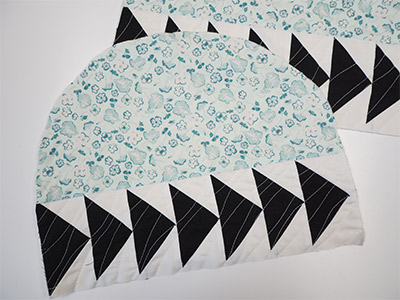
Sew the geese together in two rows of 7.
tip: This is a double sided tea cosy so that it looks nice from all angles – no one sitting down to tea has to have the ‘back’.
Sew the outers by attaching the floral rectangles to the top of the flying geese. Press and repeat for the back. Lay the pressed outers onto the wadding and quilt with your favourite design.
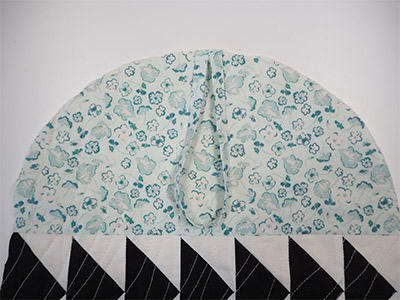
tip: I love a diagonal random wave. It is really easy to do and almost impossible to get wrong.Cut the quilted outer panel using the template that you cut the lining.Sew the lining together, right sides facing and leave a gap somewhere for turning.
tip: Try to leave the gap along one of the straight sides. It is much easier to close than the domed top.
Attach the tab to the top centre of the outer by folding it in half and basting it in place.
tip: You can make the tab as long or as short as you like. I like it a little longer for hanging. With the right sides together, sew the outer leaving the base open. Have the outer the right way out and the lining inside out so that the right sides are together and pull the lining on over the outer. Clip with Wonder Clips and sew right around the base seam. Turn out through the gap that you left in the lining and then close the gap. Stuff the lining into the tea cosy and topstitch around the bottom edge of the tea cosy.
tip: Because of gravity, the lining can collapse a bit. Combat this by putting a couple of stitches inside right at the top to anchor the lining.