
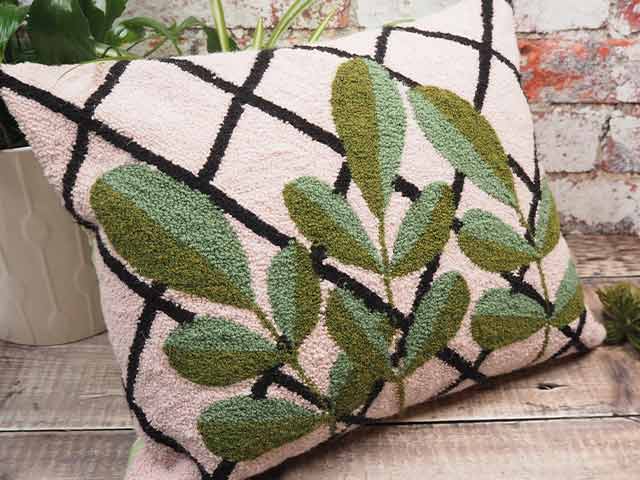
Garden Wall Punch Embroidery Cushion
ออกแบบโดย
Debbie von Grabler-Crozier
ผลิตภัณฑ์


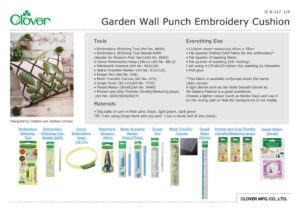
Materials
Yarn
• 50g balls of yarn in:Pale pink, black, light green, dark green
TIP: I am using Drops Nord and you won’t use a whole ball of any colour.
Everything Else
• Cushion insert measuring 40cm x 35cm
• Fat Quarter Oxford Cloth fabric for the embroidery
• Fat Quarter of backing fabric
• Fat quarter of wadding (US: batting).
I am using #279 80/20 cotton mix wadding by Vlieseline
• PVA glue
*This fabric is available in Europe under the name Lilian canvas. A light denim such as the Solid Smooth Denim by Art Gallery Fabrics is a great substitute. Choose a lighter colour (such as Adobe Clay) and use it on the wrong side so that the background is not visible.
วิธีทำ
NB: Seam allowances are all ½ cm unless otherwise stated. Please read all instructions through and assemble the equipment before beginning.
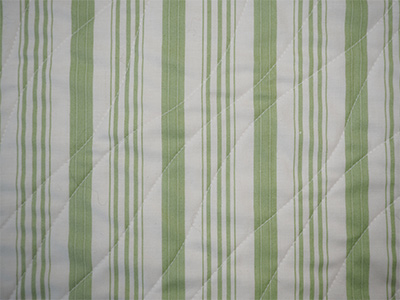
Make the back first – then it can be put aside until it is needed. Take the wadding and lay it down on a flat surface. Place the backing fabric on top and then quilt it with your favourite design IMAGE 1.
TIP: I love a random diagonal wave pattern. It suits absolutely everything and it is super easy to do.
Leave the backing untrimmed at this stage to make it easier to put the cushion together.
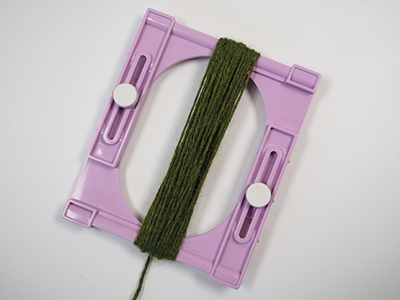
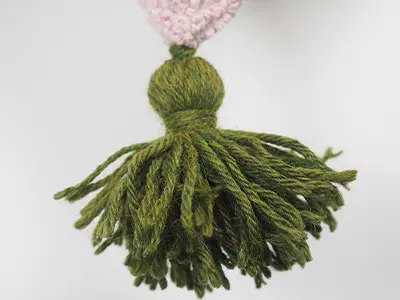
Make four tassels with the tassel maker following the instructions on the packet. I like to do about 40 wraps IMAGE 2 for a nice sized tassel and have the maker set on the middle setting.
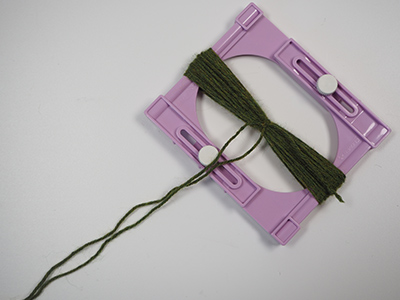
When you tie the tops off, keep the threads nice and long IMAGE 3. They will be used to attach the tassels to the cushion.
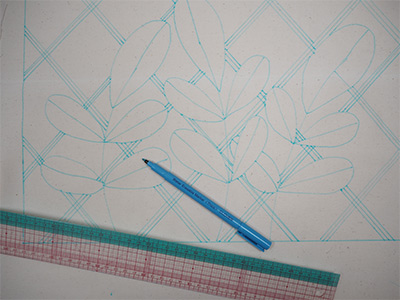
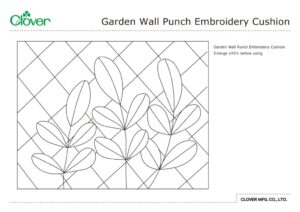
To make the punch needle embroidery, firstly mark out an area of 35cm wide x 40cm long and transfer the pattern to your chosen fabric IMAGE 4.
TIP: if you feel confident, why not try free handing the pattern? Use our water erasable marker and have the matching eraser pen handy in case things go wrong. Otherwise the transfer canvas with a water erasable marker works fabulously.
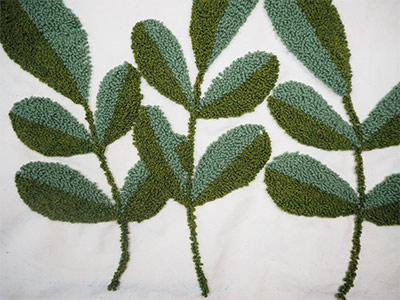
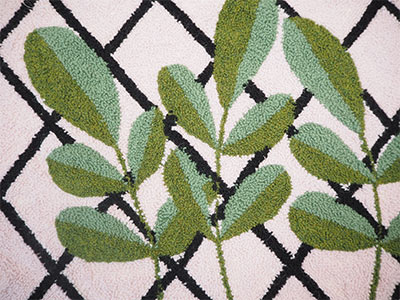
Starting with the leaves and stems (the two greens), colour the design IMAGE 5 using the Embroidery Stitching Tool.
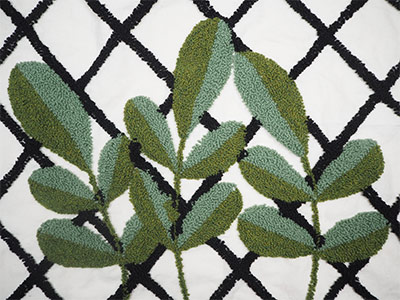
Then move to the lattice (black) IMAGE 6 and finally, fill in the pink wall.
TIP: You will notice that on the pattern the black lines are drawn in quite thin but on the finished article they are thicker, you can play with this a bit but I recommend four rows thick to balance the design.
TIP: As you finish each section, spread a thin layer of PVA glue over the back to hold everything securely. While it will hold without, this ensures that your cushion survives everyday wear and tear.
When you have finished the embroidery, trim the canvas so that you have about 1cm seam allowance all around. With the right sides together, lay the embroidered canvas onto the untrimmed quilted backing. Pin and sew all around close to the embroidered edge leaving a gap large enough to put the cushion insert in at the bottom. Trim the backing back to 1cm all around and clip across the corners to reduce bulk there. Turn the cushion casing the right way out and insert the cushion. Close the gap with a neat hand stitch.
Attach a tassel to each corner.