
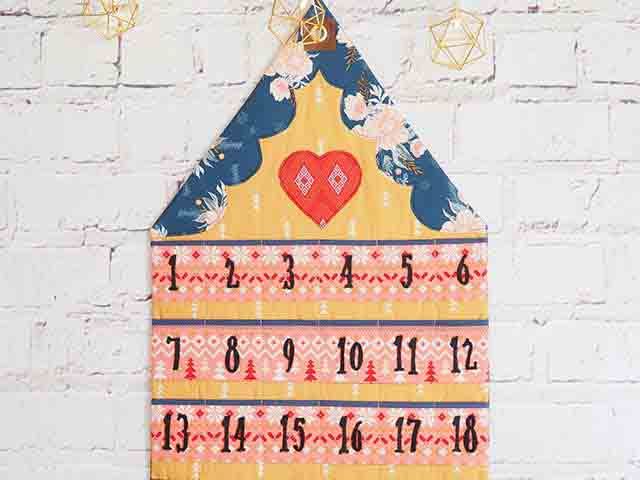
Gingerbread House Advent Calendar
ออกแบบโดย
Debbie von Grabler-Crozier
ขนาดเมื่อทำเสร็จแล้ว
approx. 63cm height *36cm wide
ผลิตภัณฑ์


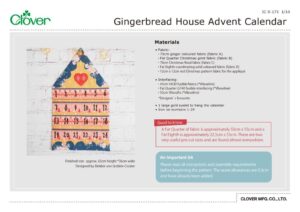
Materials
• Fabric:
・70cm ginger coloured fabric (fabric A)
・Fat Quarter Christmas print fabric (fabric B)
・70cm Christmas floral fabric (fabric C)
・Fat Eighth coordinating solid coloured fabric (fabric D)
・12cm x 12cm red Christmas pattern fabric for the appliqué
• Interfacing:
・45cm H630 fusible fleece (*Vlieseline)
・Fat Quarter G740 fusible interfacing (*Vlieseline)
・55cm Vliesofix (*Vlieseline)
• 1 large gold eyelet to hang the calendar
• Iron on numbers 1-24
Good to know:
A Fat Quarter of fabric is approximately 50cm x 55cm and a Fat Eighth is approximately 22.5cm x 55cm. These are two very useful pre-cut sizes and are found almost everywhere.
An Important bit:
Please read all instructions and assemble requirements before beginning the pattern. The seam allowances are 0.5cm and have already been added.
Cutting
From fabric A:
– 1 piece 37cm wide x 65cm tall for the background
From fabric B:
– 4 pieces 37cm wide x 7cm tall for the pocket fronts
From fabric C:
– 1 piece 37cm wide x 65cm tall for the lining
– 4 pieces 37cm wide x 7cm tall for the pocket lining
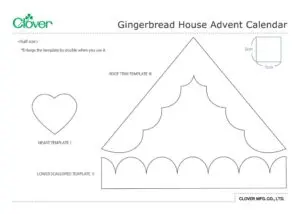
– 1 lower scalloped trim (template II)
– 1 roof trim (template III)
From fabric D:
– 4 pieces 2.5cm wide x 37cm long for the pocket binding
From the red appliqué fabric:
– 1 heart (template I)
From the H630 fusible fleece:
– 1 piece 37cm wide x 65cm tall for the background interfacing
From the G740 fusible interfacing:
– 4 pieces 37cm wide x 7cm tall for the pocket interfacing
วิธีทำ
The first thing that we need to do is to shape the top of the background, the interfacing and the lining. Fuse the interfacing to the wrong side of the background panel. Find the centre top of the background and mark it.
Measure down 25cm on each side and mark that too.
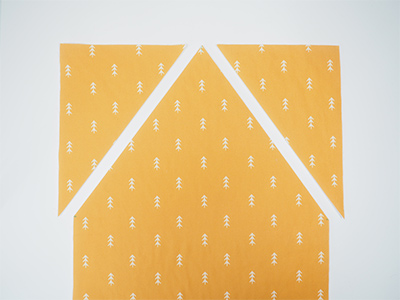
Join the centre top and side marks with a line and then cut along the line. Repeat on the lining fabric.

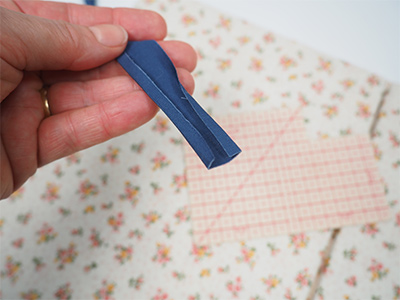
The appliqué comes next. The Vliesofix has a smooth (paper) side and a rough (glue) side. Trace the templates onto the paper side and cut out. Place the cut out pieces glue side down onto the wrong side of the relevant fabrics (as described in the cutting list) and iron to bond. Cut the applique pieces out and then iron on to the background fabric. Appliqué onto the background using your favourite method.
Designerʼs comment:
I have used a Free Motion Embroidery method with black thread but any method will work and look great.
Put the background aside and make the pockets. Fuse a piece of interfacing to the wrong side of the four pocket fronts.
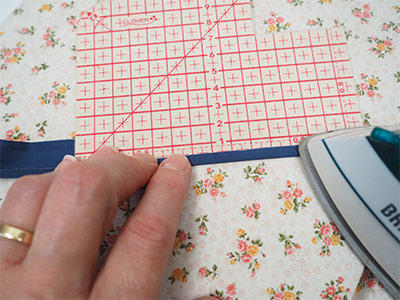
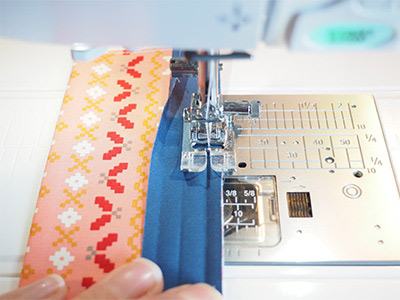
Next make the pocket binding. Fold a piece of binding in half and press to get a sharp central crease. Now use the Hot Hemmer to get a perfect 0.5cm crease on each side. Simply fold to the first line on the Hot Hemmer and press well.
Repeat on the other side of the binding too so that you have a piece of binding ready to sew on with the folds already in place. Repeat with the other three pieces of binding.
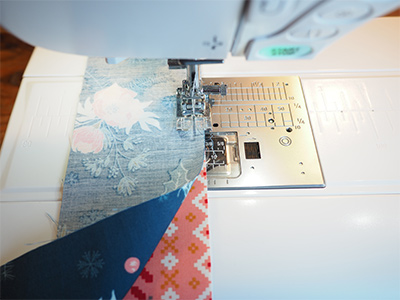
To make a pocket, take a front and a piece of pocket lining. Pin or clip these right sides together and sew the bottom seam only. Flip them the right side out and iron the seam so that it is perfect.
Baste along the top edge to keep everything together and then bind the top edge with your prepared binding.
tip: The perfect creases show you exactly where to sew.
Repeat this for all of the pockets.
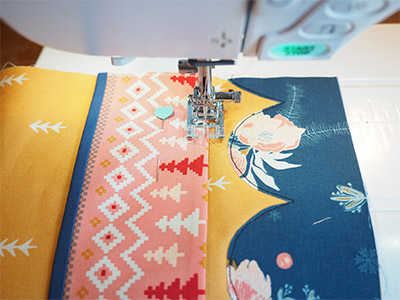
Place the first pocket onto the background fabric 7cm up from the bottom edge.
Pin well and then topstitch narrowly along the bottom edge.
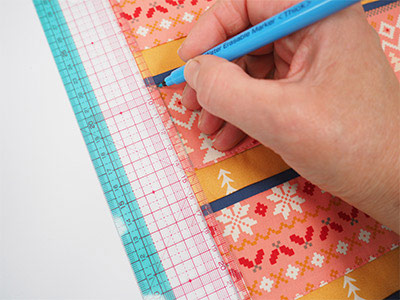
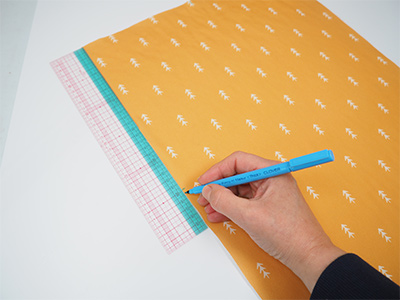
Use the Graph Ruler to divide the pocket up into six equal parts of 6cm each.
tip: To get the pocket measurements perfect, firstly measure 0.5cm on both ends and mark a vertical line (this shows the seam allowance) (IMAGE A ). Then make your first 6cm measurement from this line (IMAGE B).
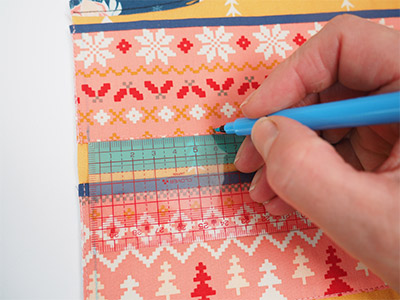
Mark at the top and bottom of the pocket, draw a line between the two marks and then sew the line. Remove the marker lines with the Eraser Pen.
tip: Baste the ends of the pockets to keep them neat. The raw ends will be hidden when we line the calendar.
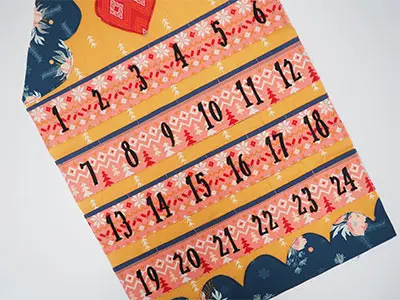
Sew the rest of the pockets on in reverse order, 2cm above the bottom one, the next 2cm above that and then the top pocket 2cm above that one .
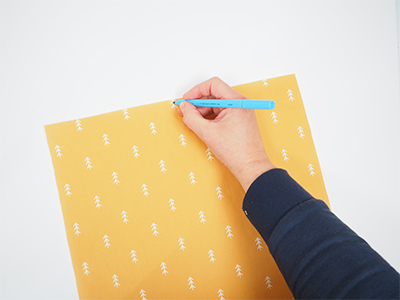
When you have the pockets on and divided up, iron your numbers to the front of each pocket.

Complete the calendar by pinning or clipping the lining fabric to the front, right sides together and sewing all around the edge. Leave a turning gap on the bottom. Clip across the corners and turn the calendar out through the turning gap. Iron so that the edges are perfect. Close the turning gap by hand so that the stitches are as invisible as possible. Finally, attach the eyelet on the top 4cm down from the top edge.
Designerʼs comment:
I have used a small square of leather to reinforce the eyelet but this is optional.