
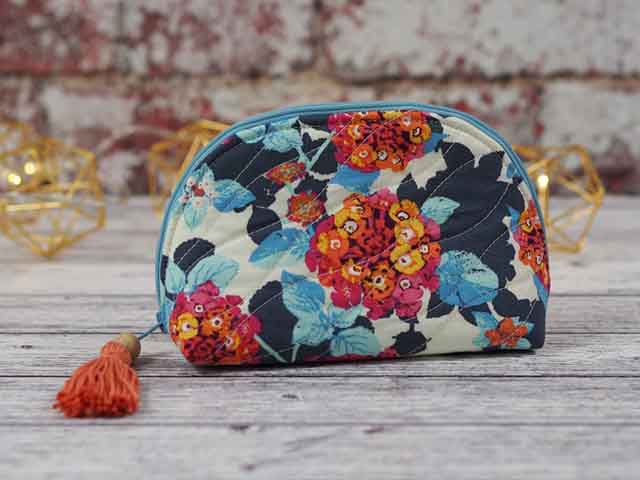
Half Moon Makeup Pouch
ออกแบบโดย
Debbie von Grabler-Crozier
ผลิตภัณฑ์


Materials
Fabric
• FQ floral outer fabric
• FQ coordinating lining fabric
Interfacing
• FQ #279 80/20 cotton mix wadding
(Vlieseline)
• FQ Style-vil foam interfacing
(Vlieseline)
Everything Else:
• 43cm zipper
• Cotton yarn to coordinate with your main fabric
• One or two wooden beads
• Your usual sewing needs
Cutting
From the outer fabric:
– One pattern piece cut on the fold
From the lining:
– One pattern piece cut on the fold
– 20cm of straight binding. Cut a strip of lining 3.5cm wide x 20cm long.

วิธีทำ
Preparation
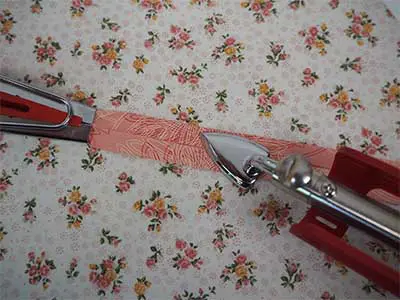
Make the binding first. Press the strip of fabric if needed and pass it through the bias tape maker, pressing as it emerges IMAGE 1.
TIP: Don’t be confused if you are a newbie! We are using a bias tape maker but making straight binding! Straight binding is great for when there are no curves to negotiate. You can use your bias tape maker to neatly turn the edges in.
NB: Seam allowances are all ½ cm (1/4”) unless otherwise stated. Please read all instructions through and assemble the equipment before beginning.
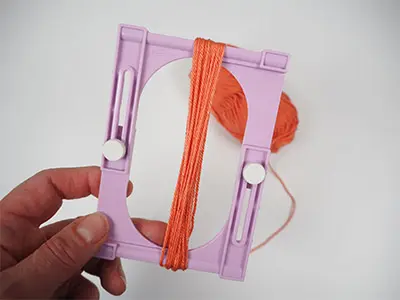
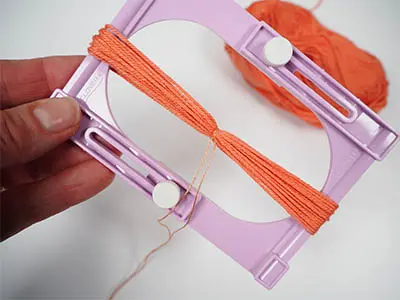
Make the tassel. Wind the cotton yarn around the tassel maker about 15 times IMAGE 2.
Tie the centre off IMAGE 3. Use a long piece of thread (about 30cm) for this and don’t trim it yet.
TIP: Use a slightly finer strong thread like a perle coton to tie the tassel off. This makes it easier to thread the beads on.
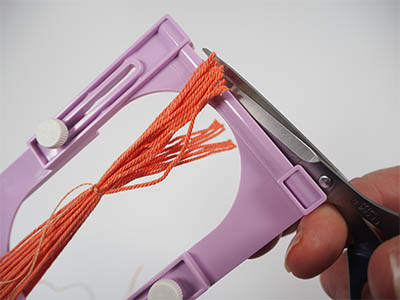
Cut the tassel from the tassel maker IMAGE 4. Fold the tassel over, tie the centre and trim if needed. It is now ready to be attached at the end.
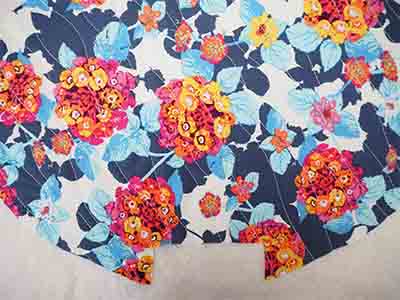
Lay the bag outer panel onto the wadding and quilt using your favourite pattern IMAGE 5.
I love a random wave because it is easy to do and impossible to get wrong.
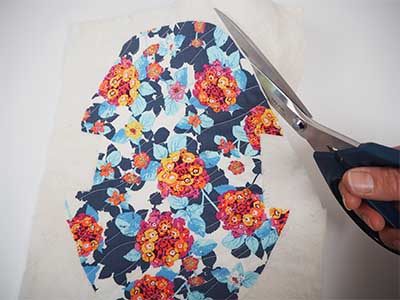
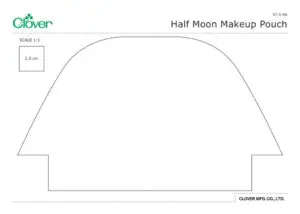
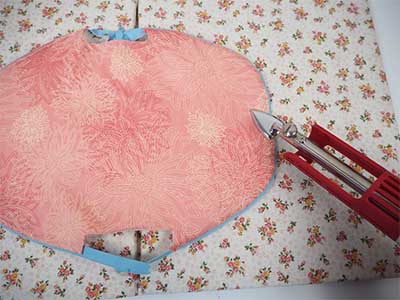
Cut the shape out IMAGE 6 and lay it onto the foam interfacing.
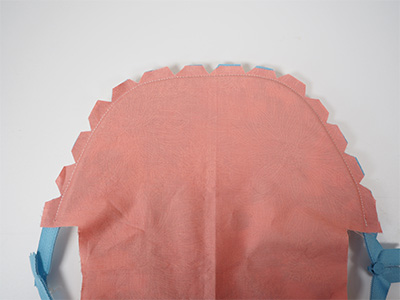
Pin and attach with a narrow machine basting seam all the way around IMAGE 7. Cut this out too. Find the centre of the top curve of the bag and mark it.
TIP: The easiest way to do this is to fold the panel in half and either make a tiny snick with your small scissors or use the water erasable marker. Repeat for the other side curve centre too.
Find the centre of both sides of the zipper. Open the zipper right out and line up one side of the zip centre mark with the centre mark at the top of the curve and pin it IMAGE 8. Pin the zip right around the curve. Wonder Clips are also great for securing the zip while you sew.
TIP: You will notice that the zip is a lot longer than needed – you have not made a mistake! This is to allow the zip to be opened fully and attached with ease. It will be trimmed at the end which is why we are using a non-metal one.
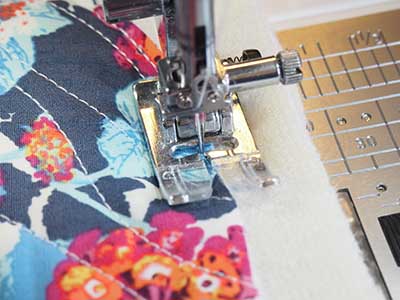
Attach the zip and repeat for the other side. Lay the lining onto the zip with the right sides together and attach this too. It is helpful to find the centres as before and simply line them all up. Cut small notches along the zip being very careful not to cut the stitching IMAGE 9. This ensures that the top will sit flat without puckering when it is turned the right way out in the next step.
Reach into one side end and pull the pouch the right way out. Press the zipper along to make it nice and flat IMAGE 10 (the Mini Iron is great for this job) and then topstitch it to keep the lining from being caught in the zip. Turn the pouch inside out and sew across the ends.
TIP: Do make sure that the zipper pull is about quarter way closed so that you do not cut it off in the next step!
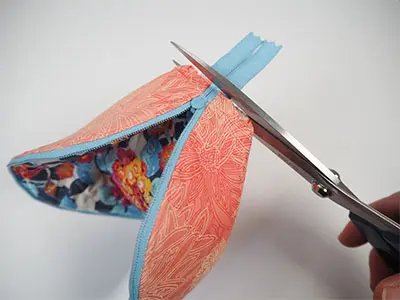
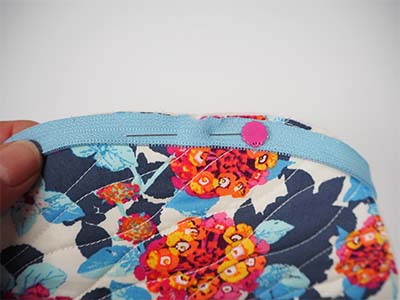
Trim the zipper ends IMAGE 11 and bind with the straight binding using the hand sewing needle and thread. You can do this by machine but I find that it is neater by hand. Some jobs are like that.
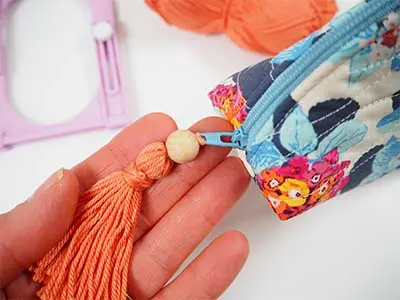
Turn the pouch the right way out and use the stiletto to poke the corners gently to get them perfectly sharp. Attach the tassel to the zipper pull using the excess thread that you used to tie the top off IMAGE 12.
TIP: You can add a bead or two for added drama.