
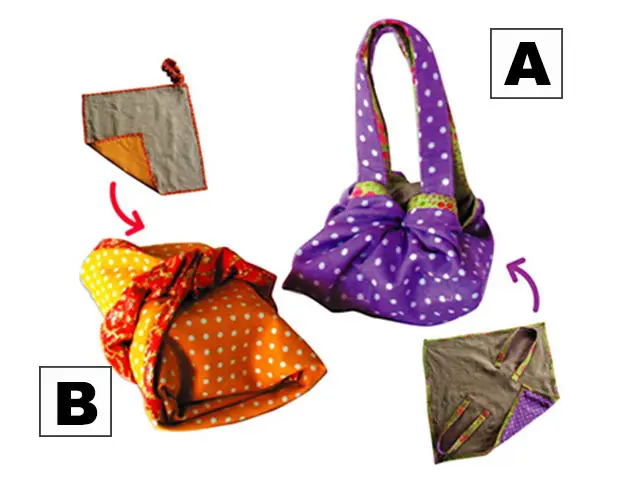
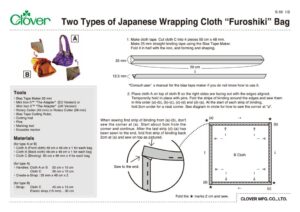
Two Types of Japanese Wrapping Cloth “Furoshiki” Bag
ผลิตภัณฑ์


Cutting mat
Pins
Marking tool
Erasable marker
Materials
(for type A or B)
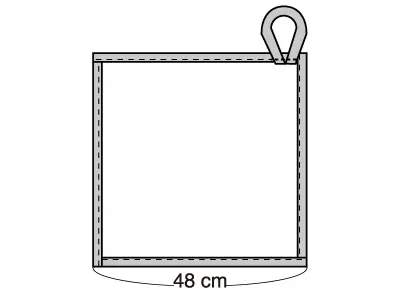
• Cloth A (Front cloth) 48 cm x 48 cm x 1 for each bag
• Cloth B (Back cloth) 48 cm x 48 cm x 1 for each bag
• Cloth C (Binding) 50 cm x 48 mm x 4 for each bag
(for type A)
• Handles: Cloth A or B 50 cm x 1 0 cm
Cloth C 50 cm x 10 cm
• Create-a-Strap : 25 mm x 48 cm x 2
(for type B)
• Strap: Cloth C 40 cm x 1 0 cm
Elastic strap (15 mm) … 30 cm
วิธีทำ
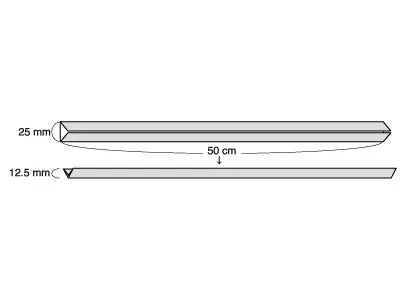
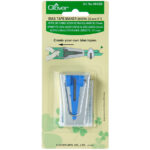
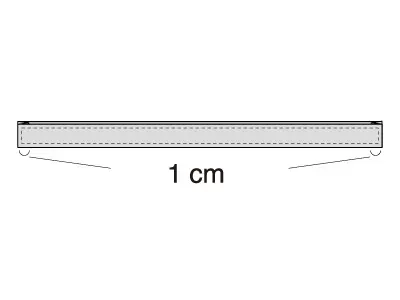
Make cloth tape. Cut cloth C into 4 pieces 50 cm x 48 mm. Make 25 mm straight binding tape using the Bias Tape Maker. Fold it in half with the iron, and forming and shaping.
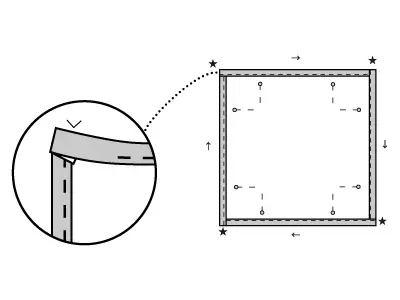
Place cloth A on top of cloth B so the right sides are facing out with the edges aligned. Temporarily hold in place with pins. Fold the strips of binding around the edges and sew them in this order (a)-(b), (b)-(c), (c)-(d) and (d)-(a). At the start of each strip of binding, fold 2cm under for a neat corner. See diagram in circle for how to sew the corner at "a".
When sewing first strip of binding from (a)-(b), don't sew the corner at (a). Start about 5cm from the corner and continue. After the last strip (d)-(a) has been sewn to the end, fold first strip of binding back 2cm at (a) and sew on top as pictured.
Sew to the end.
For type A
Use Create-a-Strap to make the handles.
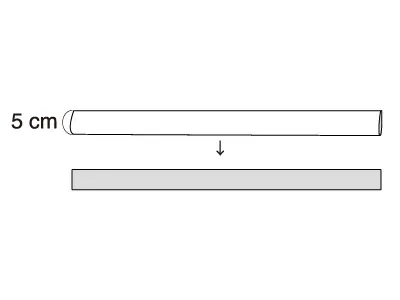
Cut two 50 cm x 5 cm from both pieces of cloth (for a total of 4) and attach to Create-a-strap pieces.
*For detailed information check the Create-a-Strap guide.
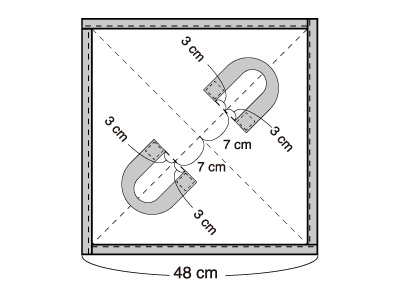
Use the following diagram as a guide when attaching the handles.
Use an Erasable Marker to mark a rough place for each handle, and stitch in place at the four □ to complete them.
It will be helpful to baste the ends of the straps in place as they were too thick to pin.
For type B
Fold the cloth in half lengthwise (right sides together) and stitch a seam 0.5 cm from the edge. Open seam with Mini Iron and turn right side out.
Pass a thread through the cloth tube and fold both edges in 1 cm.
Use the thread to pull the elastic through the tube and stitch to the edge of the bag as pictured.