
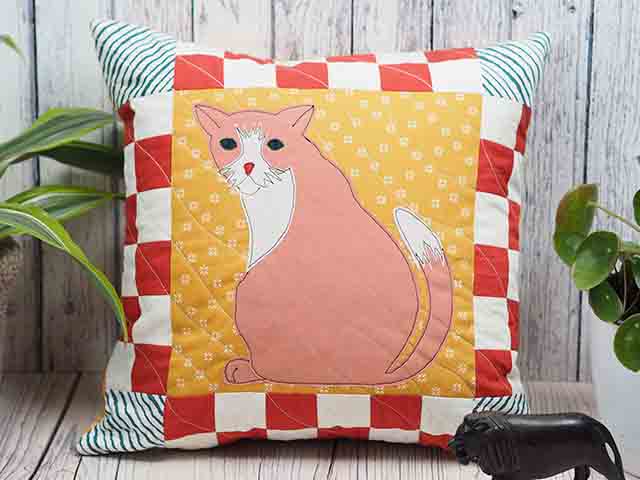
Appliquè Cat Cushion
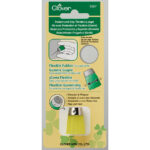
Tools


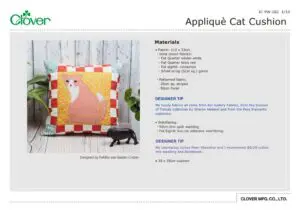
Materials
• Fabric: 110 x 33cm
・Solid colour fabrics:
– Fat Quarter winter white
– Fat Quarter brick red
– Fat eighth cinnamon
– Small scrap (5cm sq.) green
・Patterned fabric:
– 25cm sq. striped
– 50cm floral
DESIGNER TIP
My lovely fabrics all come from Art Gallery Fabrics, from the Season of Tribute collection by Sharon Holland and from the Pure Elements collection.
• Interfacing:
・50cm thin quilt wadding
・Fat Eighth iron-on adhesive interfacing
DESIGNER TIP
My interfacing comes from Vlieseline and I recommend 80/20 cotton mix wadding and Bondaweb.
• 35 x 35cm cushion
Making
Cutting
From the winter white solid fabric:
- 24 pieces 5cm sq. for the patchwork border
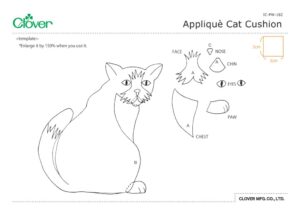
- Small pieces for the appliqué (A)- see template
From the brick red solid fabric:
- 24 pieces 5cm sq. for the patchwork border
- The catʼ s nose (C) -see template
From the cinnamon solid fabric:
- Main body of the cat appliqué (B)- see template
From the green solid fabric:
- The catʼ s eyes (D) -see template
From the striped fabric:
- 4 pieces 8.5cm sq. for the cornerstones
From the floral fabric.
- 1 piece 24cm sq. for the centre section
- 1 piece 38.5cm sq. for the backing fabric
From the quilt wadding:
- 2 pieces 41cm sq.
Good to know
A Fat Quarter of fabric is approximately 50cm x 55cm and a Fat Eighth is approximately 22.5cm x 55cm. These are two very useful pre-cut sizes and are found almost everywhere.
An Important bit
Please read all instructions and assemble requirements before beginning the pattern. The seam allowances are 0.5cm and have already been added."
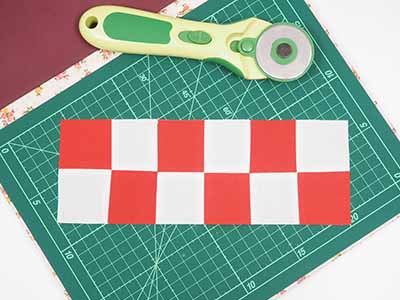
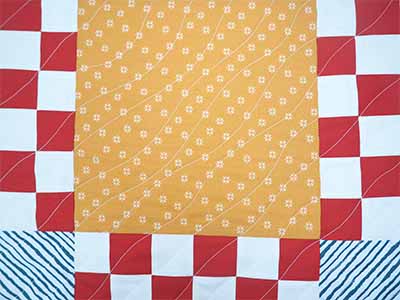
Chain piece the brick red and winter white squares into pairs and then sew them together to make four rows. Each row will have 12 squares, alternating colours and will be two squares high.
tip: The perfect tool for separating the pieces after chain piecing is the ʻQuick Cutʼ Thread cutter.
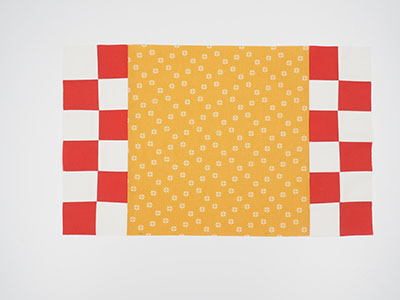
Attach one checked row to the top and bottom (or left and right) of the centre panel.
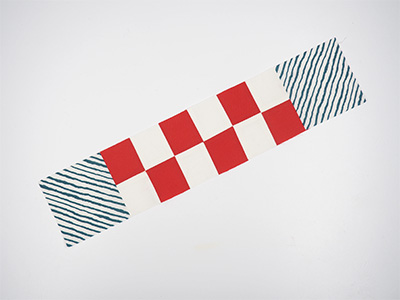
Attach a cornerstone to the remaining two rows.
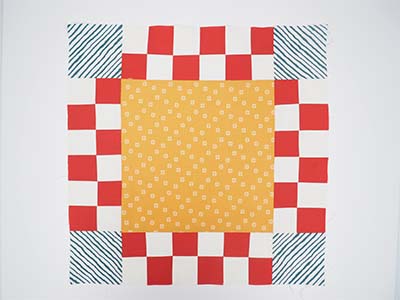
Then sew these two rows to the centre panel to form a frame.
Lay the ironed cushion front onto a piece of quilt wadding and do the same with the backing square. Quilt both with your favourite pattern.
Designerʼs comment
I love a diagonal wave pattern which is super easy to do on any sewing machine.
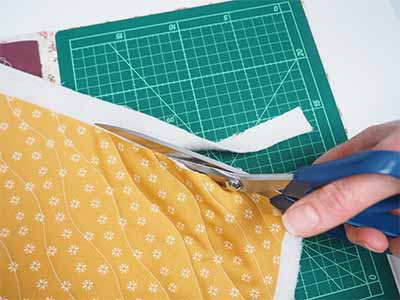
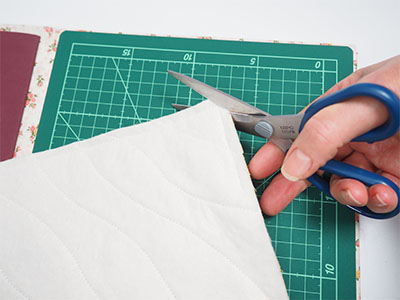
Trim the interfacing on the backing fabric square back to the fabric and put it aside.
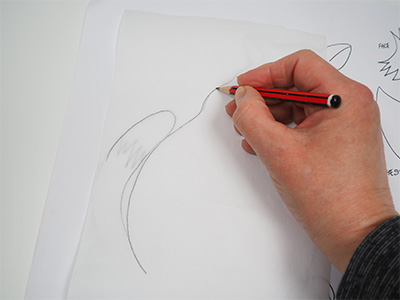
Time to build the appliqué cat. Bondaweb has two sides, a rough (glue) side and a smooth (paper) side. Trace the appliqué pieces onto the smooth side.
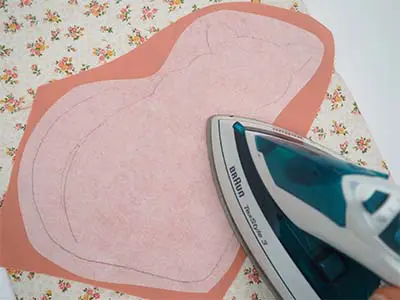
Cut out roughly and then iron onto the fabrics glue side down.
Cut the appliqué pieces out exactly. Build the cat with the body in the middle of the centre panel. Then add the white parts remembering that where you see a dashed line on the template, that piece goes under another. Finish with the green eyes and the brick red nose. Thread your machine with black thread and use a darning foot to finish the appliqué with Free Motion Embroidery.
tip: You will need to either set your stitch length to zero or drop the feed dogs to do this. Take a look at your sewing machine manual for details.
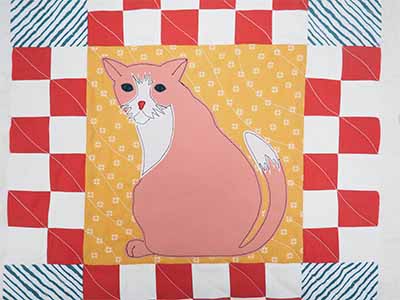
Embroider the cat including the details (on the template).
Trim the interfacing on the cushion front panel as you did for the back. Finish the cushion by sewing both panels together, right sides facing. Leave a turning gap.
Clip across the corners to reduce bulk and turn out through the turning gap. Insert the cushion
and close the turning gap with a neat hand stitch.
tip: You can put in a zipper if you prefer. If your cushion is washable, you do not need to do this.