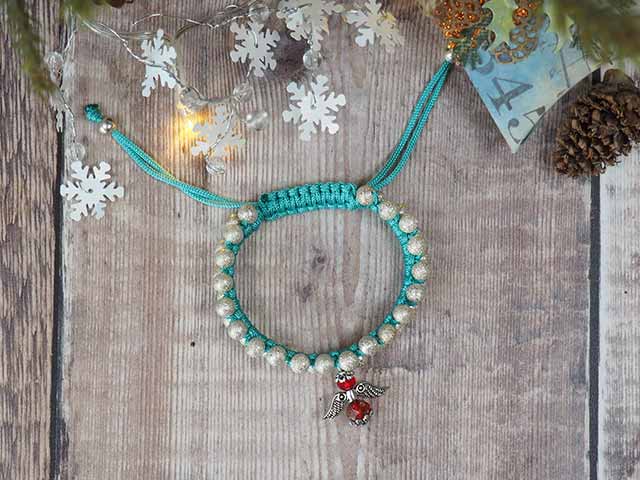
Christmas Charm Bracelet
Designed by
Debbie von Grabler-Crozier, The Folk Art Factory
Tools


Cigarette Lighter or similar tool to finish the cords
Materials
• 3.5m x 1.5mm Shamballa cord or similar weight bracelet making cord
• 38 x 6mm Beads with a centre hole large enough to pass one piece of the cord easily through
• 2 x 6mm beads for the closure with a larger central hole for two pieces of cord
• A Christmas themed charm
An Important bit: Please read all instructions and assemble requirements before beginning the pattern.

Making
Cutting
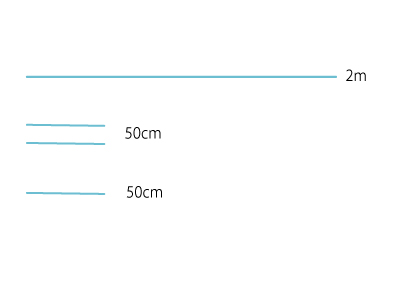
From the Shamballa cord:
・1 piece 2m long as the working yarn
・2 pieces 50cm long as the central cords
・1 piece 50cm long as the closure yarn
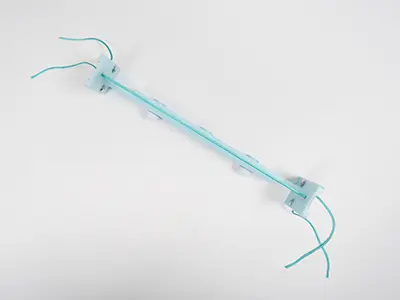
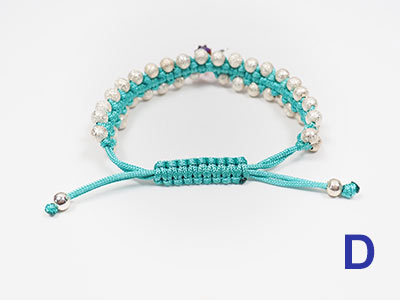
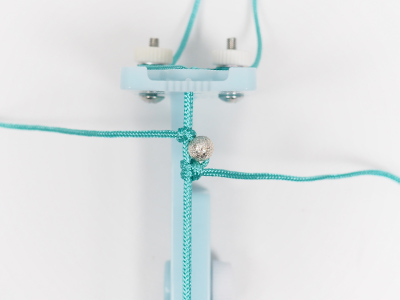
With the Bracelet Maker on the smallest setting, take the two central cords and fasten them to the Maker IMAGE 1. We will be using a Half Hitch macrame knot and threading the beads and the charm onto the working cords. The working cords in this case refer to the cords tying the knots. Begin by folding your working cord in half to find the centre and bringing under the working cords furthest away from you. Tie a regular knot to keep it in place and then put the left hand side working cord aside.

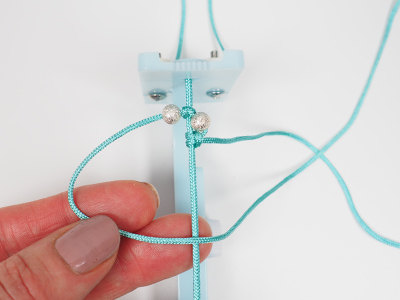
Thread a bead onto the right hand working cord. Make a ‘D’ shape on the right hand side of the work with the working cord going over the centre cords.
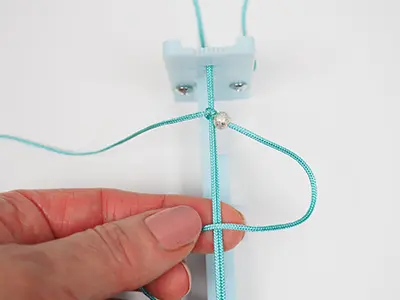
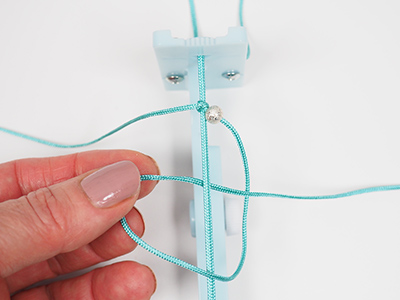
Now with that same cord, bring the end of it under the centre cords and up through the ‘D’. Tighten the knot right up next to the bead. Still working on that right hand side, form another ‘D’ but this time, bring the working cord under the centre cords and through the ‘D’ from the top.
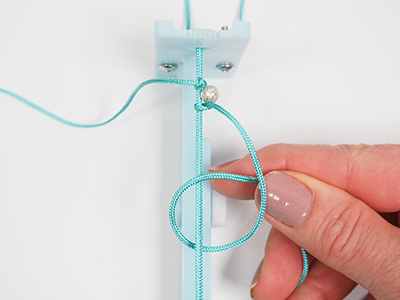
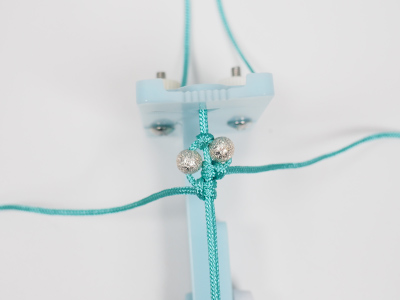
Tighten the knot and this is what you have so far IMAGE 6. Put the right hand working cord to the side and use the left hand working cord. Thread a bead on and push it all the way up.
Make the ‘D’ again but this time on the left hand side. Make the knots the same way but on the left hand side and tighten firmly after each one is complete.
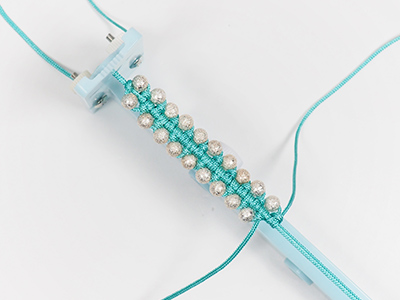
Keep working like this, alternating the left and right hand working cords until you have 10 beads on the right hand side and 9 on the left.
tip: there has to be one less bead on the left because the next step is to add the charm.
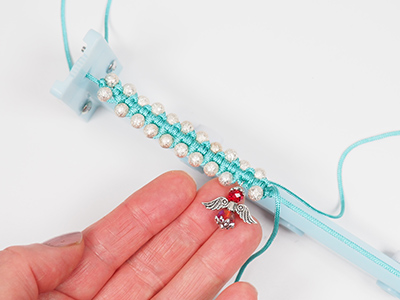
Slide the charm onto the left hand working cord.
Then continue with the beads on alternate sides. When you have finished, the bracelet should be around 14cm long with 20 beads on the right hand side and 18 plus the charm on the left.
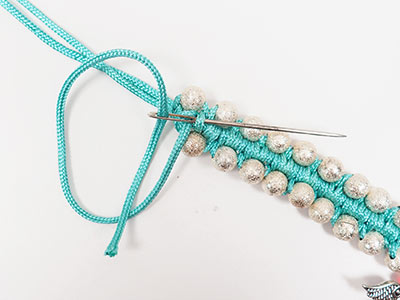
To secure, you can either thread the long ends of the cord back through the knots on the back of the bracelet or you can trim the working cords to about 1cm long and then melt them with a lighter.
tip: I prefer to use the weaving method using a darning needle for the bead part of the bracelet and the melting part for the closure.
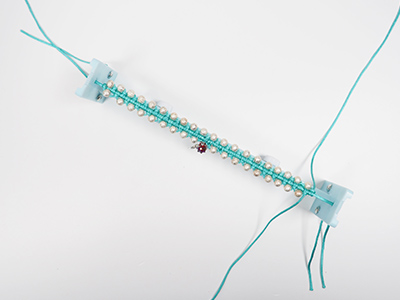
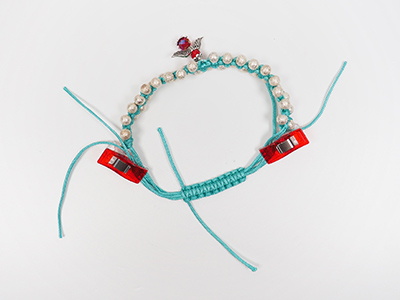
Whichever method you choose, remove the bracelet from the maker now and secure the ends. Trim the long working cords. You will have the beaded section and two rather long centre cords.
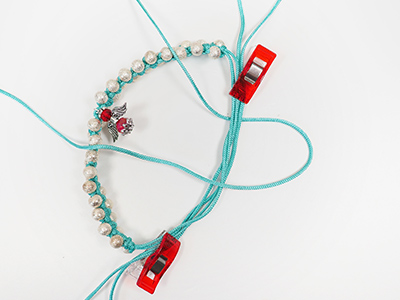
Fold the bracelet in a loop so that the centre cords overlap each other going in opposite directions and clip them allowing plenty of working space in the middle. You need the last 50cm length of cord now to make the closure.
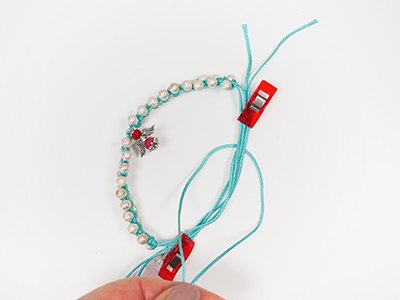
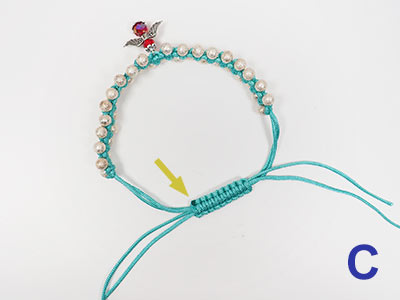
Fold it in half and place it under one end of the centre cords. This time we will use a Square Knot. Make a ‘D’ with the right hand side working cord going over the two centre cords.
Make a backwards ‘D’ with the left hand working cord going over the tail of the right hand one and under the centre cords. Bring the end of the left hand working cord up through the right hand side ‘D’. Tighten the knot.
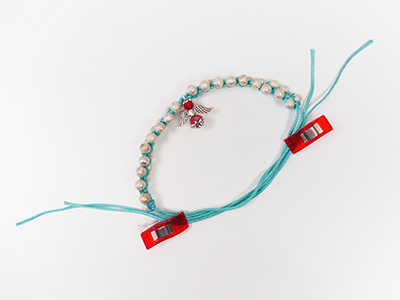
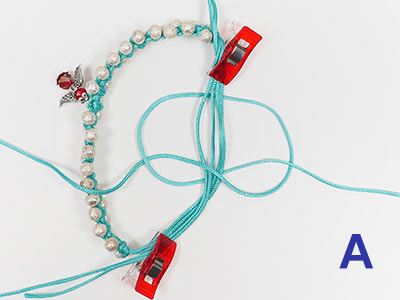
Make more Square Knots until the closure measures about 4cm.
TIP: Each time you make a knot, swap to the opposite side to start it. This way, your closure will be flat. If you start on the same side every time, you will end up with a spiral which is awesome but not as comfortable to wear.
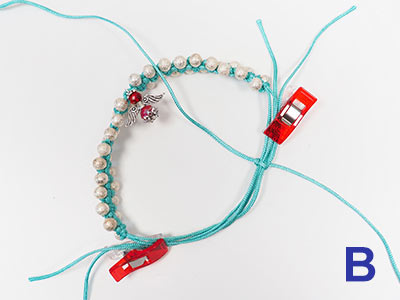
Finish the closure by trimming the ends of the working cords and melting them with a lighter.
TIP: when you do this, makes sure that the closure can move freely along the centre cords. If it is stuck fast, you will not be able to open and close your bracelet.
Thread the last two beads onto the ends of the working cords. Make a knot under the beads at about 4cm, trim and melt the excess cord.