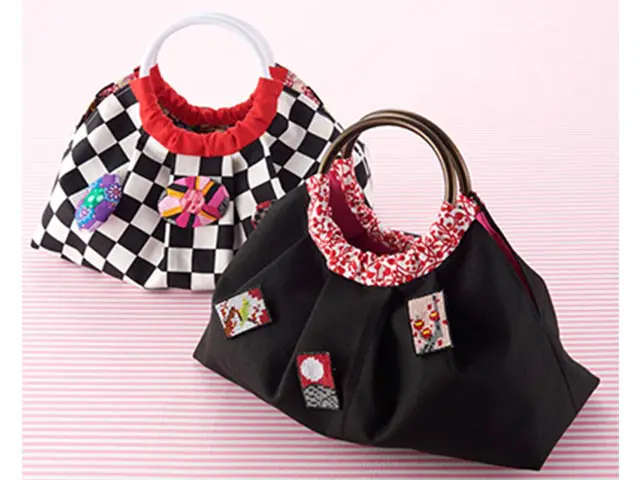
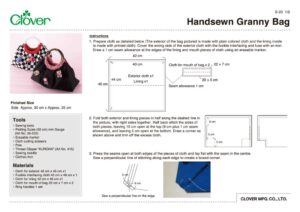
Handsewn Granny Bag
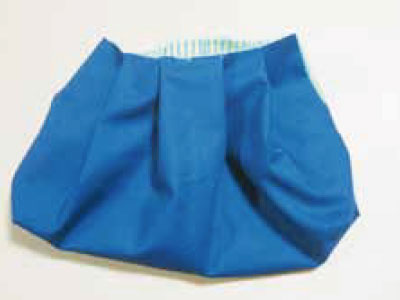
Finished Size
Side Approx. 30 cm x Approx. 25 cm
Tools

Sewing tools
Plotting Scale (50 cm) mm Gauge
Erasable marker
Cloth cutting scissors
Pins
Sewing needle
Clothes Iron
Materials
• Cloth for exterior 42 cm x 46 cm x 1
• Fusible interfacing cloth 42 cm x 46 cm x 1
• Cloth for lining 42 cm x 46 cm x 1
• Cloth for mouth of bag 22 cm x 7 cm x 2
• Ring handles 1 set
Making
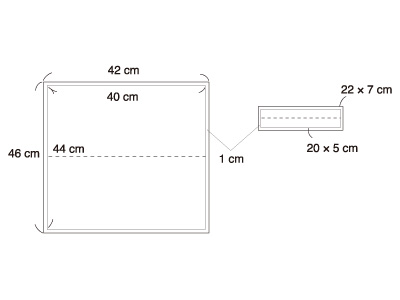
Prepare cloth as detailed below (The exterior of the bag pictured is made with plain colored cloth and the lining inside is made with printed cloth). Cover the wrong side of the exterior cloth with the fusible interfacing and fuse with an iron. Draw a 1 cm seam allowance at the edges of the lining and mouth pieces of cloth using an erasable marker.
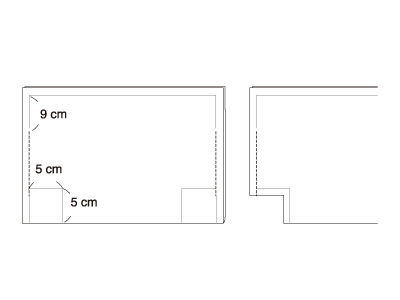
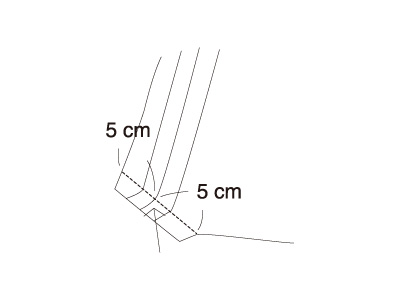
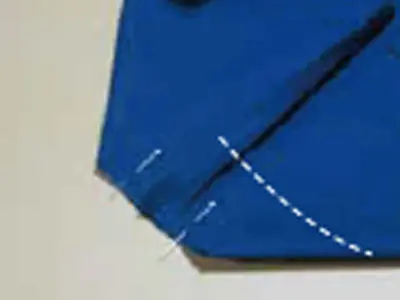
Fold both exterior and lining pieces in half along the dashed line in the picture, with right sides together. Half back-stitch the sides of both pieces, leaving 10 cm open at the top (9 cm plus 1 cm seam allowance), and leaving 5 cm open at the bottom. Draw a corner as shown above and trim off the excess cloth.
Press the seams open at both edges of the pieces of cloth and lay flat with the seam in the centre.
Sew a perpendicular line of stitching along each edge to create a boxed corner.
Attach your preferred motif.
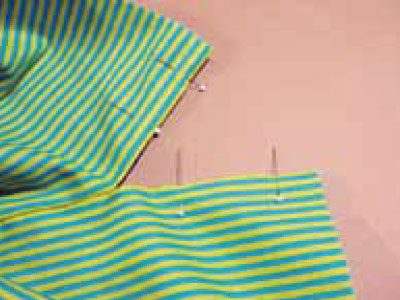
Fold back and press the seam allowances at the opening of the lining and the exterior pieces. Place the lining inside the main body of the bag as they will appear when finished, with wrong sides together. Stitch the lining and exterior pieces together along the edges with a ladder stitch, as shown in the picture.
If you are having difficulty with the ladder stitch, make it a diagonal stitch instead. Repeat two or three times at the opening to reinforce it.
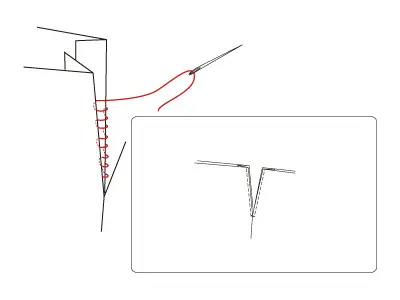
[Ladder stitch]
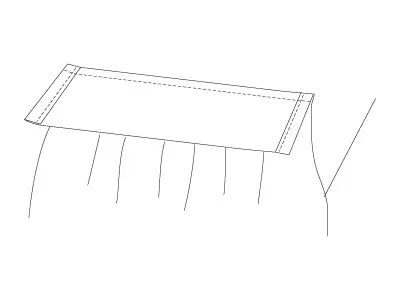
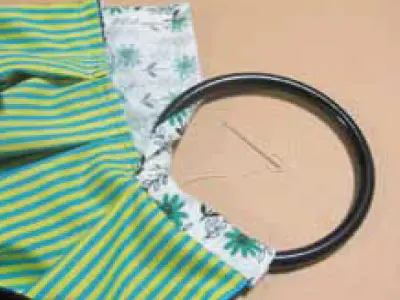
Attaching the handles. Fold and press the seam allowances of the two mouth pieces to the wrong side at both ends and stitch. Stitch the mouth pieces to the exterior of the bag, right sides together. Remove basting. Fold back and press the seam allowance on the remaining side of each mouth piece. Insert the handles and sew the mouth piece to the lining while wrapped around the handles. When both sides are complete the bag is finished.