
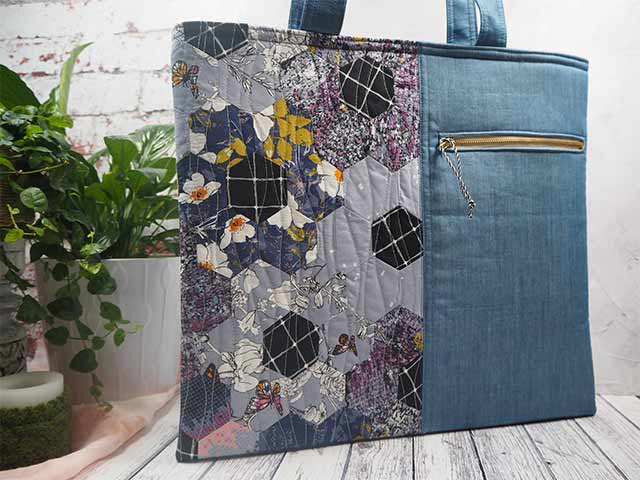
Hexie Flower Bag
Designed by
Debbie von Grabler-Crozier
Tools


Materials
Fabric
• 70cm lightweight denim for the outer.
• Assorted floral fabrics.
TIP: I have used a fat eighth pack and the great advantage of these is that they are beautifully curated for you.
•1.2m fabric for lining.
Interfacing
• 1m H630 fusible wadding (Vlieseline)
• 1.2m style-vil foam interfacing (Vlieseline)
• 25cm strip G740 fusible interfacing (Vlieseline)
• FQ S320 fusible interfacing (Vlieseline)
Everything Else
• 1x 18cm metal zipper. Choose a colour to match or compliment your fabrics.
• Something to decorate the zipper pull. I have used a small piece of baker’s twine.
• Matching threads
• Your usual sewing needs
Cutting
NB: Seam allowances are all ½ cm unless otherwise stated. Please read all instructions through and assemble the equipment before beginning.
The denim:
– Front right panel 24cm wide x 43cm deep
– Rear panel 50cm wide x 43cm deep
– Handles 15cm wide x 70cm long
– 2 pieces for the internal top trim on the lining
10cm wide x 50cm long
The lining:
– 2 pieces for the main front and back lining 50cm wide x 34cm deep
– 4 pieces for the internal slip pockets 15cm wide x 28cm long
– 1 piece for the front external zipper box pocket 22cm wide x 40cm deep
The floral Fabrics:
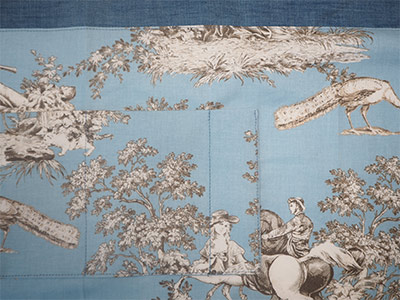
– 45 hexies using the pink template- each hexie has a centre in one
colour and then six more matching around the outside for petals. I have kept the centres the same.
TIP: remember that some of the flowers will be incomplete (the ones on the edges) and sometimes you only need half a hexie to make the pattern complete and to hint of more flowers that we cannot see.
Lay your hexies out to get the pattern correct as you plan what to cut.
TIP: The smaller rotary cutter is perfect for using with the patchwork templates.
The H630 fusible wadding:
– 2 pieces 50cm wide x 43cm deep for the front and back panels
The S320 fusible interfacing:
– 2 pieces for the internal slip pockets 12cm wide x 25cm long
The G740 fusible interfacing
– 2 pieces 16cm wide x 56cm long for the handles.
TIP: There are no cutting notes for the style-vil foam interfacing. This is cut and attached as you go along and instructions will be given as needed.

Making
Preparation

The handles. Fuse the G740 to the wrong side of the denim handle strips and then fold them in half lengthways. Press. Fold the raw edges to the centre and press again. Use wonder clips to hold the handles closed while you work. Topstitch along the length to close and decorate IMAGE 1.
TIP: Because of the extra width of the handles, it looks better to topstitch down each one twice on each side.
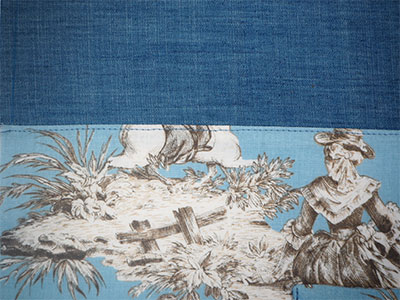
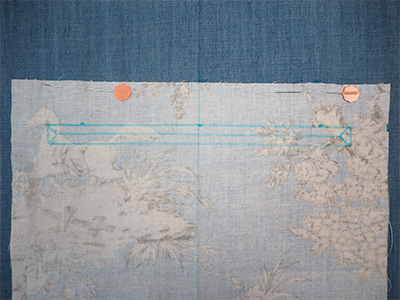
Attach the top trim to the internal lining panels and then press the seam down. Topstitch very narrowly just under the seam IMAGE 2. The internal slip pockets: take one piece of slip pocket fabric and fuse the S320 to the wrong side of it centring it well. Repeat for the other pocket.
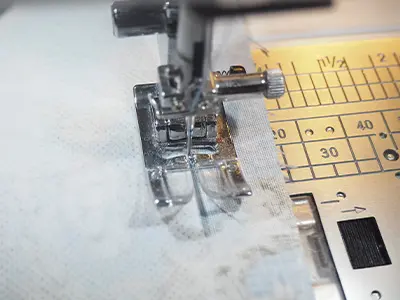
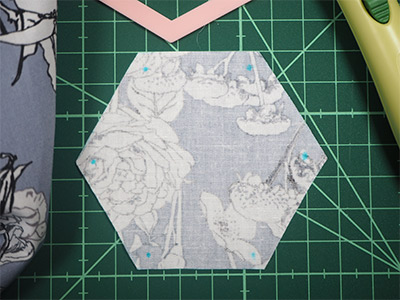
Take an interfaced piece of pocket and an un-interfaced piece and pin them right sides together. Sew all around the very edge of the interfacing leaving a turning gap in the base IMAGE 3. Clip across the corners, trim the seam allowance back to 0.5cm and turn out through the turning gap. Press so that the edges are perfect. Repeat for the other pocket
Find the vertical centre of the lining pieces and measure down 16cm from the top edge. Site the pocket onto the centre line and pin. Topstitch the pocket on with a narrow seam. Repeat for the other pocket.
TIP: These pockets are apt to sag so divide them up with a vertical seam or two. This also makes them more practical to use IMAGE 4.
The flowers come next! Although it is usual to sew hexies by hand using English Paper Piecing, I want to show you a quicker machine method. It uses ‘Y’ seams which means that when we sew the hexie sides, we start 0.5cm in from the end and finish 0.5cm in from the end. I have shown this concept here with some Water Erasable Marker dots IMAGE 5 and here is what it looks like sewn IMAGE 6.
Do this on all sides, tucking the fabric out of the way so that you can get the seams perfect. Nest the seams on the back to keep the piece very flat. Press often as you sew. Keep adding flowers until you have a panel which is wider than 26cm wide x 43cm deep. It seems odd to sew the complete flowers and then cut them back on the sides but it is the best way to see what you have in the way of a pattern. You can then use the panel either way up depending on what looks nicer. When you have finished the hexie flower panel, press it well and trim it to 26cm wide x 43cm deep.
TIP: To achieve the right size and shape, you will have to trim the some of the edge hexies in half.
Fuse H630 to the flower panel, the plain front panel and the back panel.
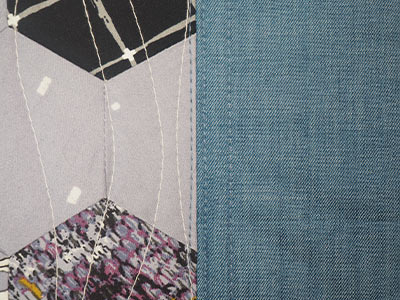
Quilt the flower panel using your favourite quilting pattern. I love a random wave pattern. It is really easy to do on just about any machine. I have worked it vertically IMAGE 7.
Make the zipper box pocket for the front right hand panel. On the denim side, find the vertical centre and mark it. Measure down 8cm and make a horizontal line. Pin one short end of the zipper box pocket lining onto this mark, right sides together. On the actual pocket lining, measure down 2.5cm and mark a horizontal box 1cm deep x 18cm long. This is the sewing line. Make another horizontal line down the middle of the box with angles at each end. This is the cutting line IMAGE 8.
Sew around the sewing line and cut along the cutting line including the angles and then ‘post’ the lining through the hole. Smooth it out perfectly on the other side and press so that the edges are perfect. Topstitch the metal zipper in and then finish the pocket by bringing the other short end of the lining up to meet the first and sewing the sides and top. Topstitch along either side of the patchwork/denim centre seam IMAGE 9.
TIP: I opted for twice on the denim side to match the handles and topstitching on the upper edge.
Take the front panel and lay it onto a piece of slightly larger foam interfacing. Keeping it nicely taut and even, attach it to the foam with a narrow machine basting stitch. Trim the foam back to the size of the panel IMAGE 10.
Repeat this for the back panel.
TIP: there is an allowance for 1cm overhang on each handle. The idea is that when you attach them, you sew them once and then when the bag is finished and topstitched around the top, the excess will be caught in the topstitching seam and thus you will secure the handles twice, making them stronger.
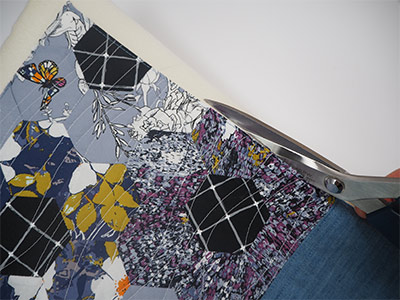
With the bag the right way out and the lining inside out, slip the lining on over the outer so that the right sides are together. Match up the side seams and clip. Sew right around the top edge leaving no gaps. Turn the bag out through the gap in the lining and close the gap.
Stuff the lining down into the bag and press the top edge. Topstitch around the top edge of the bag. This keeps the lining down and secures the handle ends. Decorate the zipper pull with a piece of leather, ribbon or a small charm.