
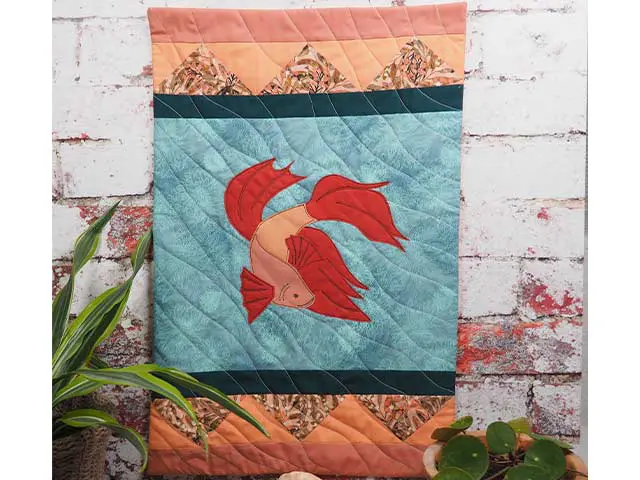
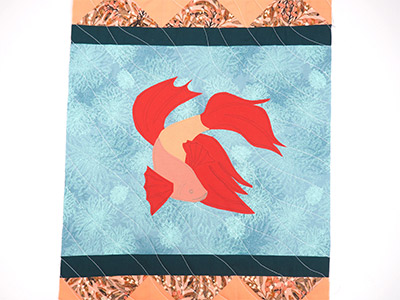
Lucky Goldfish Mini Quilt
Designed by
Debbie von Grabler-Crozier
Tools


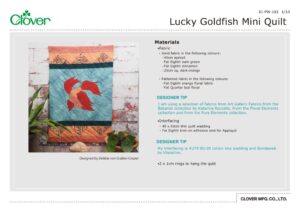
Materials
•Fabric
・ Solid fabric in the following colours:
– 45cm apricot
– Fat Eighth dark green
– Fat Eighth cinnamon
– 25cm sq. dark orange
・ Patterned fabric in the following colours:
– Fat Eighth orange floral fabric
– Fat Quarter teal floral
DESIGNER TIP
I am using a selection of fabrics from Art Gallery Fabrics from the Botanist collection by Katarina Roccella, From the Floral Elements collection and from the Pure Elements collection.
•Interfacing
・ 45 x 60cm thin quilt wadding
・ Fat Eighth Iron-on adhesive web for Appliqué
DESIGNER TIP
My interfacing is #279 80/20 cotton mix wadding and Bondaweb by Vlieseline.
•2 x 1cm rings to hang the quilt
Making
Cutting
From the apricot fabric:
- 6 pieces cut 8cm sq. for the Half Square Triangle (HST) blocks
- Small piece for the goldfish appliqué (template part A)
- 1 piece 36cm wide x 54cm tall for the panel lining
From the dark orange fabric:
- Small pieces for the goldfish appliqué (template part B)
From the cinnamon fabric:
- 2 strips 5cm wide x 36cm long for the top and bottom outer sashes
- Small piece for the goldfish appliqué (template Part C)
From the dark green fabric:
- 2 strips 4cm wide x 36cm long for the top and bottom inner sashes
From the orange floral fabric:
- 6 squares cut 8cm sq. for the HST blocks
From the teal floral fabric:
- 1 piece 36cm wide x 30cm tall for the centre panel
Good to know
A Fat Quarter of fabric is approximately 50cm x 55cm and a Fat Eighth is approximately 22.5cm x 55cm. These are two very useful pre-cut sizes and are found almost everywhere.
An Important bit
Please read all instructions and assemble requirements before beginning the pattern. The seam allowances are 0.5cm and have already been added.
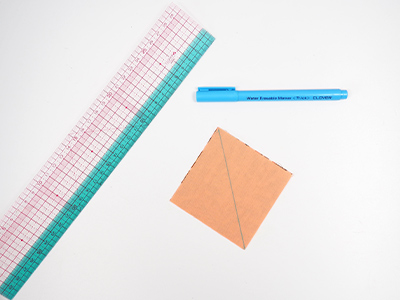
Make the HST blocks first. Take a square of floral fabric and one of apricot and place them right sides together.
Draw a line diagonally from corner to corner.
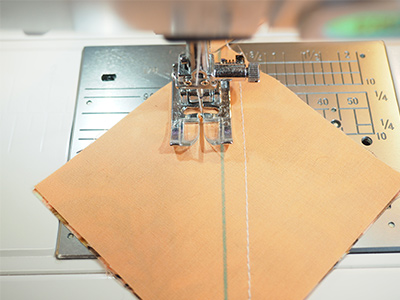
Sew 0.5cm either side of this line.
tip: This is a perfect time to chain piece. It saves time and you can use the ʻQuick Cutʼ Thread Cutter to quickly separate the pieces.

Cut along the original line to make two HST blocks.
Open the HST units out and iron the seams flat. Repeat for the other units.
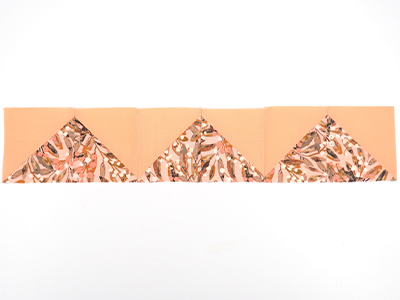
Sew the HST units together into two rows of 6 and iron.
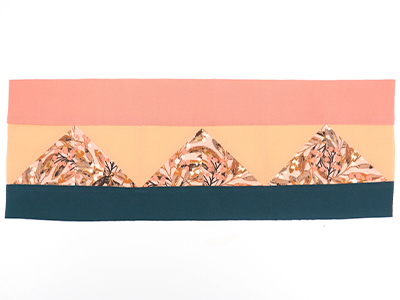
Assemble the quilt front with an outer sash first followed by a row of HST units then a teal inner sash.
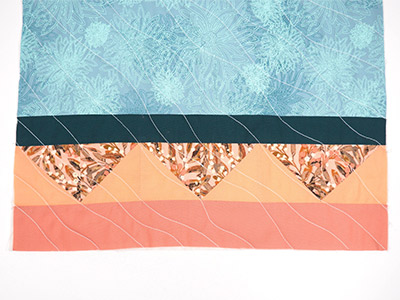
Add the centre panel and then a teal inner sash, the other row of HST units and the final outer sash. Lay the ironed and trimmed front panel centrally onto the wadding. Quilt with your favourite design.
Designer's comment: I really love a diagonal wave. It is really easy to do.
tip: So why are we quilting without the lining? Because the appliqué will be a bit untidy on the back and it is nicer to hide it.
tip: The appliqué is sewn with a Free Motion Embroidery technique. You will need a darning foot and either to set your stitch length to zero of drop the feed dogs. Check your sewing machine manual for specifics.
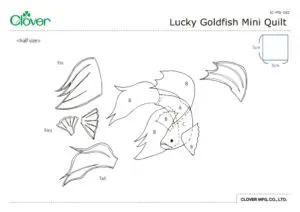
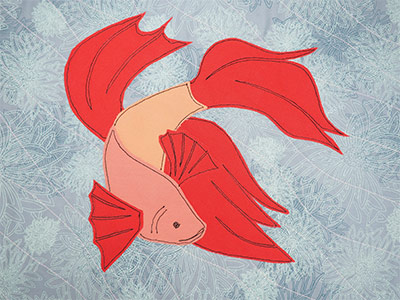
To make the appliqué, each colour is represented by a letter on the pattern.
- A is apricot
- B is dark orange
- C is cinnamon
Trace the pieces to the smooth side of the Bondaweb and cut out roughly.
tip: Bondaweb is really handy because it has a smooth paper side and a rough glue side. You can write the appliqué letter onto the paper side to help you keep track of the pieces
Iron the appliqué pieces to the pieces of fabric and cut out exactly. To prepare the appliqué, tear the paper off the fabric pieces and ʻbuildʼ the goldfish with the dark fins (B), then the light (A) and medium (C) coloured body sections.
tip: Draw the appliqué details on with your Water Erasable Marker so that you can clearly see where to embroider.
Move everything around until you are happy and then iron to bond the appliqué into place.
tip: On the template, the appliqué pieces with the dotted line go under another piece. You can see this on the fins for example.
Thread your machine with black thread and use a darning foot to embroider the fish onto the panel. Trim the interfacing so that the interfacing and panel front are the same size. Place the lining right sides together onto the front panel and clip all around. Sew around the edge leaving a turning gap in the bottom seam. Clip across the corners and turn out through the gap. Close the gap with a neat hand stitch.
Iron the quilt well and attach the rings to the back to hang.