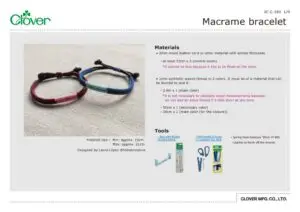
Macrame bracelet
Designed by
Laura Lopex @felinacreativa
Finished Size
Min: approx. 15cm Max: approx. 21cm
Tools

Materials
〇 2 mm round leather cord or other material with similar thickness
・at least 32cm x 2(central cords)
*It cannot be less because it has to be fixed on the loom.
〇 1 mm synthetic waxed thread in 2 colors. It must be of a material that can be burned to seal it.
・2.8m x 1(main color)
*It is not necessary to calculate exact measurements because we can add an extra thread if it falls short at any time.
・50cm x 1(secondary color)
・30cm x 1(main color(for the closure))
Bracelet measures
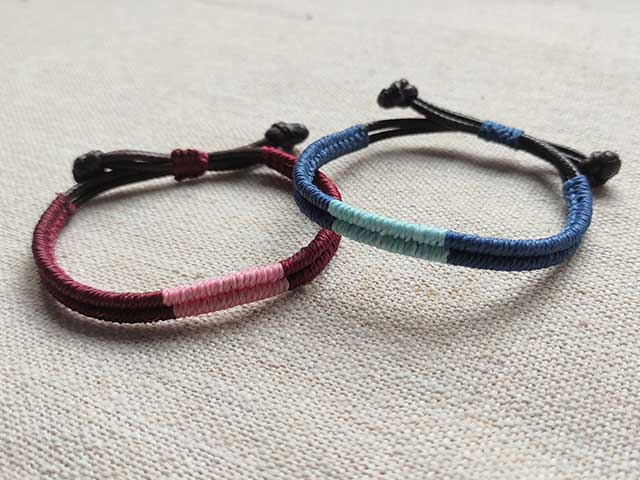
When you finish the design you will have 13 cm of wrapped rope with 2 colors for a wrist of approximately 15 cm. We leave about 8.5 cm of leather cord on each side for making the ends knots and so that the bracelet can be easily opened and removed from the hand.
Note
While we tie the bracelet we see the wrong side.
Making
Knots

・HALF RIGHT KNOT(HRK)-'P shape'
Form a P-shaped loop with the knotting strand going over the middle strand from right to left. Then pass the strand under the middle strand to the right and pull it through the loop.
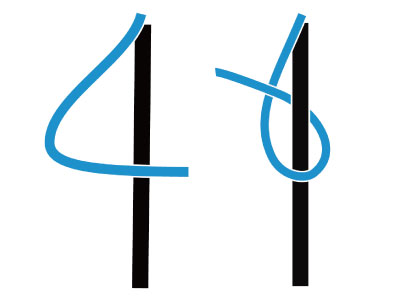
・HALF LEFT KNOT(HLK)-'4 shape'
Form a 4-shaped loop with the knotting strand going over the center strand from left to right. Then pass the strand under the middle strand tot the left and pull it through the loop.
・SQUARE KNOT
Fold the knotting thread in half and pass it under the center cords. Then pass the left strand over them to the right. Finish by passing the strand on the right over the strand you have just used and under the middle cords to end up pulling it through the loop that was formed on the left side. To make the second part of the flat knot, repeat the same steps in reverse way. Start with the right strand over the center strands.
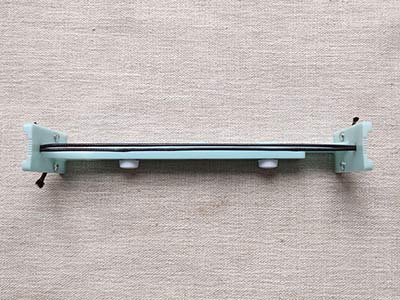
Adjust the loom to the minimum size(20 cm) and tie the 2 leather cords following the instructions. They should not be too tight to be able to knot well between them.
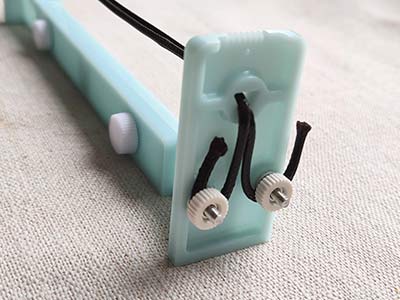
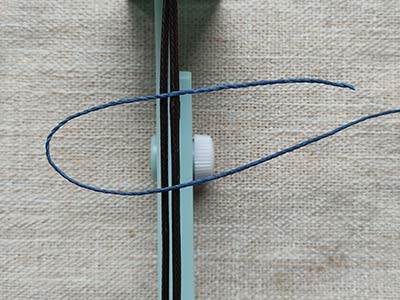
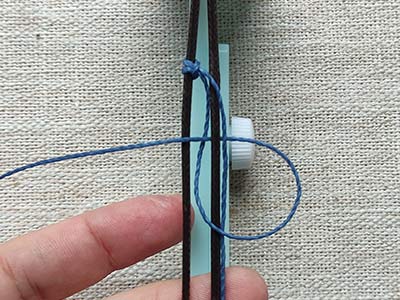
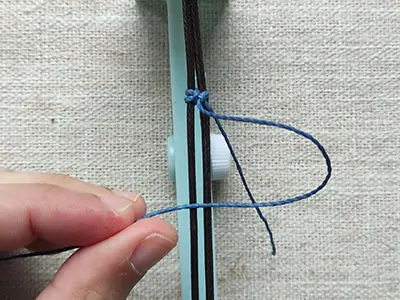
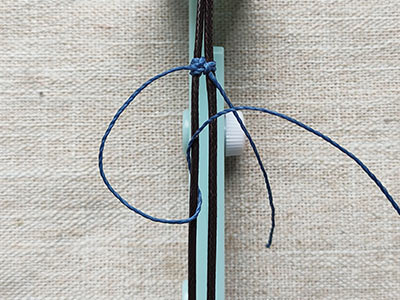
Leaving 3.5 cm of space without knotting from the edge of the loom, make a first knot in the leather rope on the left with the thread(main color).
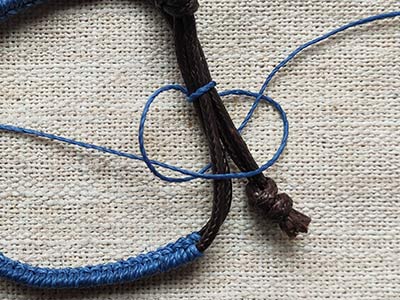
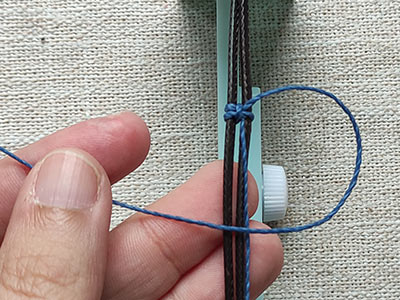
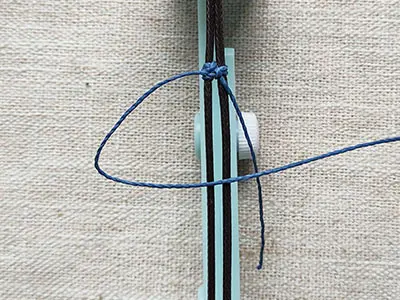
Fold the end of the thread and place the loop facing outwards over the leather ropes.
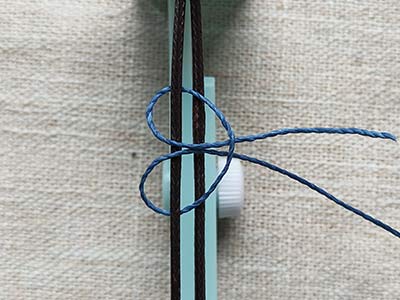
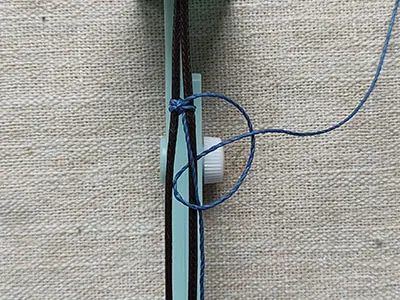
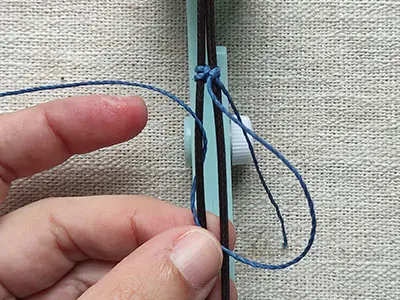
Wrap the leather cord around the loop, pulling it under the loop and toward the center of the bracelet.
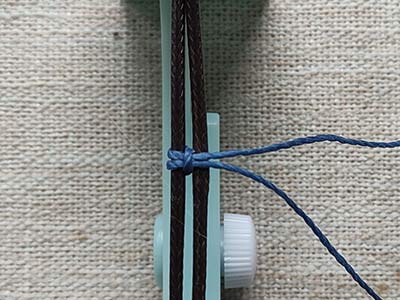
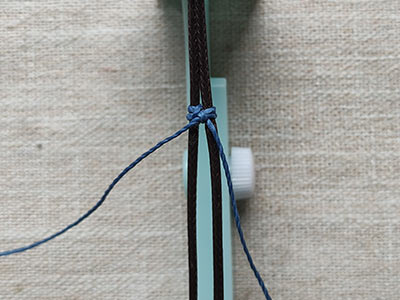
Insert the 2 ends of the thread throught the loop and pull to tighten it.
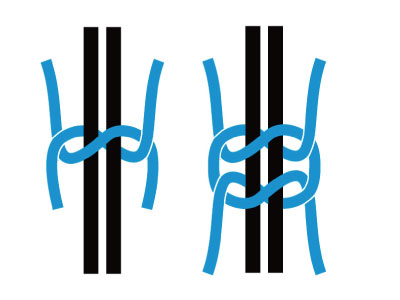
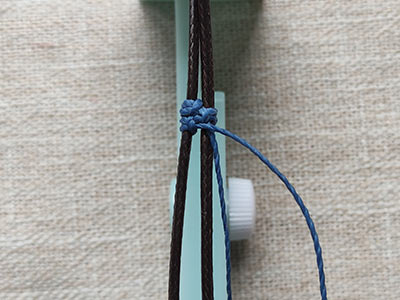
Knot 6 cm with the thread of the main color to wrap each of the 2 ropes alternately following the steps below:
Right leather cord(4-P): First tie one 4-shaped knot

And then make a P-shaped knot
Left leather cord(P-4): Tie one P knot first
And then make a 4-shaped knot
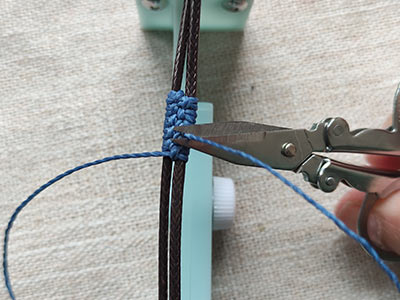
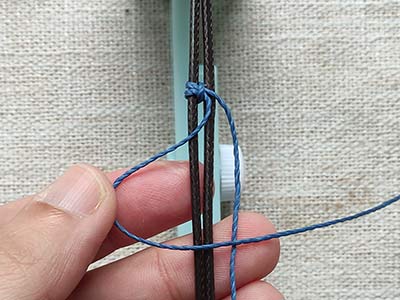
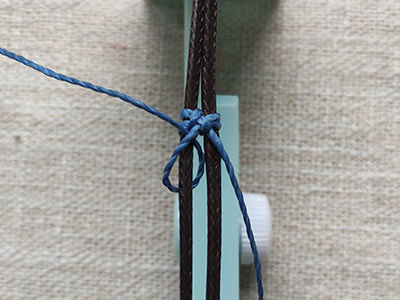
Hide the extra ends by knotting over them several times along with the leather cord as seen in the photos above. Then continue knotting normally, leaving part of the thread unwrapped to cut the excess flush.
Important: The tying thread always goes over the leather cords.
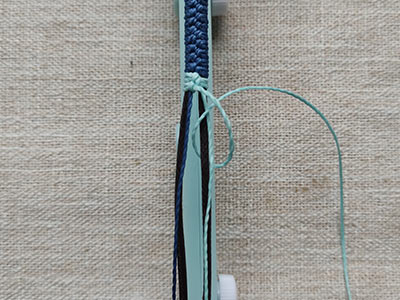
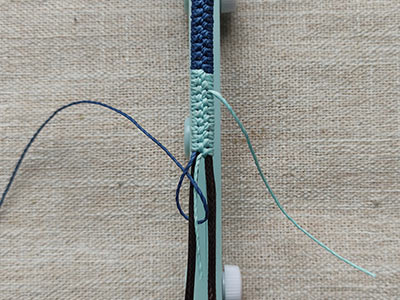
Then make a color change and knot along 1 cm with the secondary color. Wrap both the leather cord and the thread that fell short with the new thread, as we did at the beginning. The next knot will also wrap the short strand of the new thread you added. Continue knotting 1 cm with the secomdary color over the leather ropes and the main color thread.
Finish the design with 6 cm of the main color using the thread you have been covering.
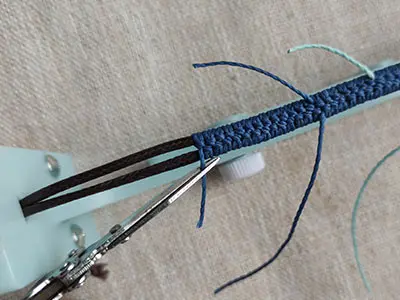
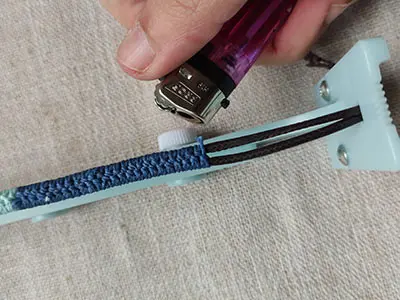
Trim off all strands left over from color changes and strand additions. Cut the final strand with a little margin to burn it and finish off.

Tie a regular knot at each end of the bracelet.
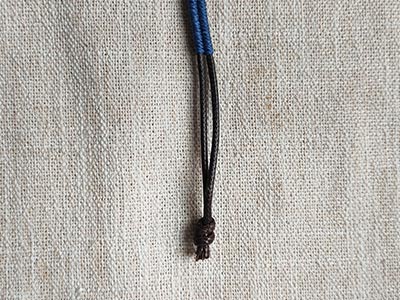
Make the adjustable closure with 1 cm square knots. Cut the strands with a little margin to finish them off with a lighter.