
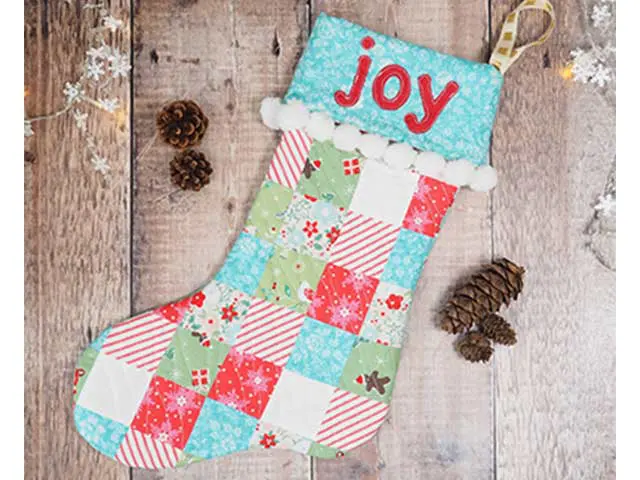
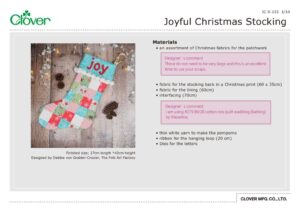
Joyful Christmas Stocking
Разработано
Debbie von Grabler-Crozier, The Folk Art Factory
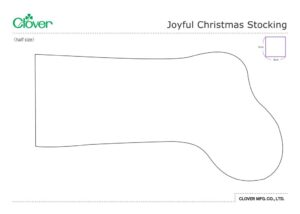
Готовый размер
Finished size; 27cm length *43cm height
Инструменты


Die cutting machine
Materials
• an assortment of Christmas fabrics for the patchwork
*These do not need to be very large and this is an excellent time to use your scraps.
• fabric for the stocking back in a Christmas print (60 x 35cm)
• fabric for the lining (60cm)
• interfacing (70cm)
• thin white yarn to make the pompoms
• ribbon for the hanging loop (20 cm)
• Dies for the letters
Designer’s comment:
I am using #279 80/20 cotton mix quilt wadding (batting) by Vlieseline.
tip: If you do not own a die cutting machine and dies, you can download suitable letters and cut them out manually. They need to be about 5cm -6cm tall and not too fussy.
Изготовление
Cutting
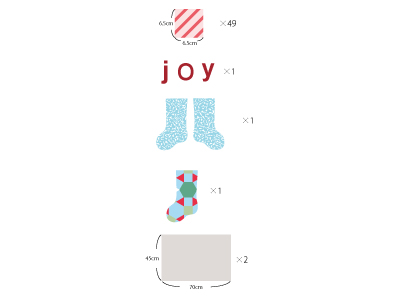
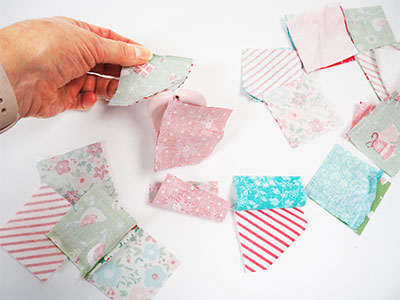
From the patchwork fabrics:
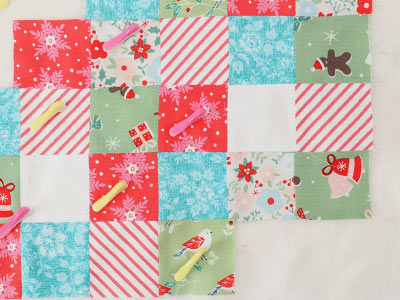
・49 squares measuring 6.5cm sq. for the patchwork
The letters ‘J’, ‘O’ and ‘Y’ from a solid fabric using either the die cutting
machine or hand cutting them.
From the lining fabric:
・2 pieces using template(page.10) (cut mirror image) for the stocking lining
From the backing fabric:
・1 piece using template for the stocking back
From the interfacing:
・2 pieces 45cm wide x 70cm long untrimmed
tip: it is essential to make sure that the front and back panels are mirror image so that your stocking will fit together properly.
NB: seam allowances are all 0.5 cm unless otherwise stated. Please read all instructions through and assemble the equipment before beginning.
Preparation
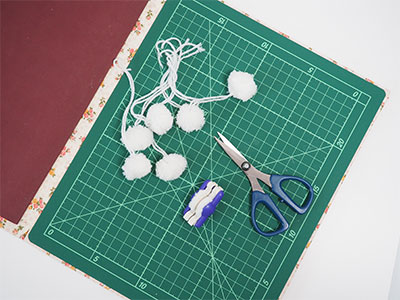
To begin with, make 9 small (2.5cm) pompoms for the trim.
Follow the instructions on Pom-Pom Maker (Extra Small)(Art No. 3127) to make the pompoms and leave a reasonably long (about 30cm folded double) tie so that you have something to attach the pompom when we are ready.
Set the pompoms aside for the time being.
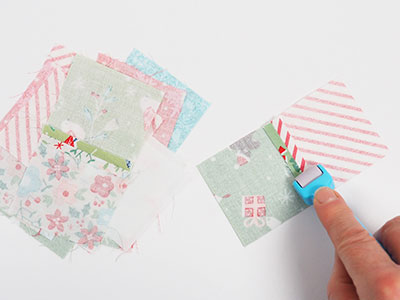
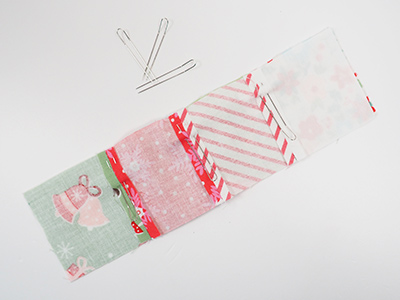
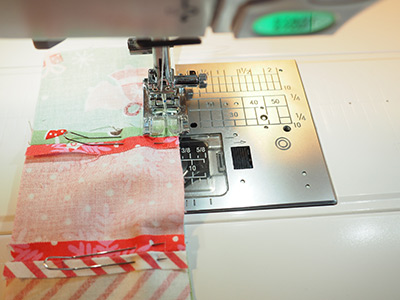
Chain piece the patchwork squares.
Separate them from the chain using the Thread Cutter.
Use the Roll & Press(Art No. 7812) to press the seams open.
Use the template(page.10) and Water Erasable Marker
(Art No. 516) or Chaco Liner Pen Style(Blue)(Art No.4710) to draw around the stocking shape onto one of the pieces of the wadding (batting).
tip: we are aiming to ‘colour-in’ the shape with the squares and the line will help to see where they are to be placed. This is especially important on the foot area.
The aim is to make the patchwork slightly larger than the outline.
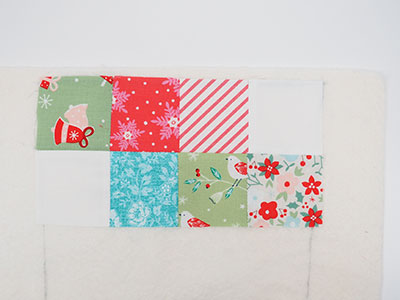
Sew the paired squares together so that they just overlap the outline.
Designer’s comment: I love the Fork Pins (35pcs)(Art No. 240) to make sure that the seams on your squares are super precise.
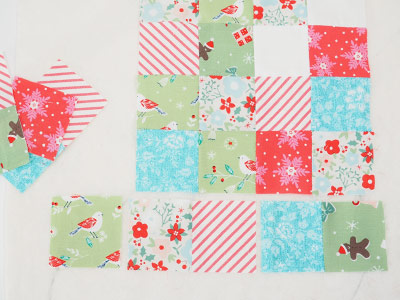
Keep adding the squares together and laying them onto the outline to see how you are progressing .
tip: When you get to the foot section, the squares will not be in straight columns anymore.
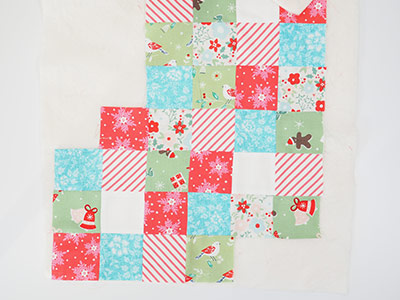
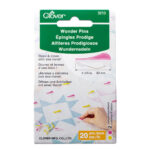
Finally press your stocking patchwork and give it a final check. When you are ready to quilt, secure the patchwork to the wadding (batting) with the Wonder Pins (Art No. 3210).
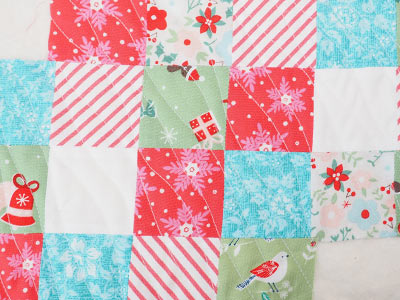
Quilt with your favourite pattern.
Designer’s comment: I love a random diagonal wave which is super easy to do on most sewing machines.
Pin the back panel to the other piece of wadding (batting) and quilt that the same way. When the quilting is finished, lay the template over your patchwork panel and redraw the line. Cut the front and the back panels out and set aside.
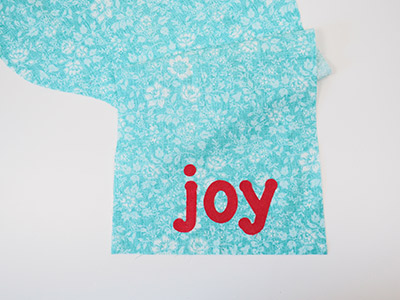
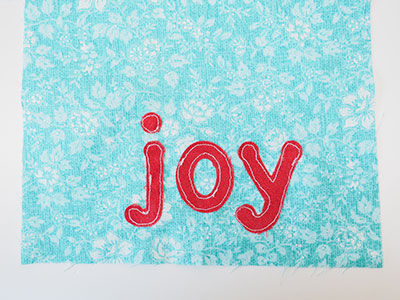
On front of the lining cuff, we need to applique the word ‘joy’. Take the front lining and turn it upside down. Glue the letters onto the cuff 2cm up from the edge (now on the bottom because the piece is upside down) and right in the middle. Set your sewing machine up for free motion embroidery and using the Darning Foot this time, applique the letters on or hand stitch applique. Snip away any loose threads.
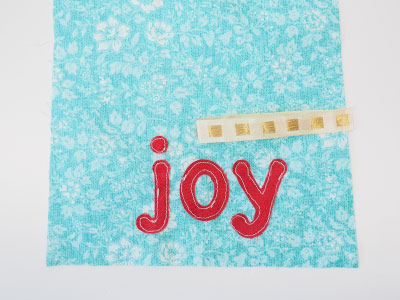
Measure up 10cm from the front edge of the lining and attach the hanging loop. Fold it in half and sew it securely.
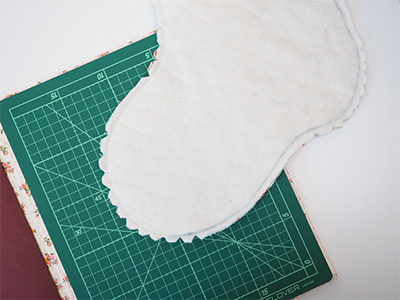
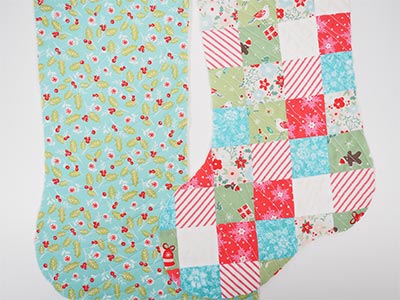
Working on the outer, place the two quilted outer panels right sides together and sew around the sides and bottom. Leave the top open.
Everything will sit flatter if you notch the curves on the toe and the heel. Do the same on the lining but leave a turning gap somewhere on one long side. With the outer the right way out and the lining inside out, pull the lining on over the outer. The right sides should be together.
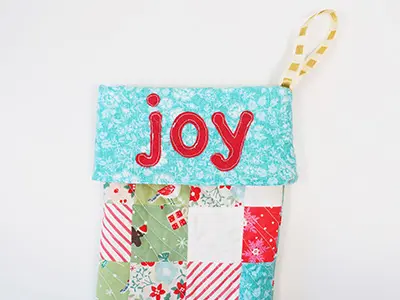
Line the side seams up nicely and sew around the top edge. Turn the stocking out through the gap in the lining and close that gap. Stuff the lining down into the stocking and then topstitch around the top edge. Turn the cuff over by 10cm. The hanging loop will be at the back and your word will be the right way up IMAGE 14.
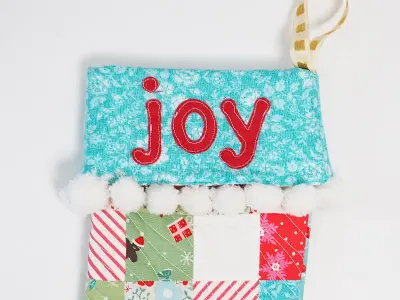
Using a hand sewing needle, attach the pompoms to the edge of the cuff 2.5cm apart IMAGE 15.