
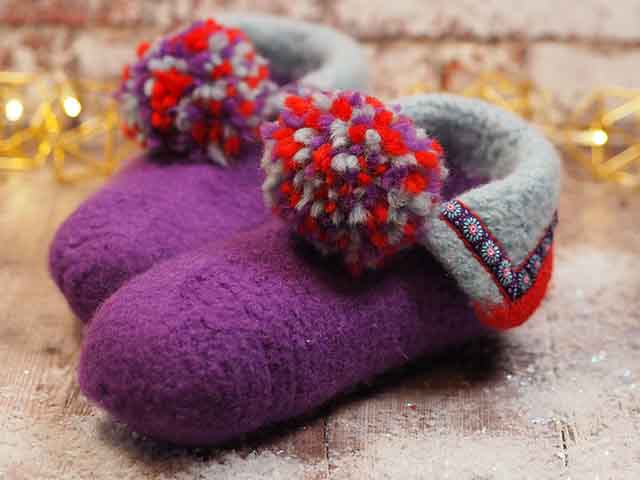
Felted Crochet Sami Slippers
ออกแบบโดย
Debbie von Grabler-Crozier
ผลิตภัณฑ์


Materials
Yarn
• 5x 50g balls felting wool for the main colour.
I have used Drops Eskimo in purple*
• 3x 50g balls felting wool for the trims.
Mine is Drops Eskimo in aqua (2 balls) and red (1 ball)
*You need just a bit more than two balls of the main colour per slipper. Save the leftovers for the pompoms.
Everything Else:
• Braid
Some important info:
These slippers fit a women’s size 6-7UK shoe size with a relaxed fit and you can make them a bit bigger or smaller by either felting them at a higher temperature for longer (to make it smaller) or by putting it onto your foot the second it comes out of the machine (to stretch it and make a little bigger). You should do this anyway while it is wet because it will conform to your foot shape and size. This is a bit uncomfortable because it is wet but it will help to ensure a great fit. The longer you leave them on, the more they will fit your feet and you will have a dedicated left and right too. The felting is done in the washing machine at 60°C and I advise you to include a bath towel or a pair of jeans in with the slippers to increase friction. This method of felting is easy but you have less control. Alternatively you can felt by another method if you prefer.
Crochet abbreviations used in this pattern:
Ch- chain
ss- slip stitch
sc- single crochet (US) double crochet (UK)
วิธีทำ
The Crochet:
NB: Please read all instructions through and assemble the equipment before beginning.
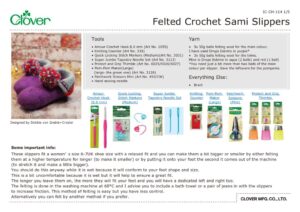
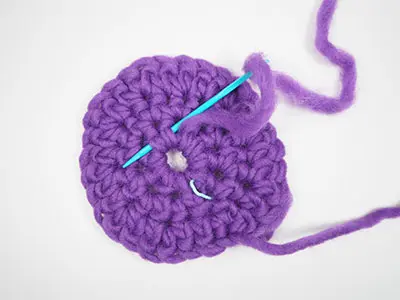
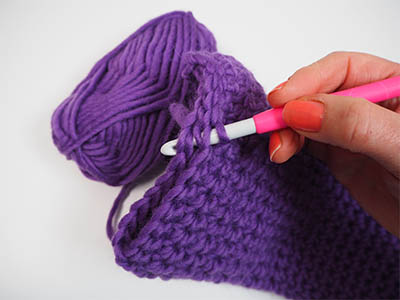
Ch 4 stitches and ss to form a ring IMAGE 1.
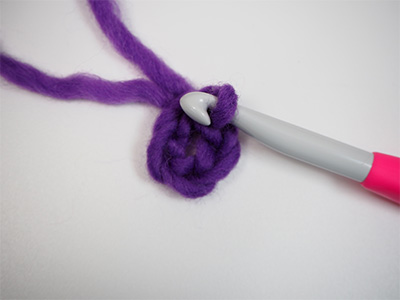
Row 1: ch 1 (counts as the first stitch) and then 9 sc into the ring. Ss to join (10 stitches) IMAGE 2.
Row 2: ch 1 (counts as one) and 2 sc into each stitch. Ss to join (20 stitches)
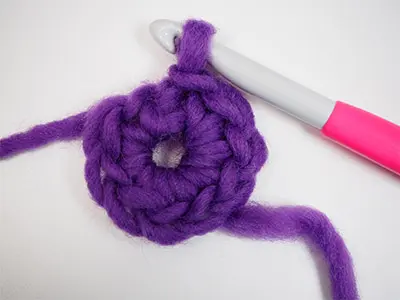
Row 3: ch1 (counts as one) and *1 sc into the first stitch and 2 sc into the next*. Repeat ** to the end of the row and ss to join (30 stitches) IMAGE 3.
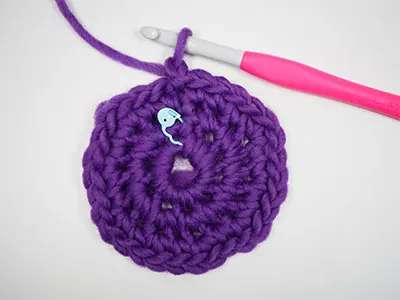
TIP: At this point, I would use the super jumbo tapestry needle to weave the starting thread around the centre hole IMAGE 4. Pull it gently to close the hole and trim the thread end. This gets rid of it.
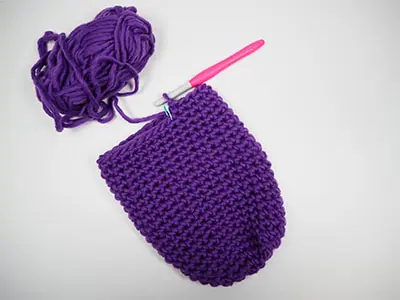
Rows 4-22: working in a spiral now (no need to ss and ch1 for this bit), sc into every stitch IMAGE 5.
TIP: Put the slipper onto your foot now. It should be larger all around (it will shrink about 1/3 in the felting process). The overall length of the slipper at this point is about 23cm from the beginning toe circle to where you are now.
Move your stitch marker to the working edge of the slipper and to make the heel, keep on with sc but this time work back and forth from the stitch marker leaving 2 stitches IMAGE 6. This will become the top of the slipper.
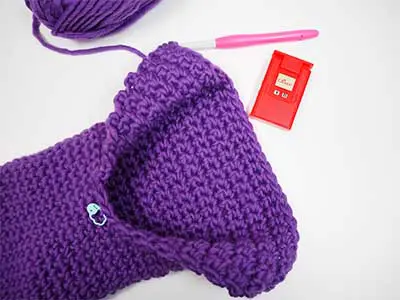
Heel row 1: ch1 and turn the work. Sc 29 stitches, Heel rows 2-17: ch 1 and turn the work and sc back and forth like this IMAGE 7.
TIP: The texture on the heel will be different because it is worked back and forth, turning the work instead of the spiral that makes up the main part of the foot. Ss the back of the heel closed IMAGE 8 and weave in the end.
TIP: At this point your slipper is looking clownishly large! But don’t panic, the felting process will take care of it!
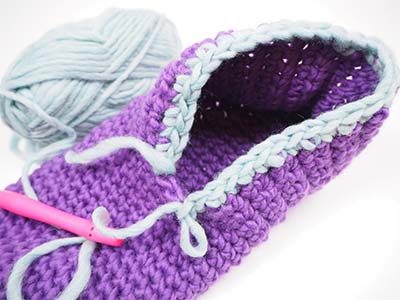
A word about colour choices to begin with. The Sami people are the nomadic groups from northern Scandinavia and they make terrific use of hand-made braids and trims. Ours is not necessarily hand made of course but it looks great and I have actually chosen my colours from the trim. It is unlikely that we will have the same trim so buy yours and then build your colours around it. Beginning at the start of the heel section, pick up the stitches with a row of sc in your first colour IMAGE 9 (32 stitches).
Cuff rows 2-10: continue back and forth with a ch1 and a turn at the end of each row with contrast colour 1.
Cuff rows 11-13: swap to the next contrast colour and continue the same way. Fasten off your work and weave in the ends IMAGE 10.
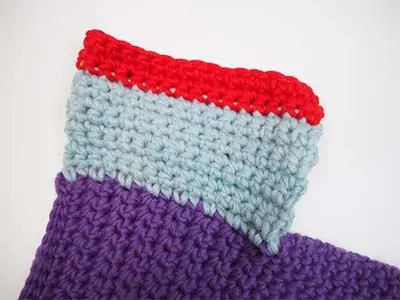
This is what you have now IMAGE 11. It is time for the fun bit so into the washing machine they go! Use soap as normal and a 60°C wash with a pair of jeans or some bath towels. As soon as they come out of the machine, fit them on while still wet. This is super important because this is your window for shaping and custom fitting. Don’t be afraid to stretch them and rub them a bit to mould them around your heel.
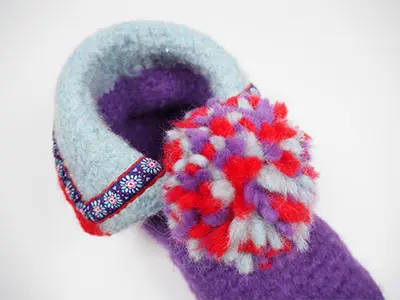
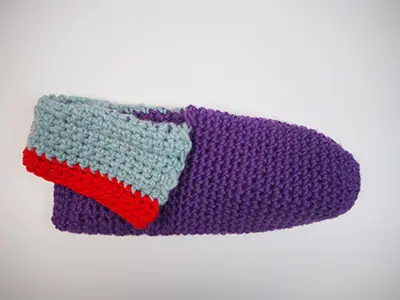
Finish off with a pompom using all of the wool from the project. Trim the cuff with your braid, carefully mitring the corners IMAGE 12.
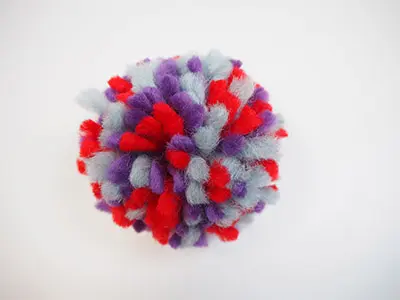
TIP: The pompom maker is the easiest thing to use. And it is a great way to use the odds and ends of wool. Simply follow the instructions on the packet for perfect results each time. I do like to trim mine a bit to get it nice and round IMAGE 13.