
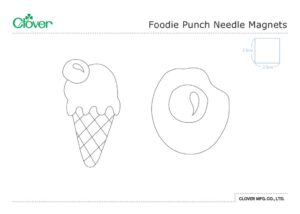
Foodie Punch Needle Magnets
ออกแบบโดย
Debbie von Grabler-Crozier
ขนาดเมื่อทำเสร็จแล้ว
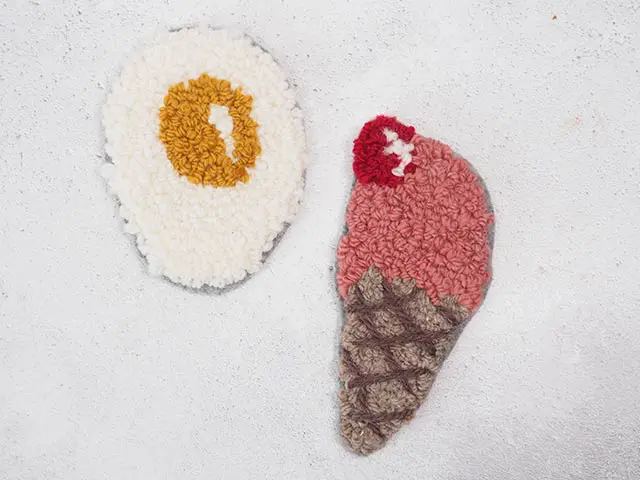
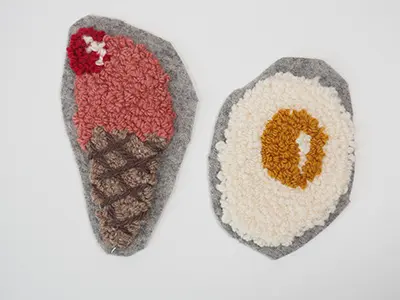
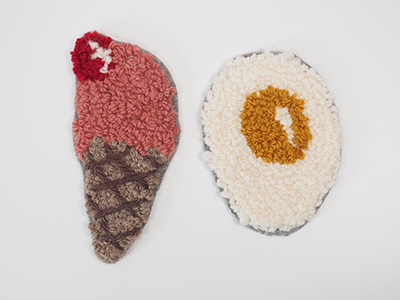
ice cream: approx. 11cm height *6cm wide egg: approx. 9cm height *8cm wide
ผลิตภัณฑ์


Glue to secure the thread on the back. *This can be a ‚special ‘ glue or simply a good quality PVA"
Hole Punch
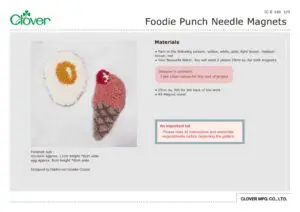
Materials
• Yarn in the following colours: yellow, white, pink, light brown, medium brown, red
• Your favourite fabric. You will need 2 pieces 25cm sq. for both magnets.
Designer’ s comment
I like Lilian canvas for this sort of project.
• 25cm sq. felt for the back of the work
• A5 Magnet sheet
An Important bit
Please read all instructions and assemble requirements before beginning the pattern.
วิธีทำ
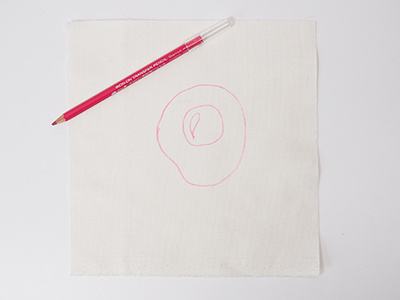
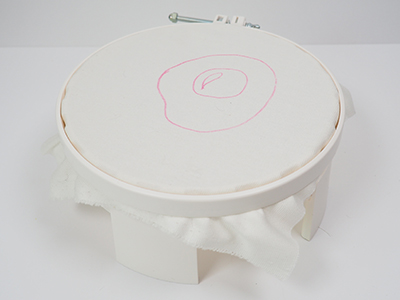
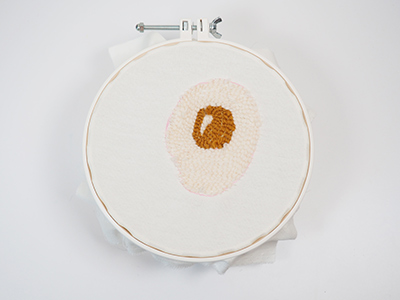
Use the Iron-on Pencil and your template to transfer the image to a piece of fabric. Place the fabric into the hoop and tighten it.
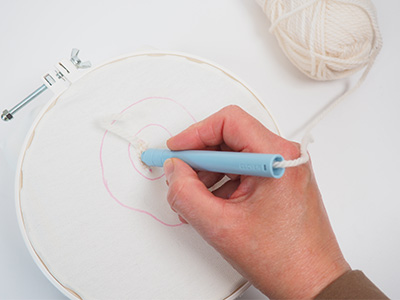
Thread your punch needle with the first colour and begin the embroidery. I have started with the white highlight on the egg yolk.
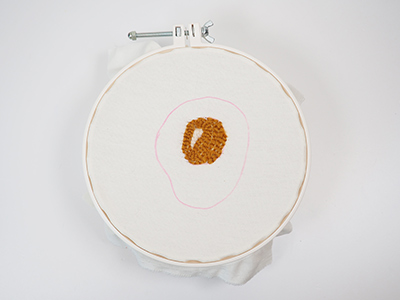
Change colour (yellow) and fill in the rest of the colour of the egg yolk. Then change colour to white and embroider the egg white.
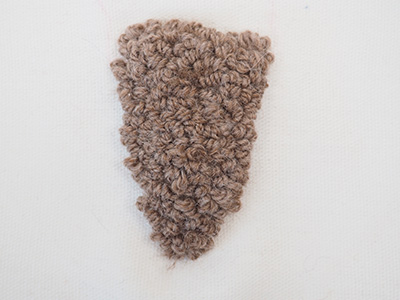
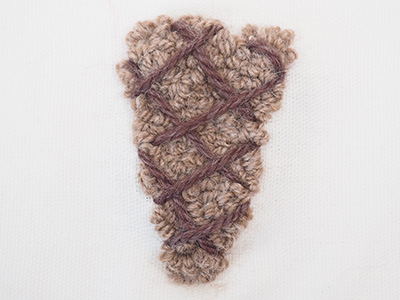
Repeat the first two steps (transferring the image and putting into the hoop) with the ice cream. Thread the needle with the first colour (medium brown) and
embroider the ice cream cone. Then use the darning needle and darker brown to stitch a waffle texture over the top.
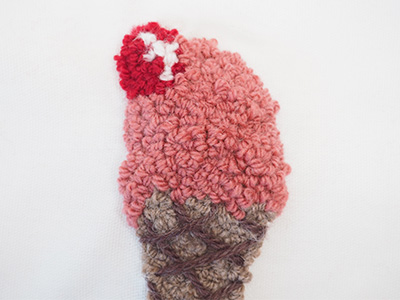
Finally, finish the ice cream with the pink and the red (and a little white highlight on the cherry).
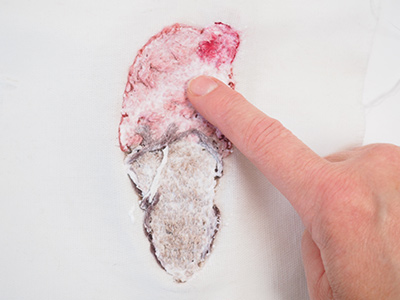
Take the embroidery out of the hoop and spread the fabric glue onto the back of the stitched area using your finger to make it even.
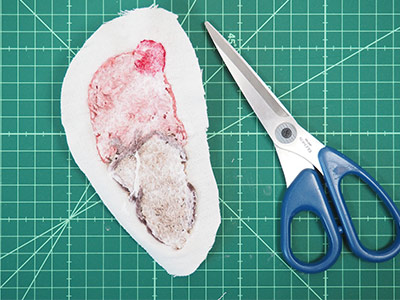
When it is dry, Trim each embroidery back leaving 1-2cm all around. Make little snips in this fabric so that it is easier to fold around the corners and curves.
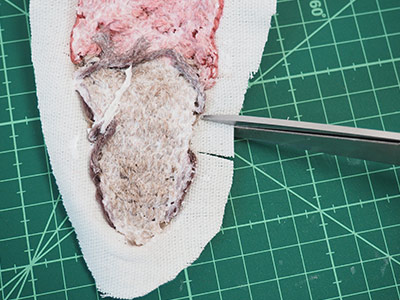
Fold the fabric back to the wrong side of the embroidery and glue into place.
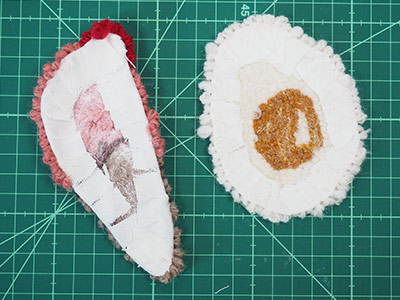
Lay each embroidery onto a slightly larger piece of felt and glue well.
Trim the felt back so that there is only a small edge showing (1-2mm).
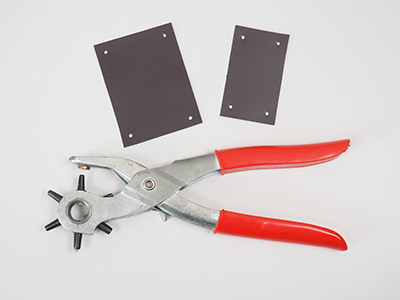
Cut a piece of magnet sheet about 5cm wide x 7.5cm long for the egg and about 4cm wide x 7cm long for the ice cream. Make a hole in each corner.
tip: You can trim the magnet if you need to so check before you put the holes in. I like to round the corners too.
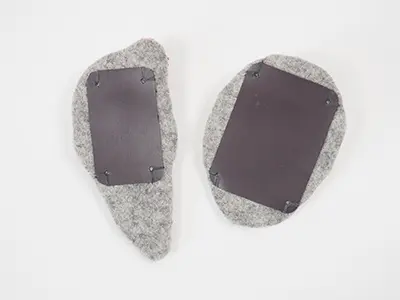
Use a hand sewing needle and thread to neatly attach the magnets to the felt back sewing through the holes that you made with the hole punch.
tip: You can use a strong glue to attach the magnet too. If you do this, you do not need to make the holes in step 11.