
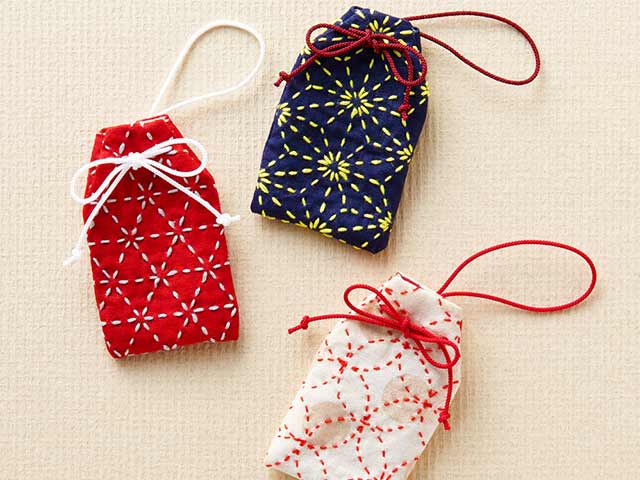
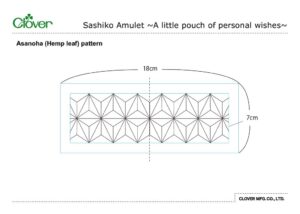
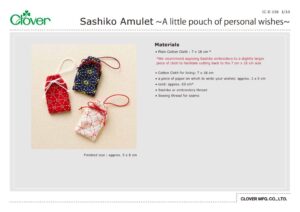
Sashiko Amulet ~A little pouch of personal wishes~
ขนาดเมื่อทำเสร็จแล้ว
approx. 5 x 8 cm
ผลิตภัณฑ์


Materials
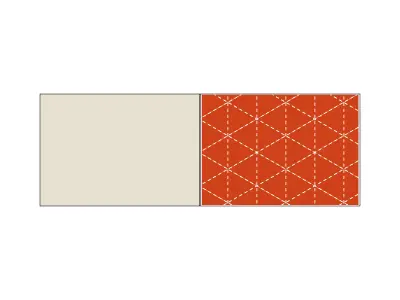
• Plain Cotton Cloth : 7 x 18 cm *
*We recommend applying Sashiko embroidery to a slightly larger piece of cloth to facilitate cutting back to the 7 cm x 18 cm size
• Cotton Cloth for lining: 7 x 18 cm
• a piece of paper on which to write your wishes: approx. 3 x 5 cm
• cord: approx. 60 cm*
• Sashiko or embroidery thread
• Sewing thread for seams
วิธีทำ
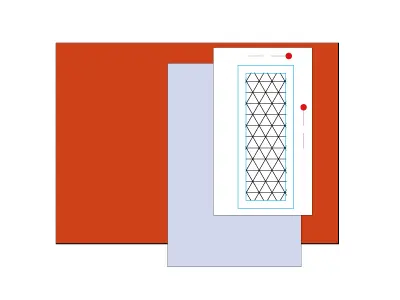
Lay cotton cloth on a hard, flat surface. Cover with "Clover Chacopy", chalk side facing down on fabric right side. Trace the Sashiko pattern lines with the tracing wheel.
With the pattern now transferred to the fabric, stitch along the design lines using Sashiko needles and thread.
*Stitch only inside the finished area (marked as blue square)
tip: Work the straight lines first, using the longer Sashiko needle. Keep stitches even and avoid tension. Using the shorter Sashiko needle and working fewer stitches at a time, sew the curves and finer detail.
When Sashiko stitching is finished, lay the lining on top, right sides facing.
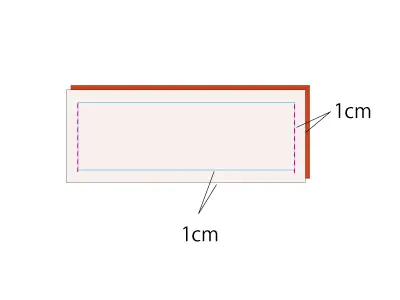
Stitch along the 1cm seam allowance at each end (as shown).
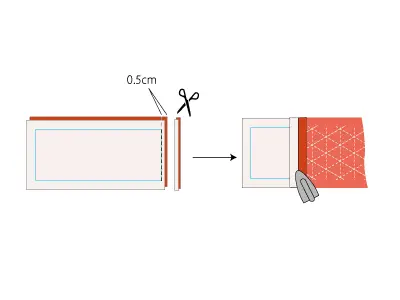
Trim back the stitched seam allowance on both sides by 0.5cm and iron the seam flat as shown.
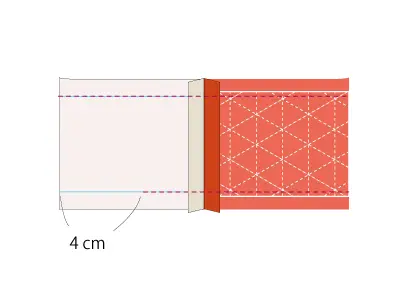
Fold as illustrated and stitch remaining seam allowances, leaving a 4cm gap for turning through (as shown).
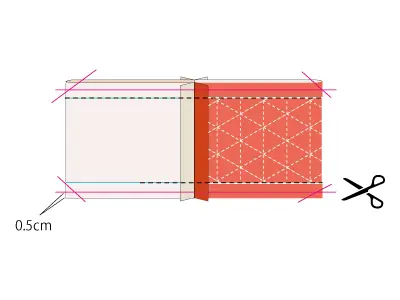
Trim back the remaining seam allowances by 0.5cm and snipping each corner (as shown).
Turn right side out through the opening gap. Turn in the raw edges along the seam and press. Use a neat slip stitch to close the opening.
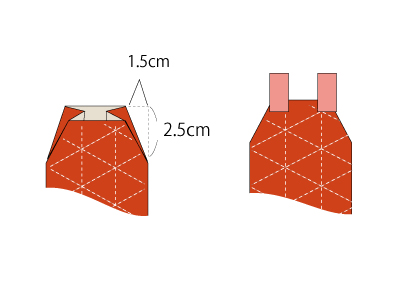
Stuff the lining down inside the outer cloth and iron press lightly. Now insert your special written wishes and fold the top edge as shown in the diagram.
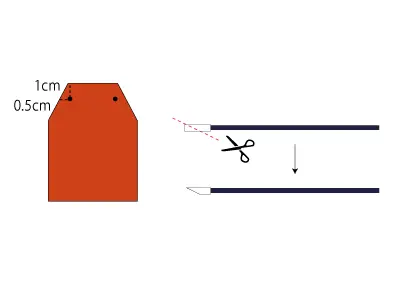
Make 2 holes with awl to thread through the cord.
tip: For easier threading of the cord: Wrap cord end with sellotape and cut (as shown).

Cut cord to your preferred length, tying a loop on the WS and making a bow on the RS as shown.
*Secure loop knot on WS using craft glue.