
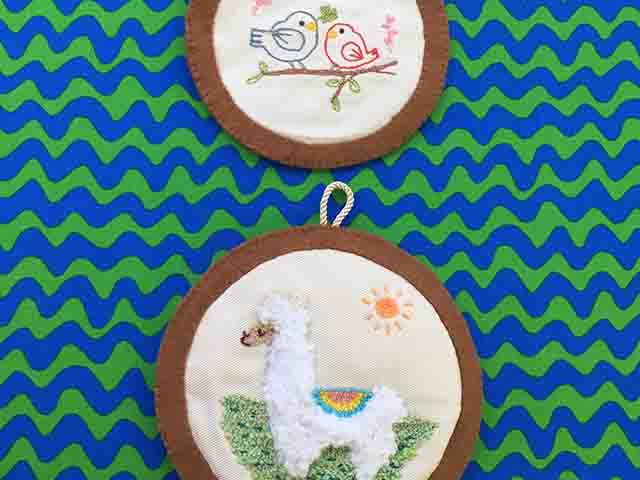
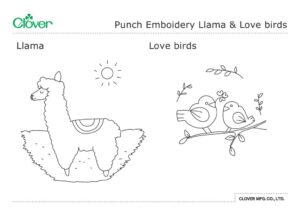
Punch Emboidery Llama & Love birds
Designed by
Sachiyo Ishii
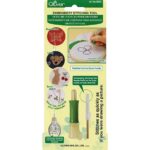
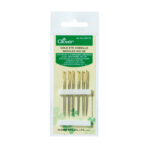
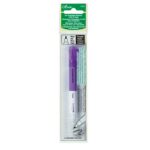
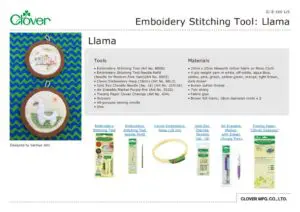
Tools


Materials
Llama:
• 20cm x 20cm Haworth cotton fabric or Monk Cloth
• 4-ply weight yarn in white, off-white, aqua blue, yellow, pink, green, yellow-green, orange, light brown, dark brown
• Brown cotton thread
• 7cm string
• Fabric glue
• Brown felt fabric, 18cm diameter circle x 2
Love birds:
• 15cm x 15cm Oxford cotton fabric
• 3-ply embroidery thread in blue, yellow-green, red, yellow, dark brown, brown, pink
• Brown cotton thread
• 7cm string
• Fabric glue
• Brown felt fabric, 16cm diameter circle x 2
Making
Llama: step1
Transfer the motif onto the fabric, using Clover Chacopy. With Air Erasable Marker, draw over the outline of llama so that you can see the shape from the wrong side as well.
Place the fabric in hoop. For the best result, use Clover Embroidery Hoop which grips the fabric firmly.
Llama: step2
Using the Embroidery Stitching Tool, adjust the needle length to position 1. Thread the needle with white yarn. From the wrong side, work the outline of llama and then fill in the llama’ s body. Loops shall be left on the right side.
Turn to the right side and work satin stitch to complete the rest of the motif, leaving loops on the wrong side this time.
Llama: step3
Work the details with hand stitches, using chenille needle and referring to photo for colours. Embroider eyes and mouth with straight stitches. Embroider dots in grass.
Make straight stitch around the orange circle for the sun.
Lightly coat the loops on the wrong side of work with fabric glue. Allow it to dry.
Llama: step4
Gently press with iron.
Mark a 15cm diameter circle in the centre of one of the 18cm circles of brown felt. Cut out the smaller circle, leaving a 1.5cm wide ‘frame’ intact around the edge. Sew inner edge of felt frame to embroidered fabric, using over-cast stitches. Mark top centre and sandwich the string between the framed embroidery piece and the remaining 18cm felt circle. Sew the felt pieces together around outer edge, using blanket stitches all around.
Love birds: step1
Practical tips:
Using 3-ply thread creates a delicate look, however, if you cannot find 3-ply and find it troublesome to separate strands from common 6-ply embroidery threads, use 6-ply threads and 6-ply needle (8803).
Love birds: step2
Using the Embroidery Stitching Tool, adjust the needle length to position 1.
Work the details with hand stitches, using chenille needle and referring to photo for colours. For the eyes, make French knots.
Love birds: step3
Lightly coat the loops on the wrong side of work with fabric glue. Allow it to dry.
Gently press with iron.
Love birds: step4
Mark a 12.5cm diameter circle in the centre of one of the 16cm circles of brown felt. Cut out the smaller circle, leaving a 1.75cm wide ‘frame’ intact around the edge.
Cut out 12.5cm circle from one of the brown felt piece to create a frame. Sew inner edge of felt frame to embroidered fabric, using over-cast stitches. Mark top centre and sandwich the string between the framed embroidery piece and remaining 16cm felt circle. Sew the felt pieces together around outer edge, using blanket stitches all around.