
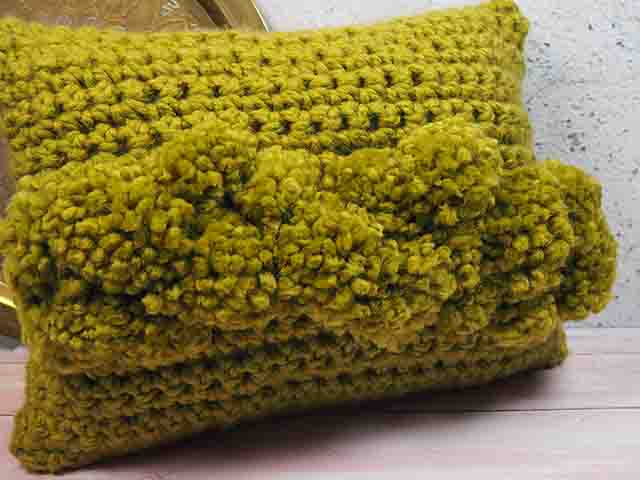
Pompom Cushion 2
ออกแบบโดย
Debbie von Grabler-Crozier
ผลิตภัณฑ์


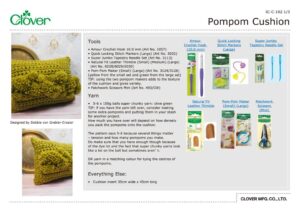
Materials
Yarn
• 5-6 x 100g balls super chunky yarn: olive green
TIP: if you have the yarn left over, consider making some extra pompoms and putting them in your stash for another project. How much you have over will depend on how densely you pack the pompoms onto the cushion.
The pattern says 5-6 because several things matter
– tension and how many pompoms you make. Do make sure that you have enough though because of the dye lot and the fact that super chunky yarns look like a lot on the ball but sometimes aren’t.
DK yarn in a matching colour for tying the centres of the pompoms.
Everything Else:
• Cushion insert 35cm wide x 45cm long
วิธีทำ
The Crochet:
NB: Please read all instructions through and assemble the equipment before beginning.
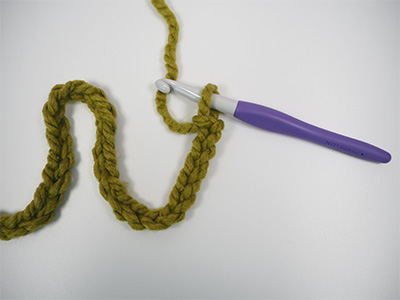
Chain 26 IMAGE 1.

Turn and then sc (single crochet/ UK: double crochet) into each stitch. Repeat this for 45 rows IMAGE 2.
TIP: fit the crochet panel onto your cushion because they can vary quite a bit. It should fit snuggly but not stretch so that you can see the cushion underneath. Add or subtract a row to get it perfect. Fasten off.
The Pompoms:
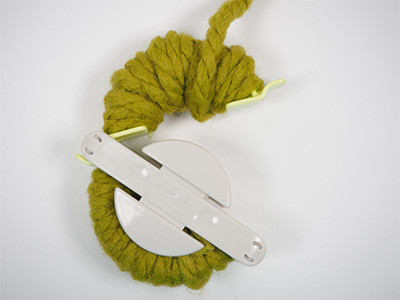
Take the pompom maker and some yarn and wind the yarn around the first two arms of the pompom maker. Repeat for the other two arms and close the pompom maker IMAGE 3.
TIP: using the two pompom makers adds to the texture of the cushion and gives variety.
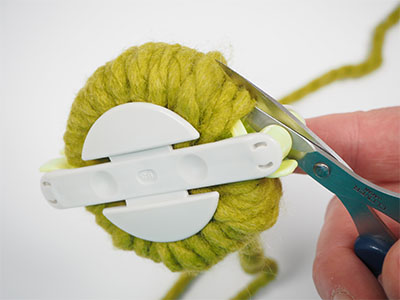
Cut the pompom using the channel on the pompom maker as a guide for your scissors IMAGE 4.
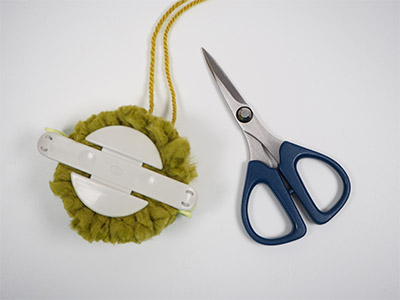
Tie a piece of yarn around the ‘waist’ of the pompom IMAGE 5.
TIP: make this long enough (about 30cm) and don’t trim it as you normally would when you have made the pompom. The tails will be used to secure the pompoms to the cushion. Use a slightly thinner but colour matched yarn to tie off. This is especially important if you have used very chunky yarn.
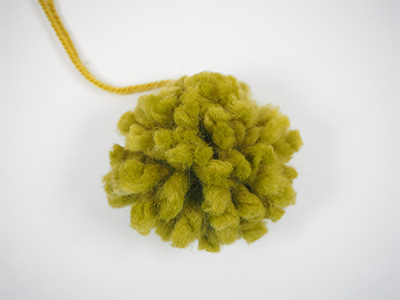
Remove the pompom from the maker IMAGE 6.
Make about 18 pompoms or so in 2 different sizes. Use the long tails to secure the pompoms to the crochet panel 15cm up from one short end. This panel will be in the middle of your cushion when you are done.
TIP: Your crochet hook is handy for pulling the yarn tails through. Do check where the centre of the front will sit on your cushion though before you put the pompoms on.Tie the pompoms off on the wrong side of the crochet panel and trim the tail ends leaving a bit to keep them secure.Use your yarn plus the largest of the darning needles from the set to sew the sides and base of the cushion leaving a gap in the base. Insert the cushion and close the base gap.